PERSONAL PROJECTS: Portrait & Identity
Definition: Portrait photography, or portraiture, is a type of photography aimed toward capturing the personality of a person or group of people by using effective lighting, backdrops, and poses. A portrait photograph may be artistic or clinical.
“It’s one thing to make a picture of what a person looks like, it’s another thing to make a portrait of who they are.” |
I find this quote inspirational to the project because I want to discover the hidden depths of identity within the people I photograph. I am seeking to capture the essence of somebody in a single moment and reveal their true selves through the lens.
|
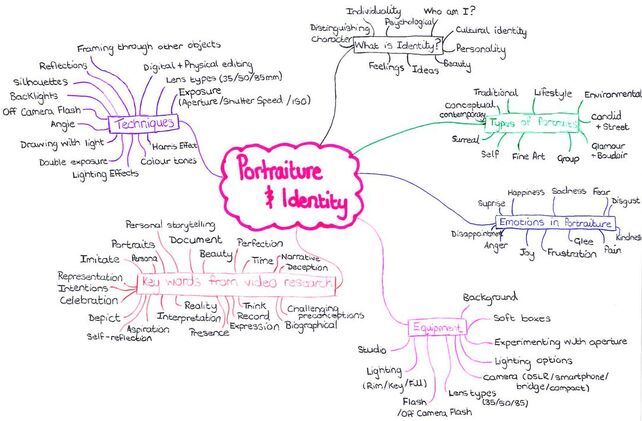
Mind Map
|
|
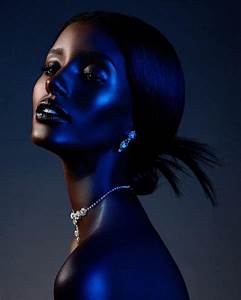
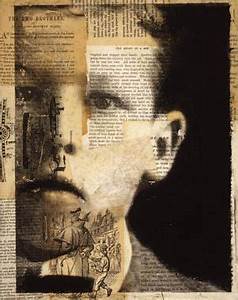
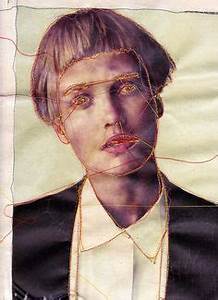
Early Inspirational Images
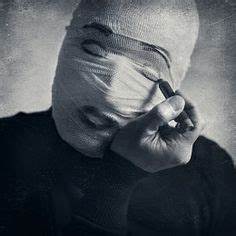
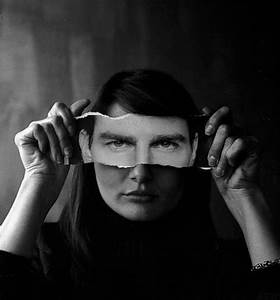
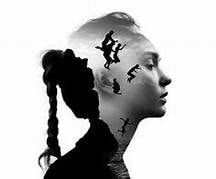
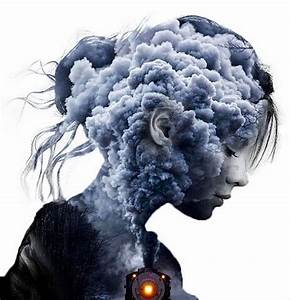
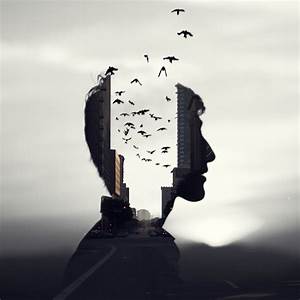
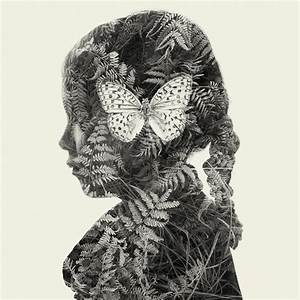
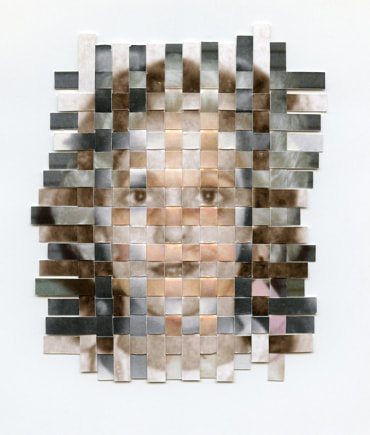
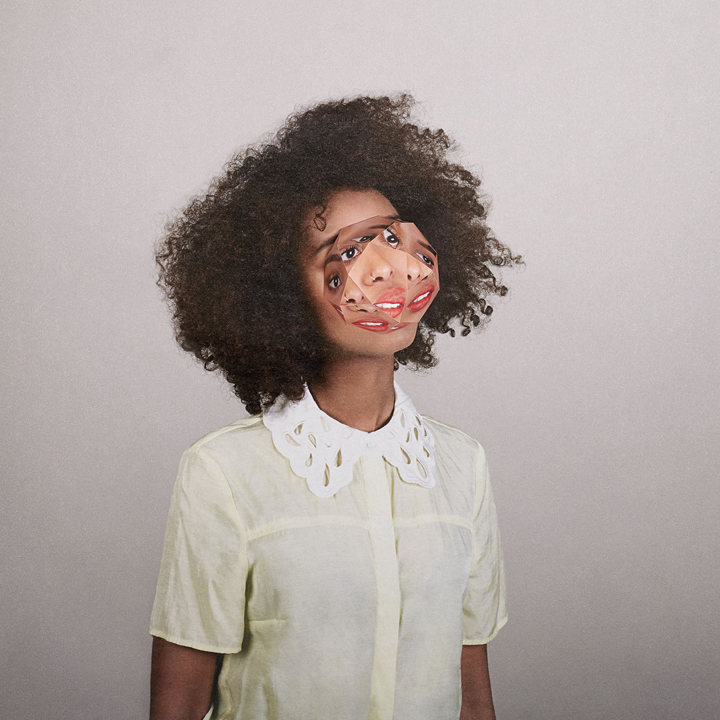
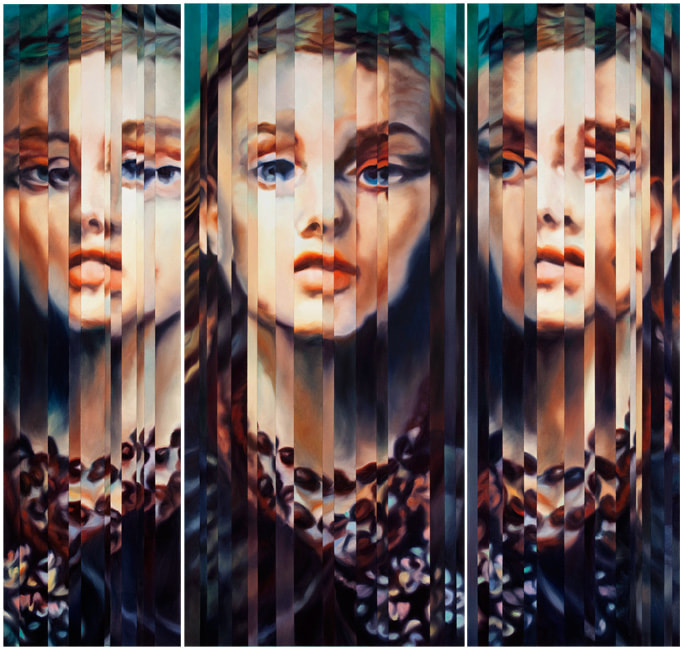
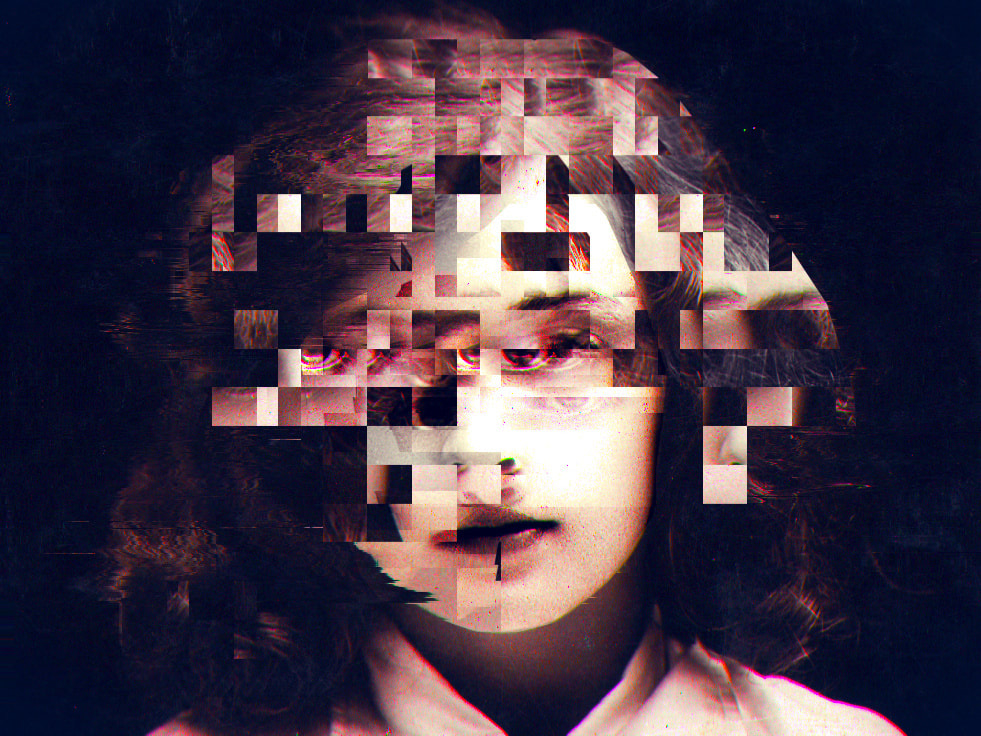
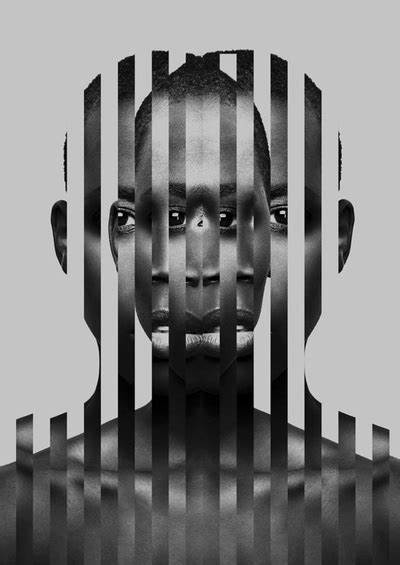
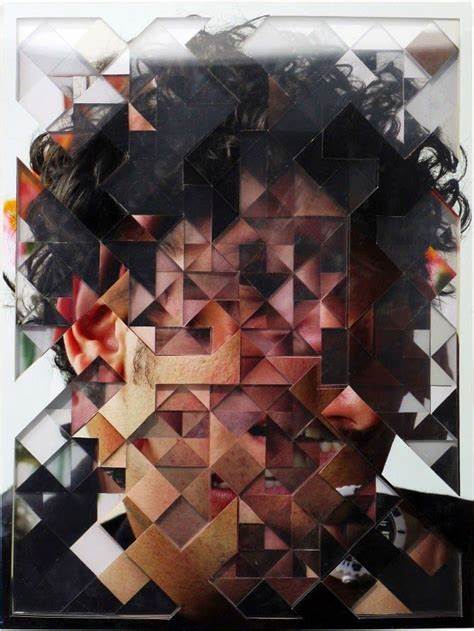
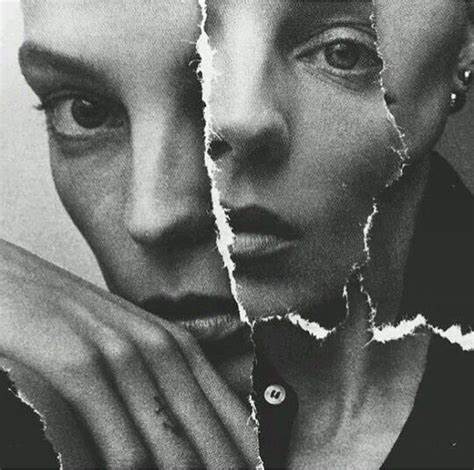
Following the written mind map, I began to investigate portrait photography and identity examples. Below are the findings from this research. I feel the most inspirational image for me is on the first row, third picture along because it demonstrates great use of fragmentation and I am interested in how this technique can imply confusion through the disfigurement.


Professional Portraiture Workshop / Collaborative Shoot
|
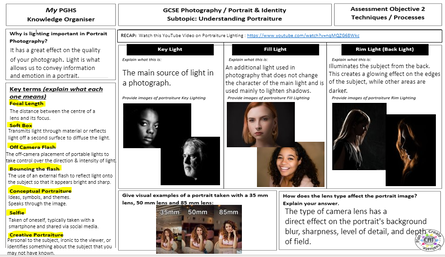
As prior research I created a knowledge organiser and watched two videos on lighting. From this I learnt about techniques used by photographers to effectively use lighting and I learnt numerous lighting key terms, such as fill light, rim light and key light.
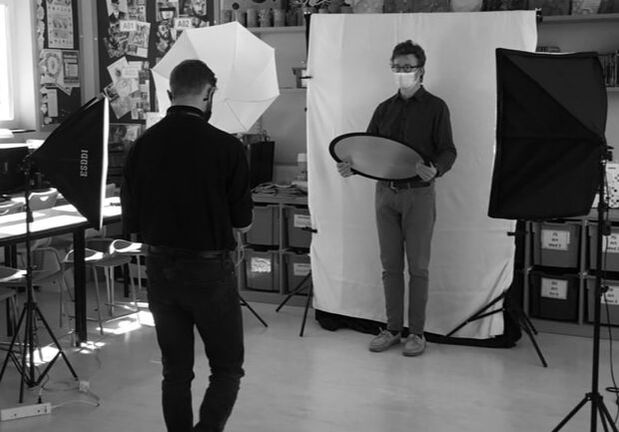
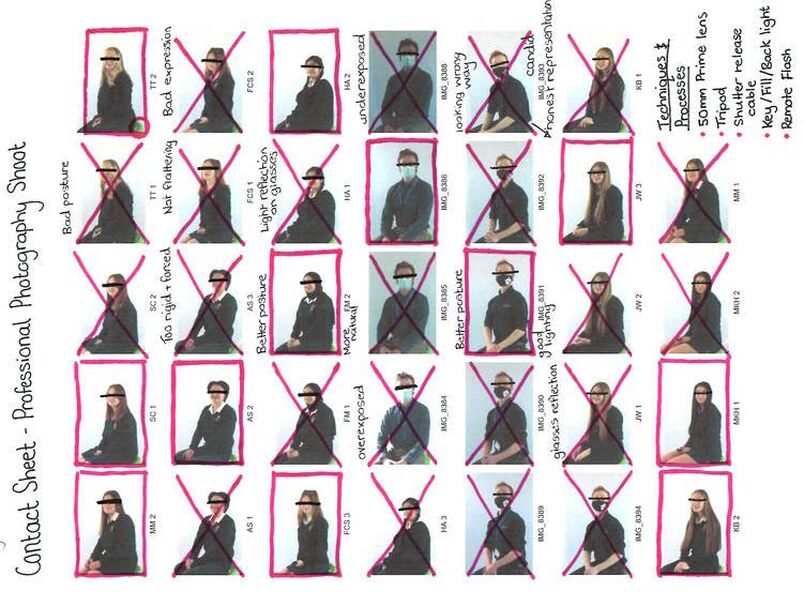
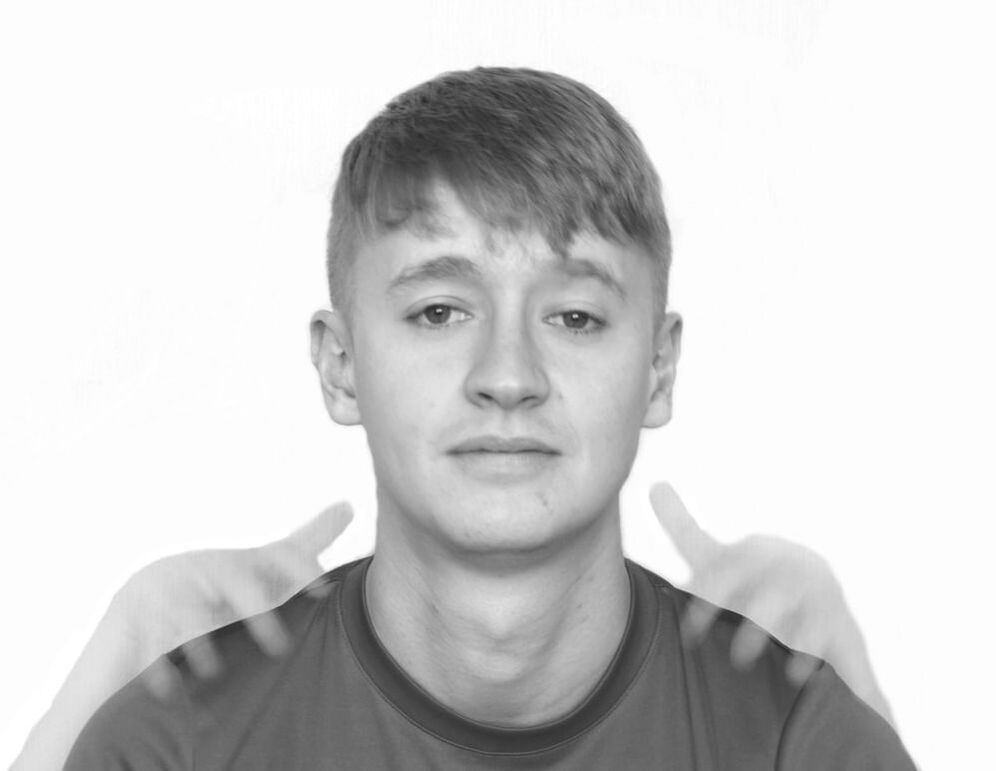
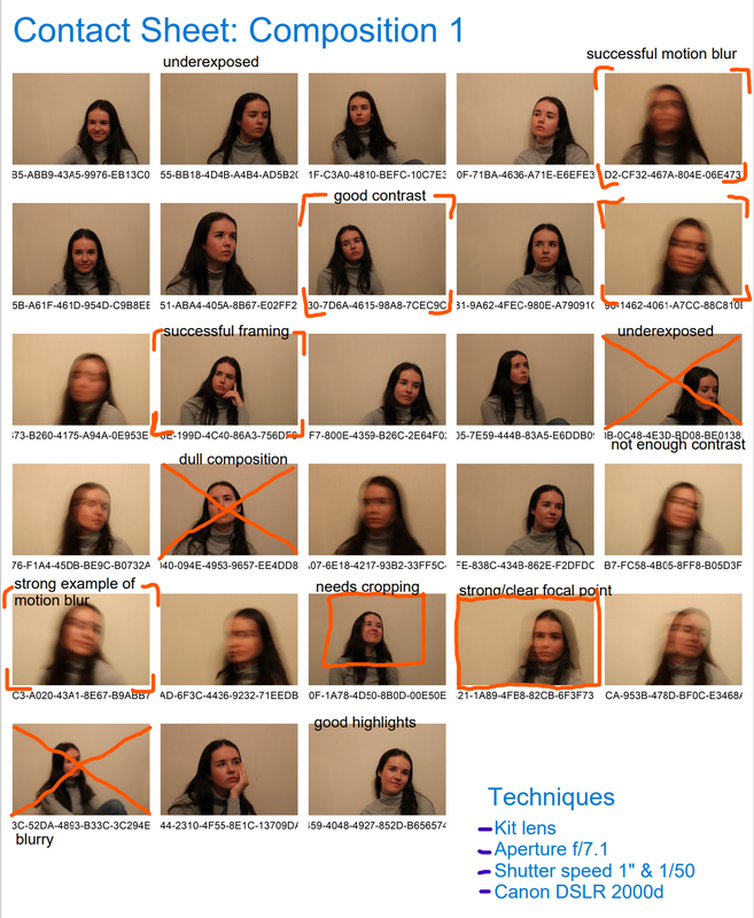
The aim of this photography shoot was to take professional pictures of Year 11 students for their year book. As shown in the picture (top left), Mr Dever is a professional freelance photographer who works at my school. The equipment used during the shoot was a DSLR camera on a tripod, soft boxes, shutter remote cable, and a remote flash with an umbrella - to diffuse the light out. The shoot took place at midday, which provided natural, ambient lighting. To maintain student confidentiality, I disguised their faces on my contact sheet by putting a line through their eyes and using just their initials. There was a safe working environment during the shoot because we had hand gels and were socially distanced. From this shoot, I gained important knowledge on controlled lighting and the impact key, fill and rim light can have on an image. This experience helped me develop as a photographer because I now understand how to avoid facial distortion in my portraits - by using a prime lens - and how using a shallow DoF can limit background interference. |
Professional Portraiture Workshop / Contact Sheet
Professional Portraiture Workshop / Digital Editing
|
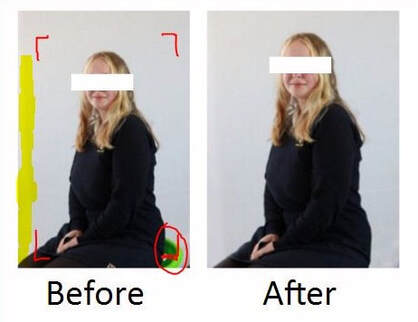
On PIXLR, I initially cropped the image using the rule of thirds to ensure the model was in the centre of the image. Then, I removed the green chair in the bottom corner of the image using the clone tool. Finally, I used he magic wand lasso tool to select the background and apply the blur filter to remove any background defects. |
Research and Investigation / Breaking the Rules
Now that I have investigated the professional photography process within a school setting, I will now look at the alternative methods used in portraits which break the traditional methods. I will begin by breaking the first rule, that a portrait must be of a single exposed face.

Research and Investigation / Double & Multi Exposure
|
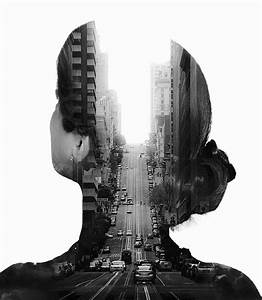
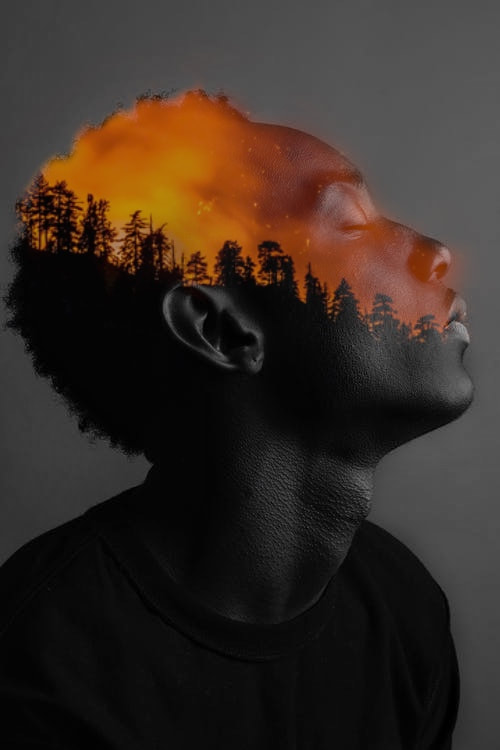
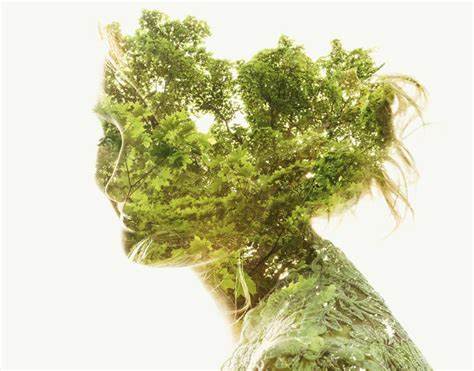
In photography, a double or multiple exposure is the superimposition (layering) of two or more exposures to create a single image, with a corresponding meaning.
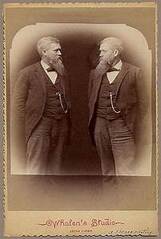
Shortly after photography's invention, photographers figured out a way merge exposures together, known as double exposure photography. It was sometimes used to falsely convey twins and spirits, this was all done within the device — a tradition that still carries on today. This technique is useful in my project because it can carry multiple meanings and symbolise a subject's identity within a portrait. |
|
Contemporary Double and Multi Exposures:
Research and Investigation / Double & Multi Exposure / Initial Experiments
Computer Initial Experiments / PIXLR

|
|
|
|
Image Evaluation
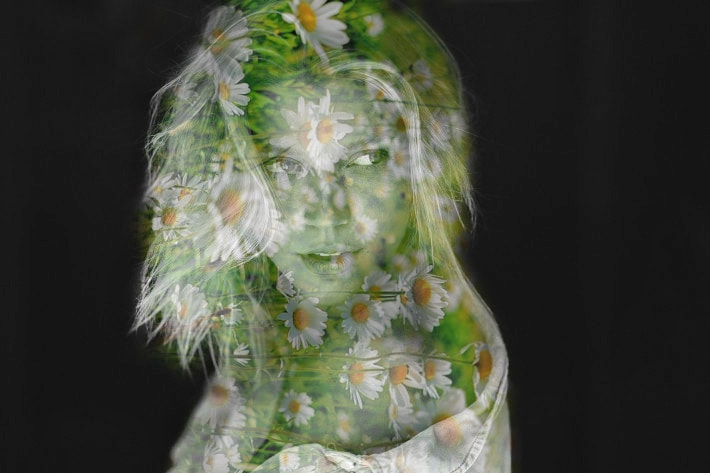
The strengths of this experiment were the skills I gained in using the crop out mask tool and the adjustments I made within the layering. The cropping around the model's side profile allowed for a dynamic composition and the blend mode tool created a softer outline around the face. The negative space creates a clear contrast from the face, which really makes the focal point stand out. To improve this experiment I would need to improve my digital editing skills on PIXLR, which would come with practice. Also, use the lasso tool and edit the exposure to make the background a crisp white. From this process I learnt how to superimpose images and edit their transparency / opacity to evoke tranquil, delicate and peaceful feelings. |
|
Smartphone App Initial Experiments / Snapseed
|
|
|
Image Evaluation
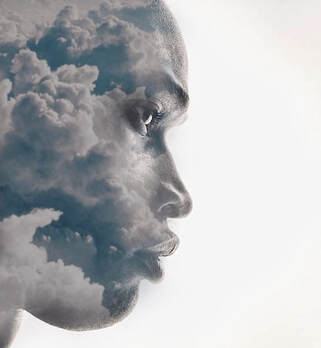
I believe I was able to successfully use the layering technique to create a double exposure image. The structure tool and contrast tool are two edits I particularly enjoyed as they brought out the grey tones within the original portrait which added to the solitary feel of the image. However, the blue tones in the layered clouds image transformed the feeling of the image to one of hope and ambition. To improve this image, I could have used the rotation tool to make the model look up, as in looking up towards and having his head in the clouds. This experiment allowed me to further enhance my double exposure skills and understand the tools available within the snapseed app. |
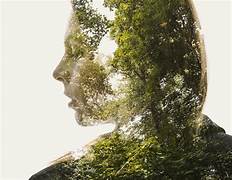
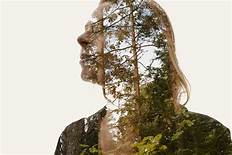
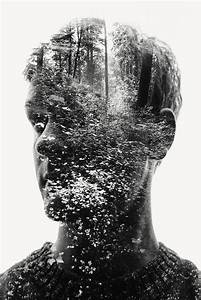
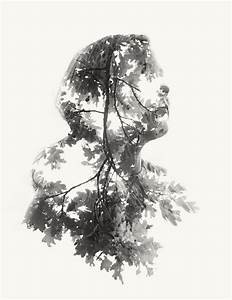
Research and Investigation / Multi Exposure / Christoffer Relander
|
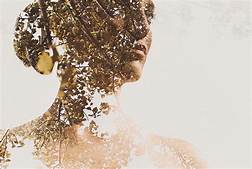
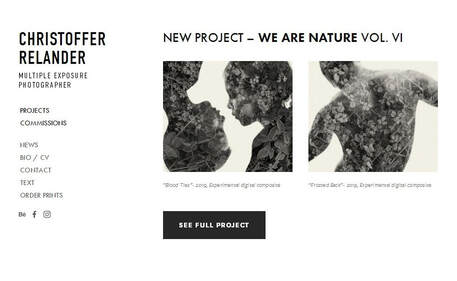
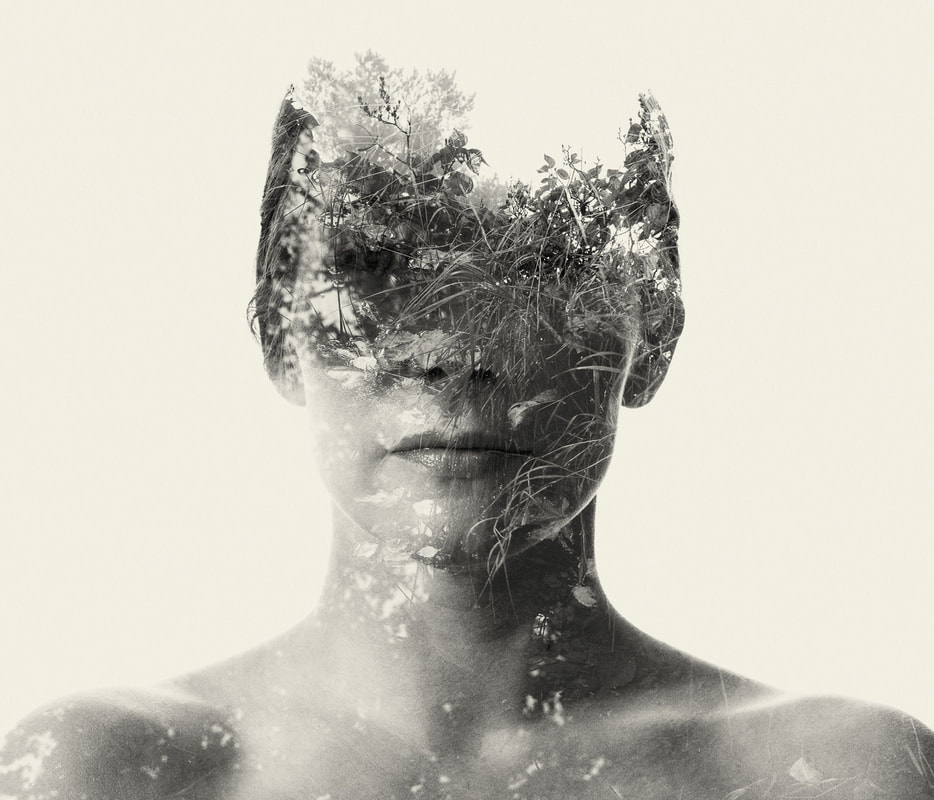
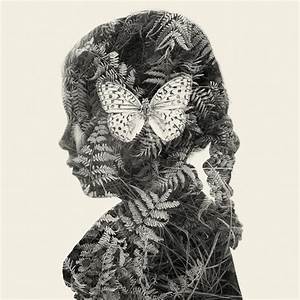
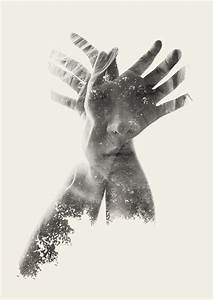
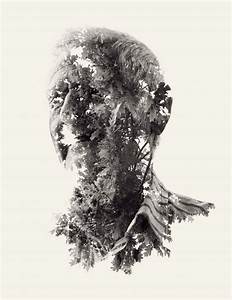
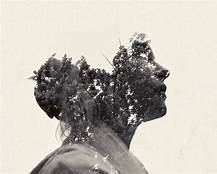
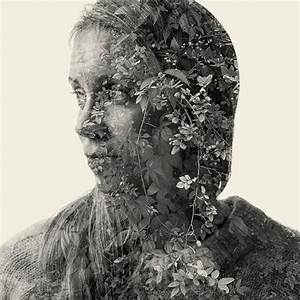
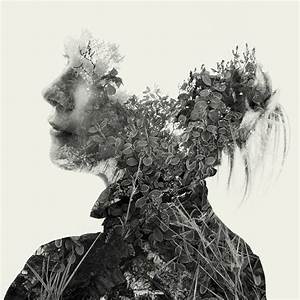
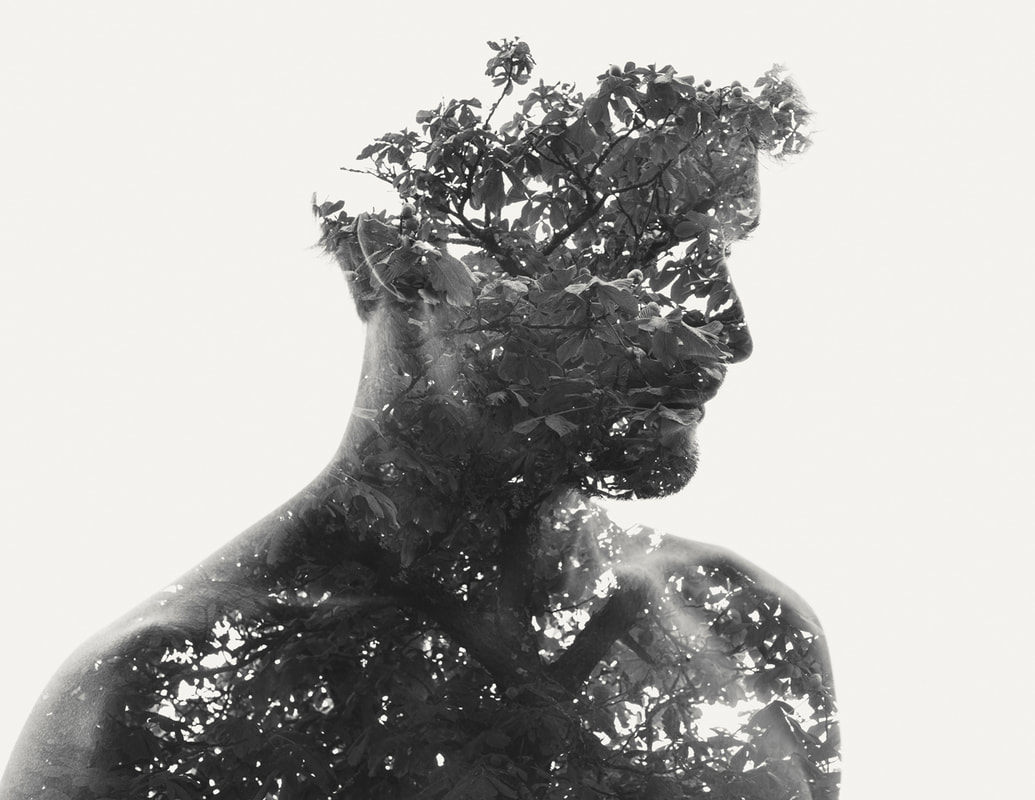
"With alternative and experimental camera techniques I am able to create artworks that otherwise only would be possible through painting or digital manipulation in an external software.” I will start my research into Portraiture & Identity by looking at the work of Christoffer Relander. This photographer uses the experimental, multi exposure technique to strongly convey his imaginative photography. I wanted to study this artist because I was fascinated by his ability to capture the real, natural beauty of the environment around him.
Christoffer Relander is a photographer from a small town of Ekenäs, near Helsinki, Finland whose work addresses the fascination of creating your own realities from reachable memories. Using multiple exposure Relander creates a wonderful eeriness but intimacy within his superimposed images. His website is: https://www.christofferrelander.com/ I chose this quote from Christoffer Relander because it highlights the importance of the multiple exposure technique and how it can uniquely symbolise identity. It's very difficult to capture a subject's identity in a portrait, however through superimposing images, extra symbolism can be hinted at. 
|

Research and Investigation / Multi Exposure / Christoffer Relander / Shoot Plan
|
For my shoot, I will be taking inspiration from the photographer Christoffer Relander and his signature, multiple exposure technique. The shoot will take place outside in the crisp daylight to get bright images and take advantage of the natural lighting.
I will need a model for my shoot to emulate Relander's portraiture work but besides this I will have no props and will rely on the nature and scenery around me. The equipment I will use are my DSLR camera with its kit lens. Finally, my plans for post shoot are to digitally manipulate my images using a software like PIXLR to add in the multiple exposure effect to successfully emulate the work of Christoffer Relander. |
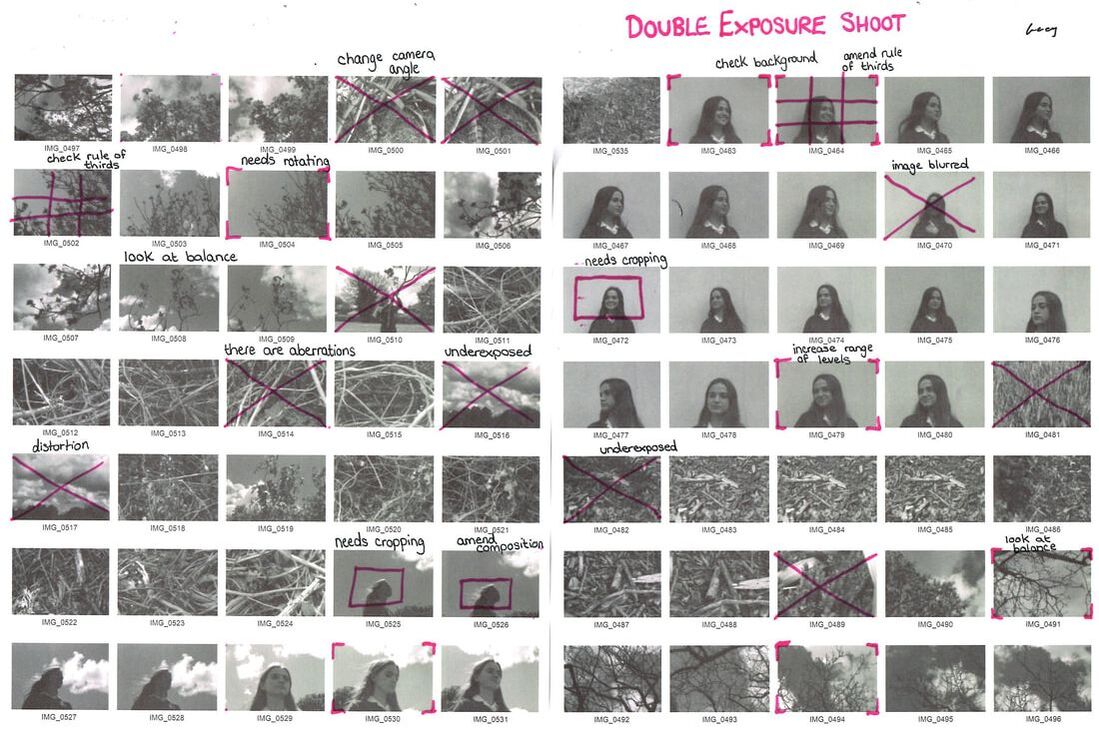
Research and Investigation / Double & Multi Exposure / Contact Sheet
Research and Investigation / Double & Multi Exposure / Digital Edits
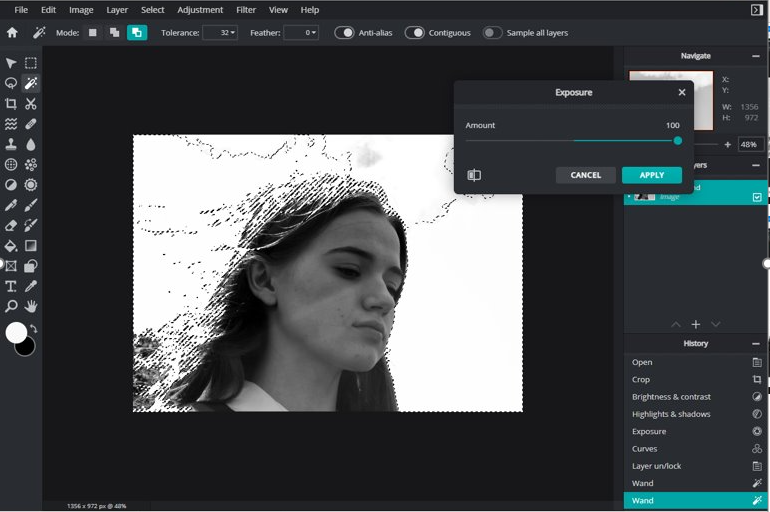
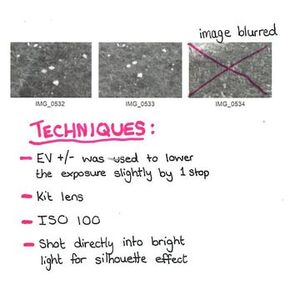
Step 1 - Firstly, I prepared the base image by cropping and adjusting the brightness and contrast. Then I altered the highlights, shadows, exposure, and curves. Finally, I used the lasso tool to overexpose the white background.
|
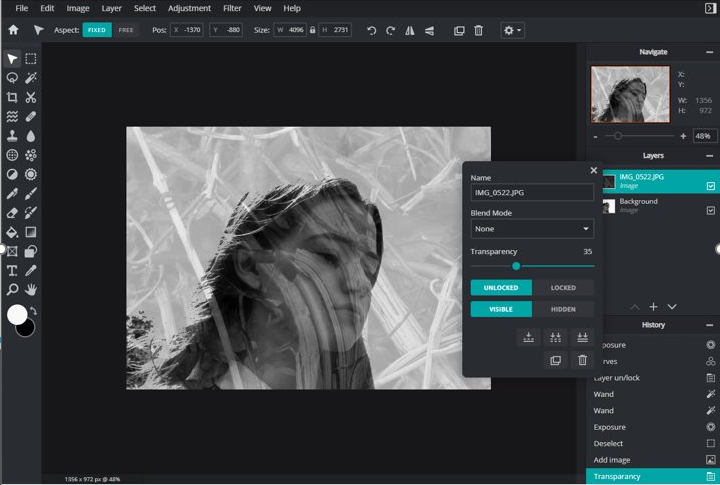
Step 2 - Then I added a new image layer and reduced its transparency. Next, I adjusted the highlights and shadows of my new image layer.
|
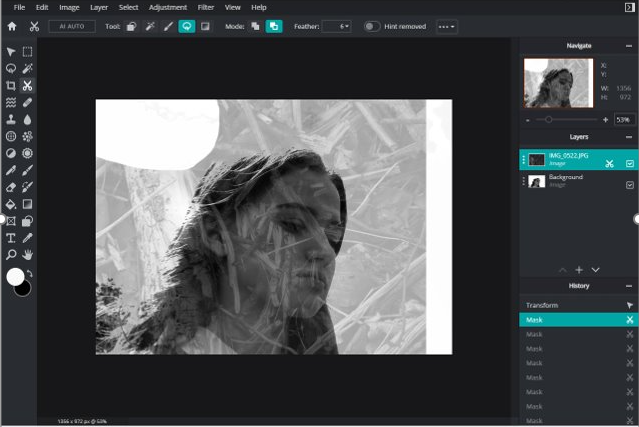
Step 3 - To further the effect I started to remove my new image layer in all areas besides the model's face.
|
|
|
|
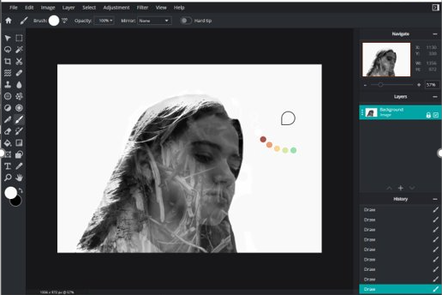
Step 4 - I then continued to remove any aberrations and I added a softer edge using the paint brush tool and slowly increasing the opacity.
|
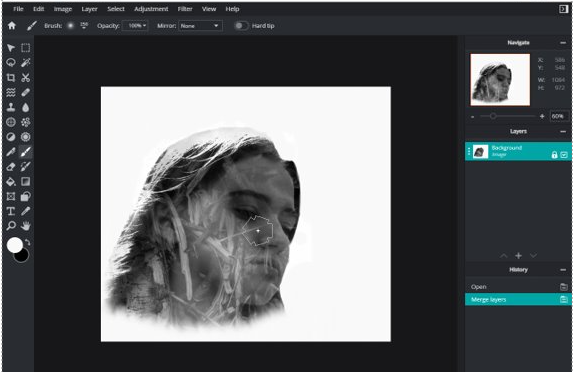
Step 5 - Finally I used a soft brush tool to further emulate Christoffer Relander. I selected a unique brush shape and slowly removed parts of the portrait.
|
Research and Investigation / Double & Multi Exposure / Best 4 Edits
|
|
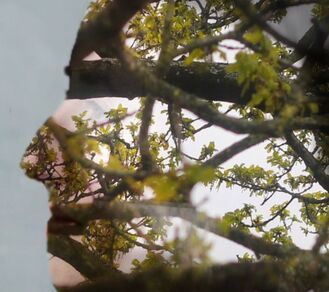
Research and Investigation / Double & Multi Exposure / Best Image
|
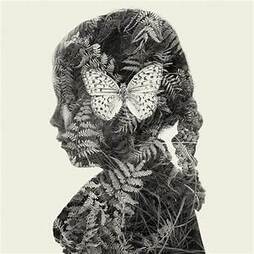
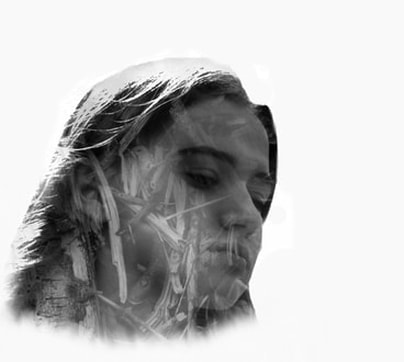
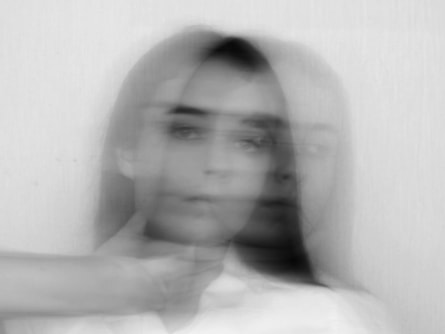
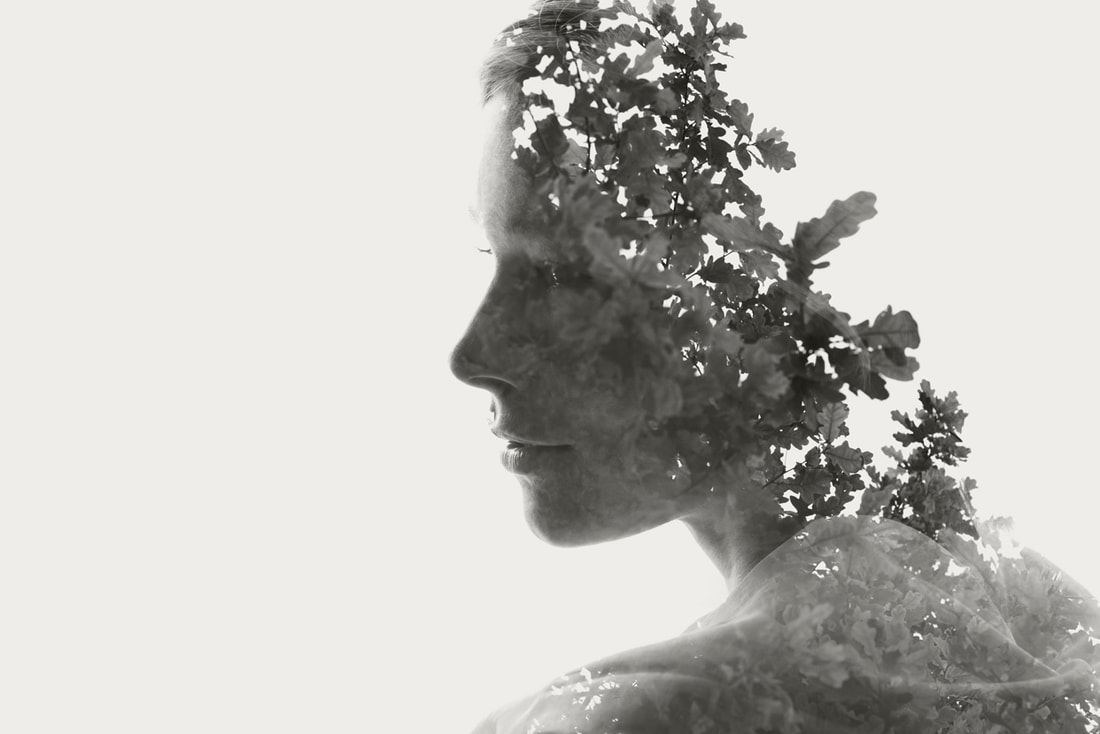
This image is successful because it successfully emulates the work of Christoffer Relander, by conveying emotion through the double exposure technique. The mood of this portrait is expressed through the model's mundane, sorrowful appearance. The overlay I chose to accompany the portrait visually articulates the confusing, chaotic identity of this person. Contrast within the image reveals the distressing features within the downhearted expression of the young woman. |
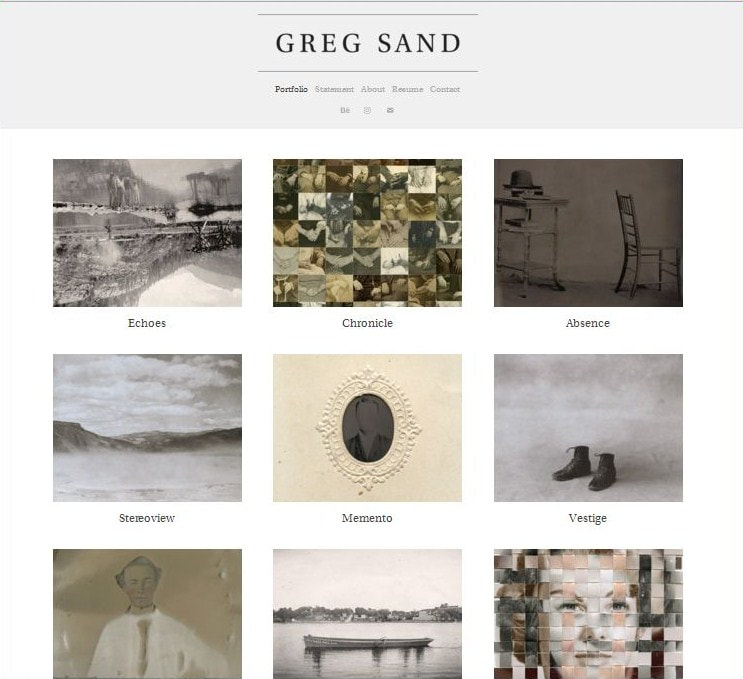
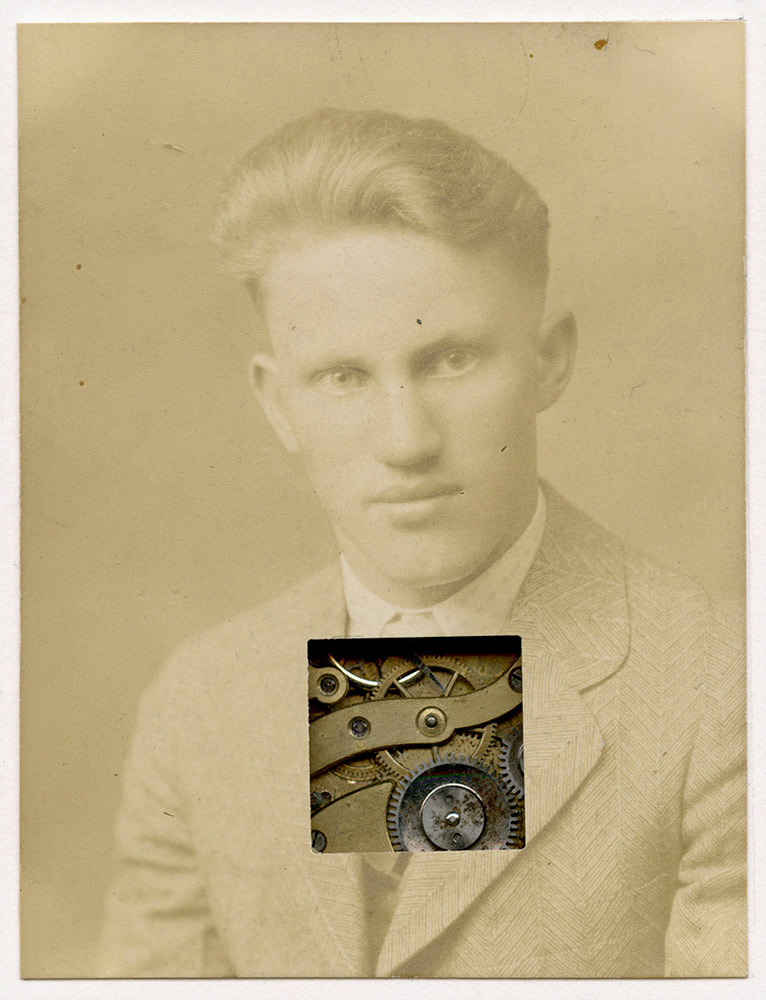
Artist Investigation / Greg Sand
“(Photographs) do not show a whole person or an entire life, but instead capture a single moment, these keepsakes help determine some of the pieces of memory that stick with us.” - Greg Sand
|
I will continue my research into Portraiture & Identity by looking at the work of Greg Sand. This photographer uses a wide variety of techniques to successfully convey his chosen themes. I selected this artist because I believe that trying to emulate his work will strengthen my technical photography skills and broaden my photographic knowledge.
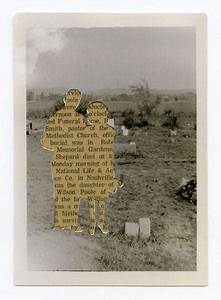
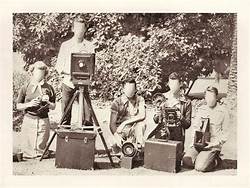
Greg Sand is an artist and photographer from Tennessee, USA whose work addresses themes such as memory, the passage of time, and death. Using found photographs, Sand constructs images that examine the fragmentation and disfigurement of memories and identity. His website (on the left) is: gregsand.net/work I chose this quote from Greg Sand because I think it draws connections between both portraiture and identity. It's almost impossible to capture somebody's entire identity in a portrait, but the single moment captured can convey so much about the subject's personality and feelings. This quote links in well with my project of portraiture and identity. |
|
|
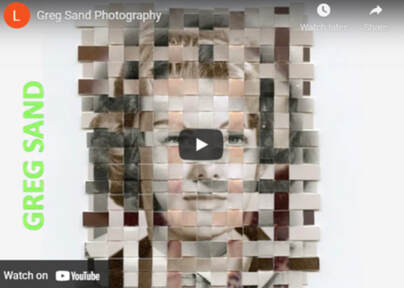
This video highlights the techniques used by Greg Sand which all allude to themes of time passing and the temporality of life. It's a short collection of examples of Sand's work but there is a clear differentiation of photographic techniques and styles, however they all explore the same themes of change, relationships and memory.
To emulate his work I will use a variety of hand and digital manipulation on my images, exploring different tones within my portraits and distorting my subject manner. My digital manipulation will most likely take place on PIXLR - an editing software - where I can adjust levels and curves to successfully emulate the work of Greg Sand. I will also explore the technical process of reflection and use this to effectively convey the theme of memory.
To emulate his work I will use a variety of hand and digital manipulation on my images, exploring different tones within my portraits and distorting my subject manner. My digital manipulation will most likely take place on PIXLR - an editing software - where I can adjust levels and curves to successfully emulate the work of Greg Sand. I will also explore the technical process of reflection and use this to effectively convey the theme of memory.
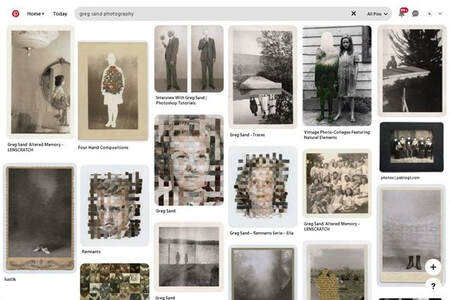
Greg Sand Examples:


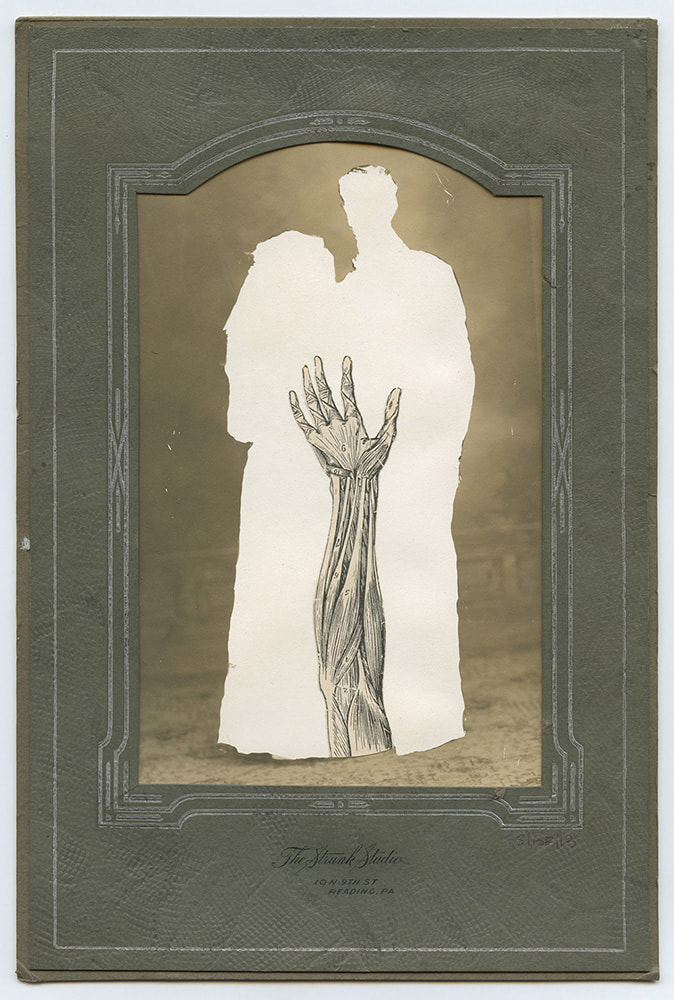
Photographic Techniques / Reflection
|
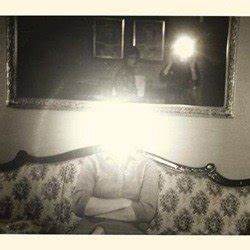
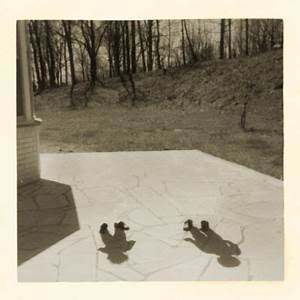
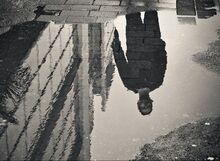
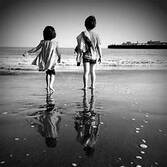
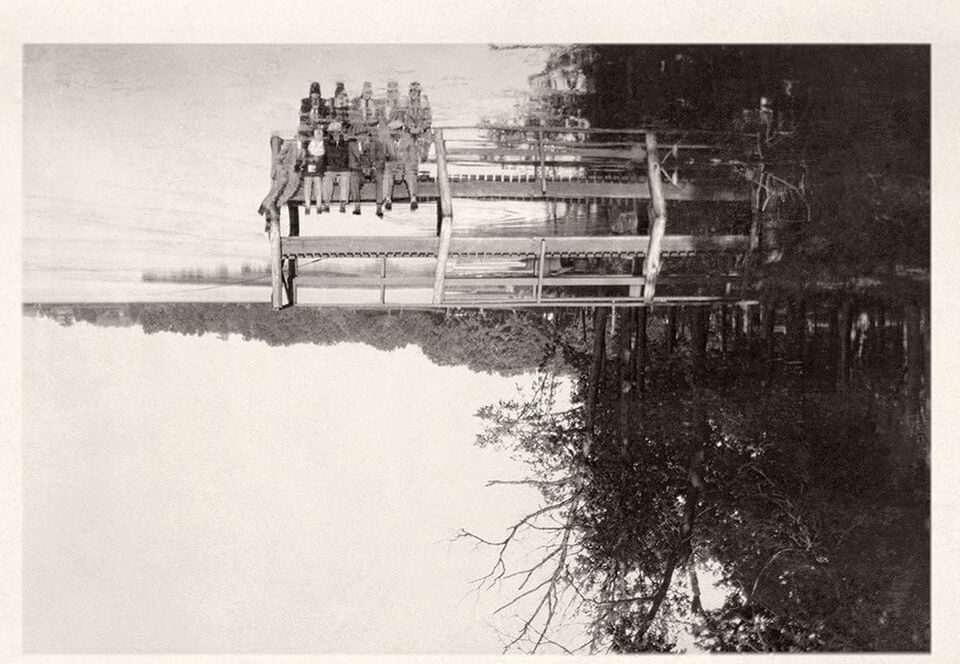
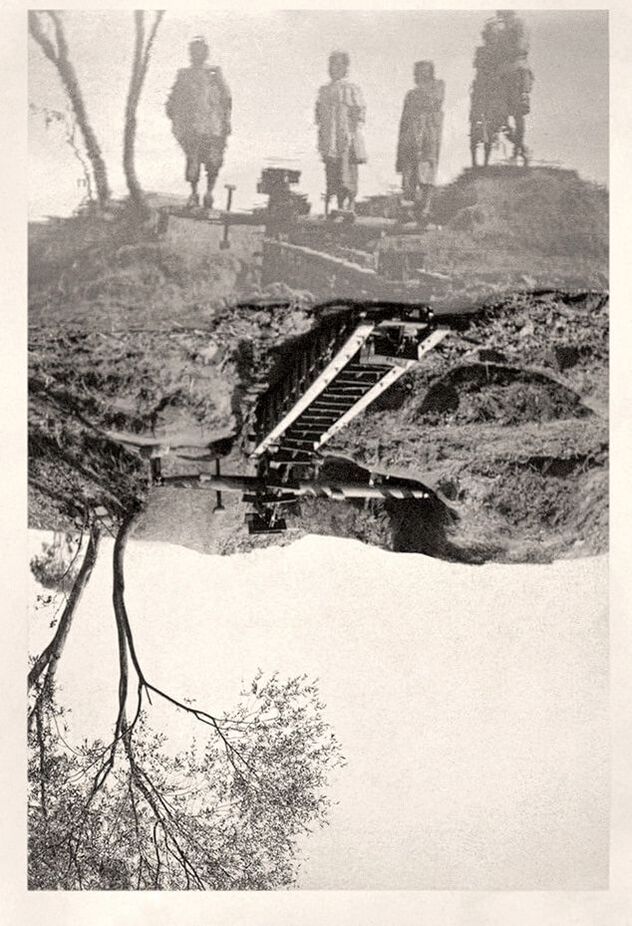
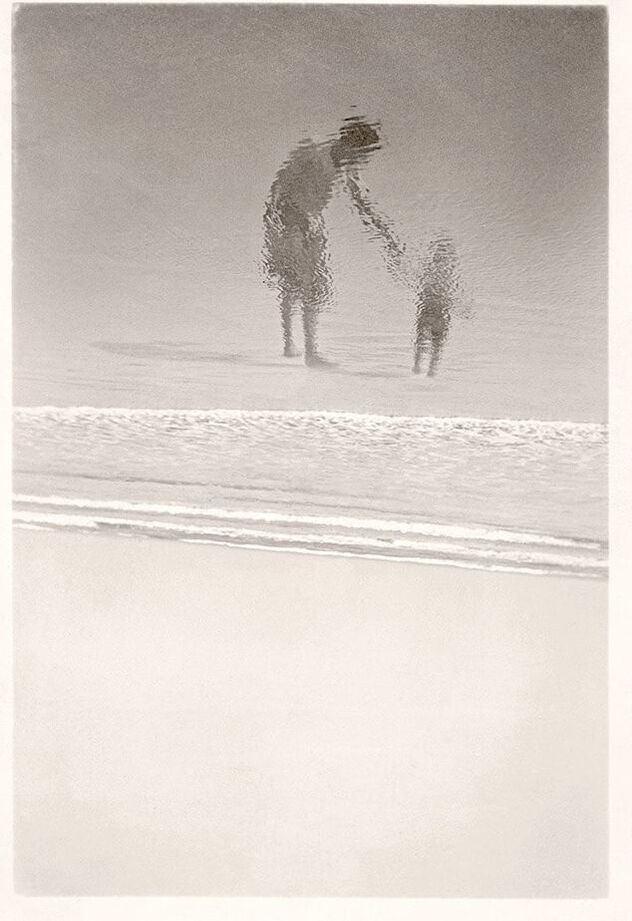
Reflection photography is when you use reflective surfaces, like water, to create an artistic echo of a scene. Reflections can completely alter an image from something fairly straightforward to something richer, abstract or otherwise more artistic. Greg Sand uses this technique in his 'Echoes' series of images, in which he explores the struggle to retain memories, by making the reflection the subject and focal point.
|
|

|
|
'Echoes' by Greg Sand
|
|
Shoot Plan / Greg Sand
|
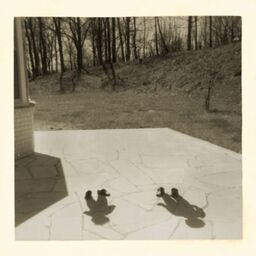
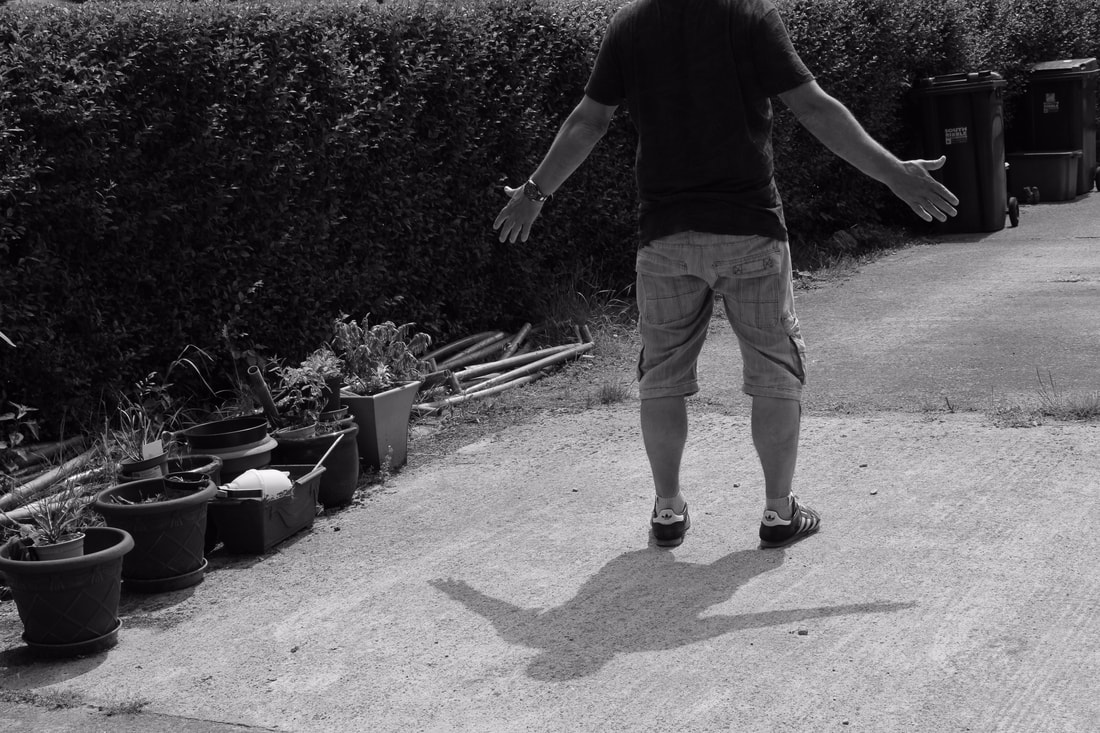
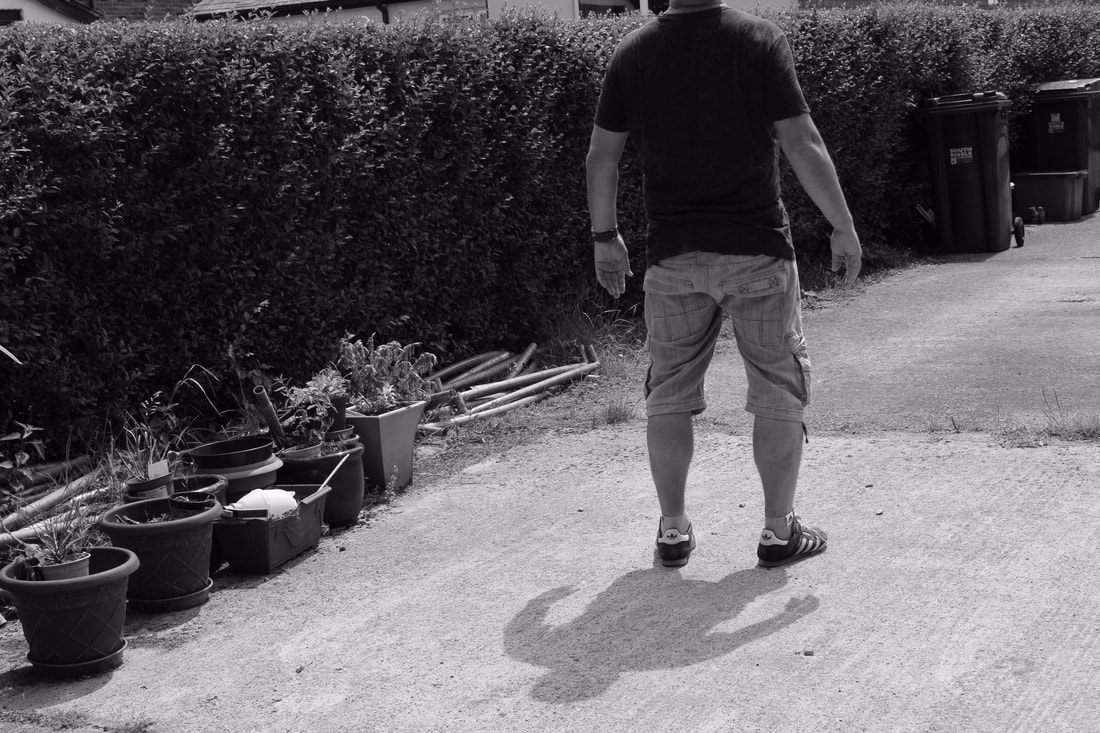
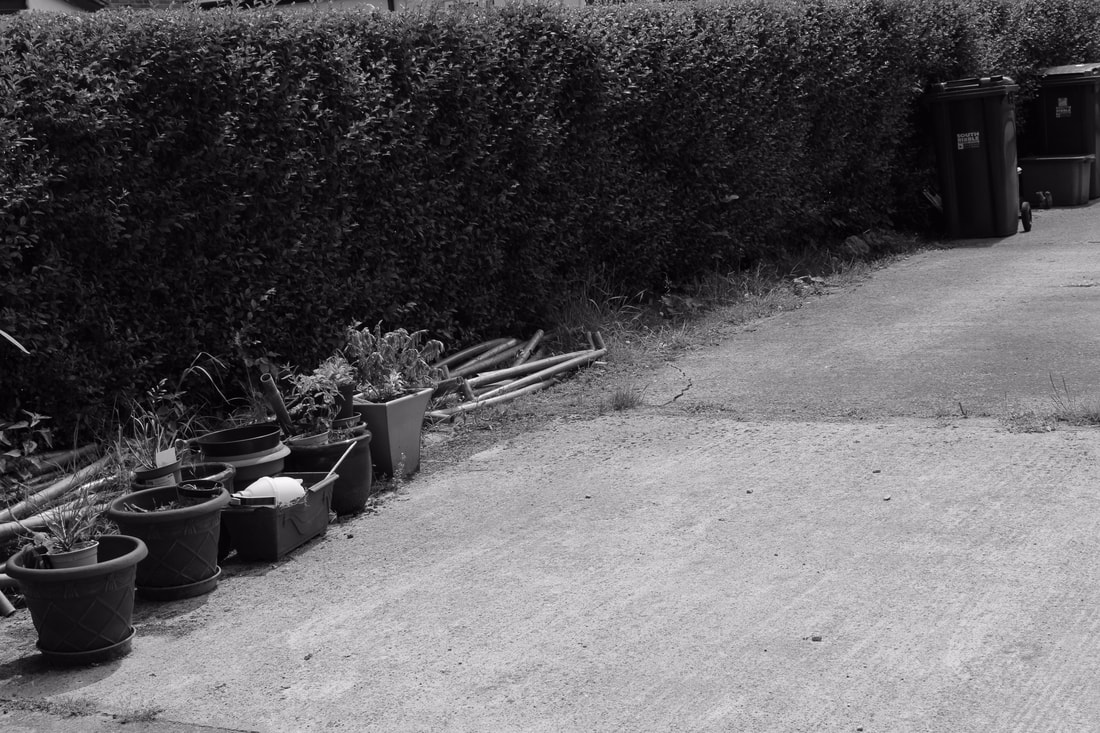
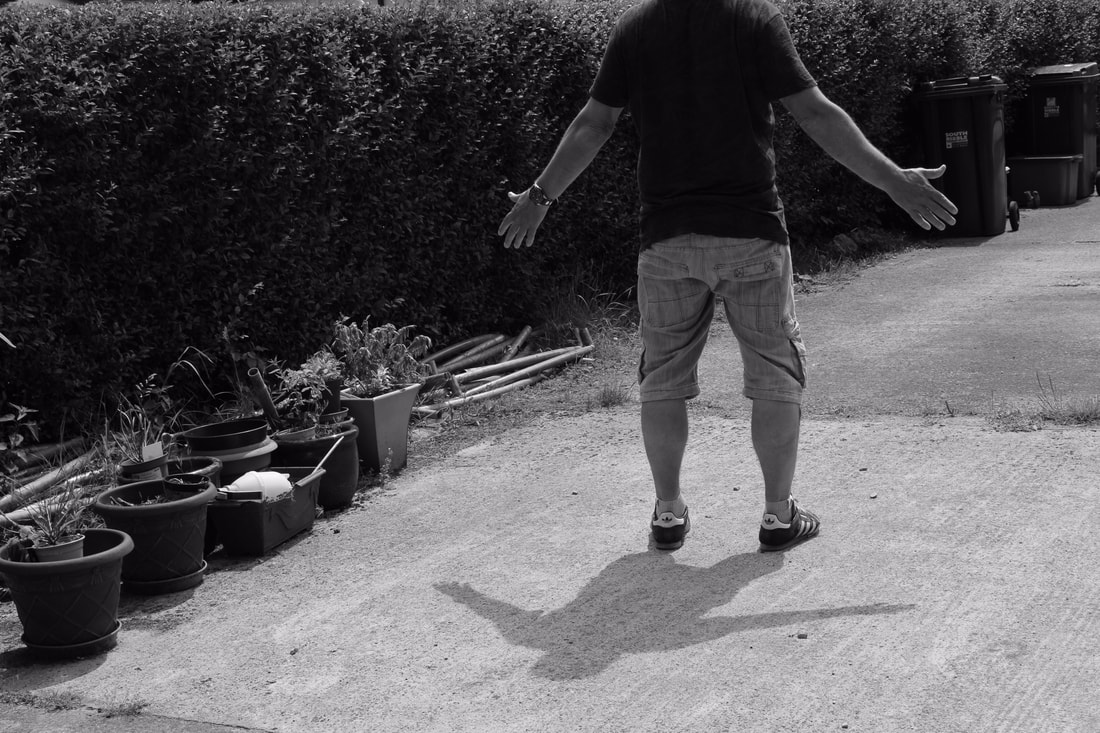
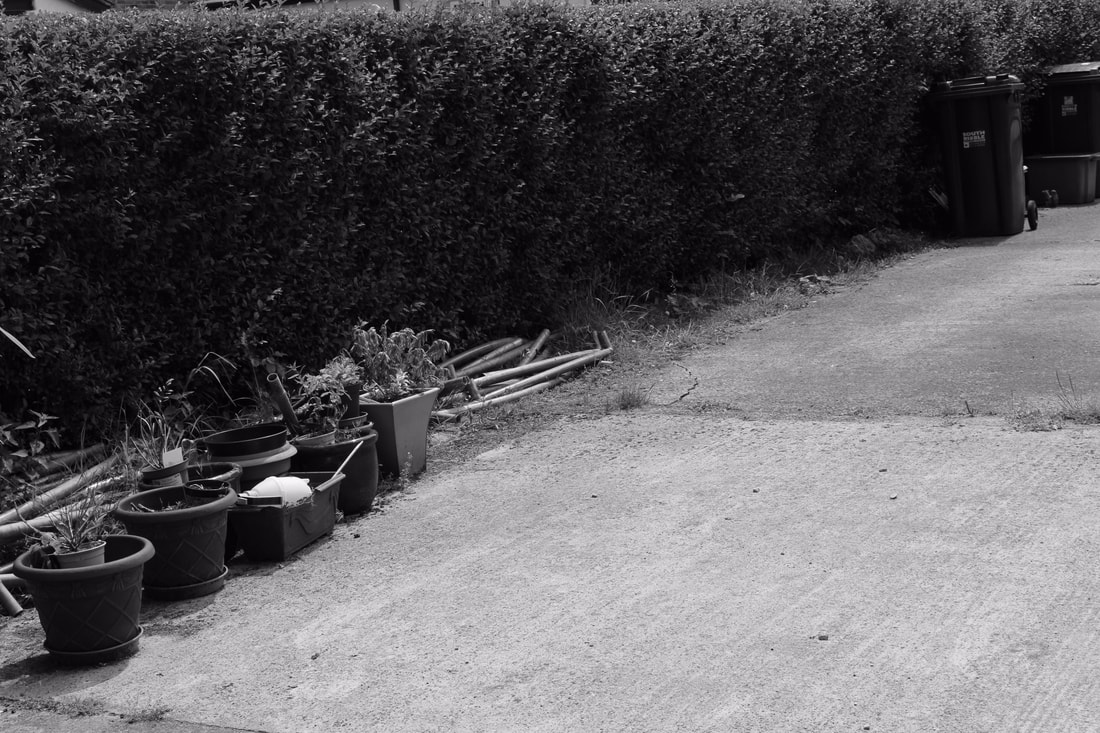
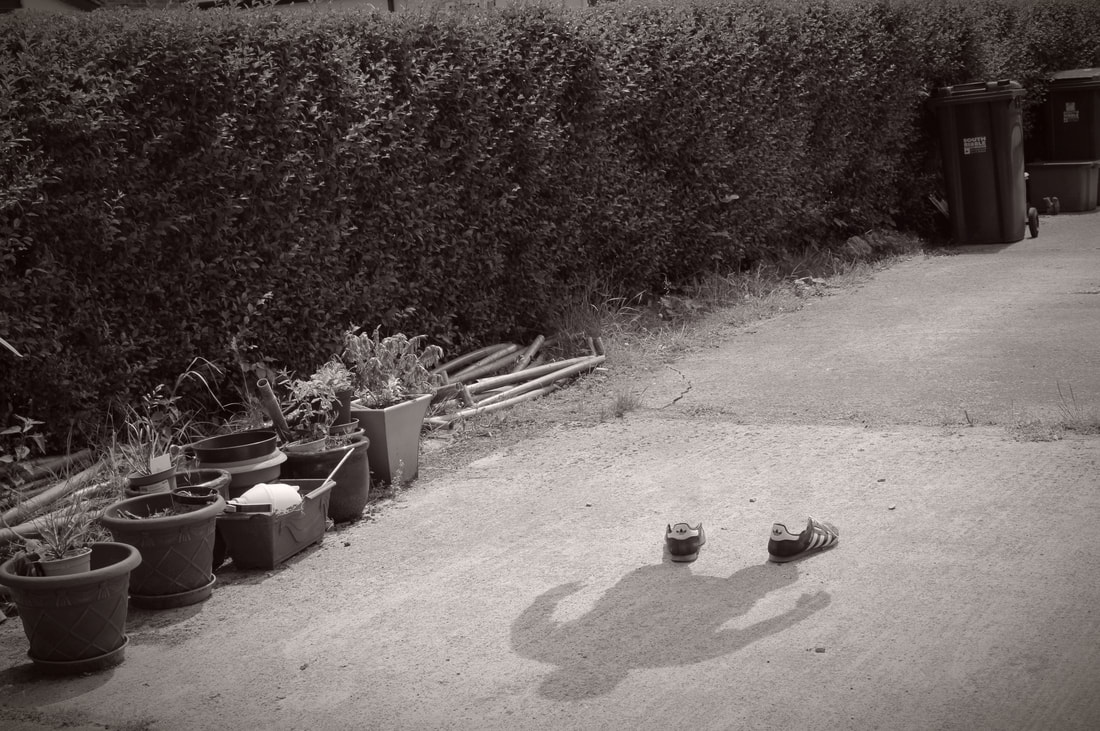
I have drawn inspiration from the work of Greg Sand because his portraiture work captures identity in a unique and obscure way. I plan for the shoot to take place outside with natural light because I want to capture the crisp shadow of my model. The props I intend to use are a model to successfully emulate Greg Sand's portraiture work. The lighting will be bright, natural light and I will adjust the white balance on my camera. My subject will be back lit to successfully capture the model's shadow/outline. I intend to shoot with my DSLR camera with a kit lens on a tripod because I need to stabilise my camera. Following the shoot, I intend to digitally manipulate my images using PIXLR to remove the model's body (leaving only a shadow) and emulate Sand's eerie absence within his portraits.
|
Shoot Inspiration:
|
Research and Investigation / Initial Images / Greg Sand

|
|
|
Research and Investigation / 2 Best Edits / Greg Sand
|
|
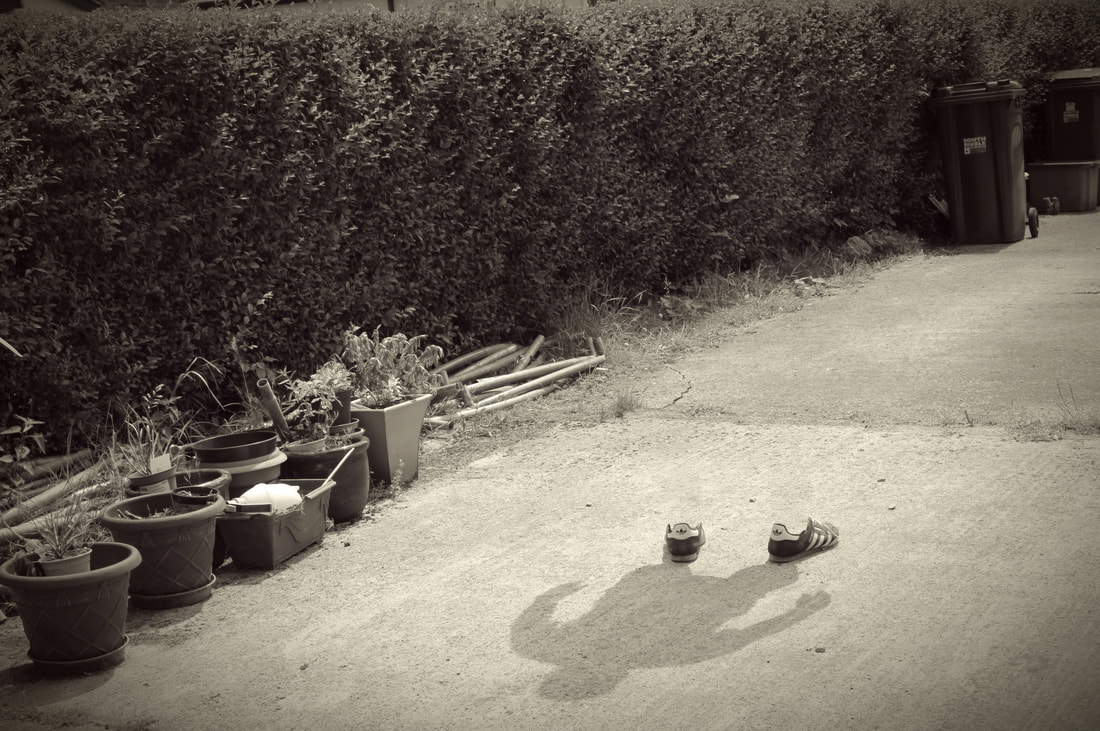
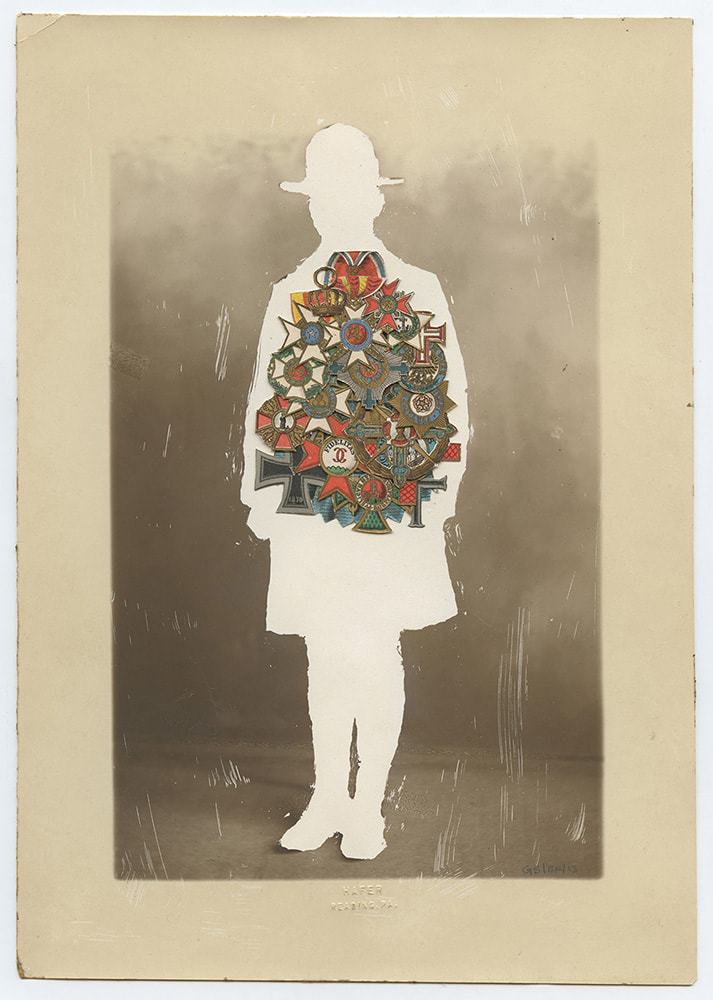
Research and Investigation / Best Image / Greg Sand
|
|
This is my most successful outcome from this Greg Sand emulation shoot. I edited the hue and colour balance of this image to best emulate Sand's work, which has an old, sepia tone. It follows the same foundations as Sand's reflection work, with a noticeable absence within the composition. This absence visually articulates the struggle to retain memories. |
Shutter Speed Workshops / Long Exposure / Motion Blur / Light Drawing
|
What is Shutter Speed and Blur in Photography?
Shutter speed in photography is a controllable function that can let more or less light in; also, this is the only setting that can freeze time and capture a blur in motion. Shutter speed is the length of time the camera sensor was exposed to light. |

|
|
|
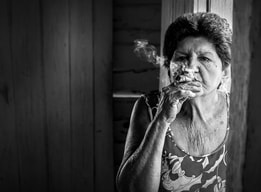
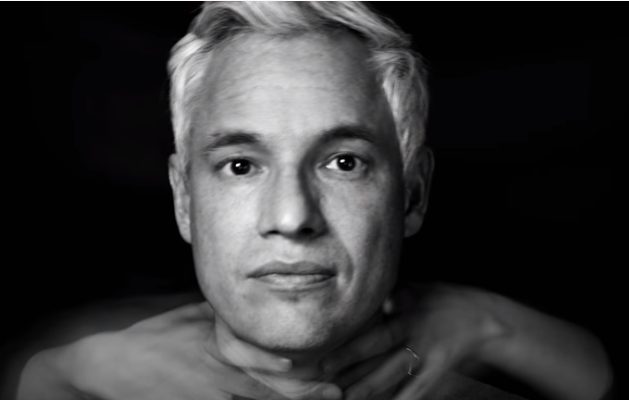
Slow Shutter Speed Portrait Examples - creates a sense of movement, blur or dynamic motion

|

|
|
Fast Shutter Speed Portrait Examples - captures crisp details and freezes them in time
Photographic Techniques / Long Exposure
|
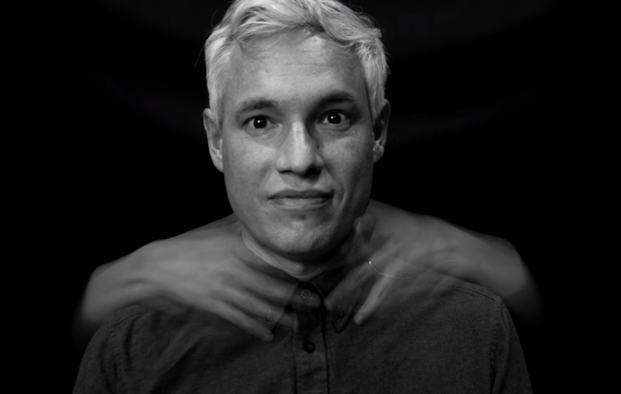
What is Long Exposure in Portrait Photography?
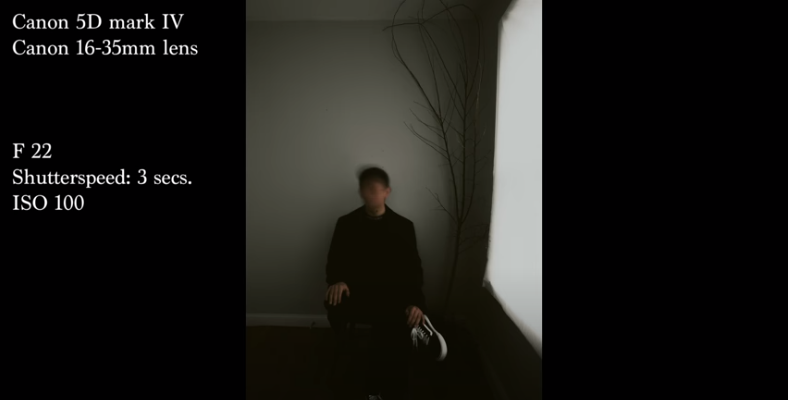
Long exposure in photography captures movement during a long shutter speed. This technique can evoke apprehension and anxiety with ghost-like figures and objects captured in the portraits. To successfully emulate this technique, you should change your camera settings to manual, set your shutter speed and aperture to around 3" and f/14. Also, have your ISO on auto, place your camera on a tripod and add a 2 second timer. |
Aperture f/11
Shutter Speed 3" ISO 64 |
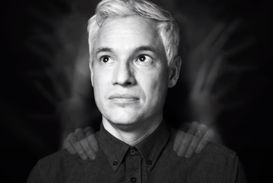
Aperture f/16
Shutter Speed 3" ISO 64 |
Aperture f/14
Shutter Speed 3" ISO 64 |
Photographic Techniques / Long Exposure / My Experiments x9

Photographic Techniques / Long Exposure / 4 Best Edited Images
I cropped this image and reduced its saturation. I adjusted the curves and used the brush tool to remove some abbreviations within the face. I left the background underexposed because I liked the irregular feeling of the portrait.
During the editing process, I cropped this image then reduced its saturation. Next, I altered the brightness and contrast and adjusted the levels. Finally, I used the draw tool to remove aberrations from the background.
|
Using PIXLR, I cropped this imaged and reduced its saturation. Then, I made adjustments to its brightness and contrast and then highlights and shadows. Finally, I changed the curves, which resulted in this eerie outcome.
I cropped this image, reduced its saturation, then increased its lightness. Next, I altered the highlights and shadows then the brightness and contrast. Last, I used the draw tool to remove any aberrations from the background.
|
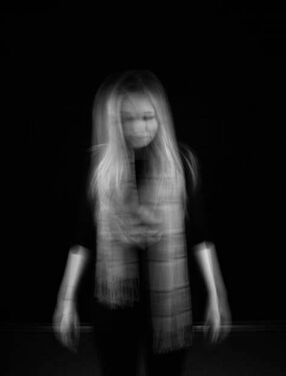
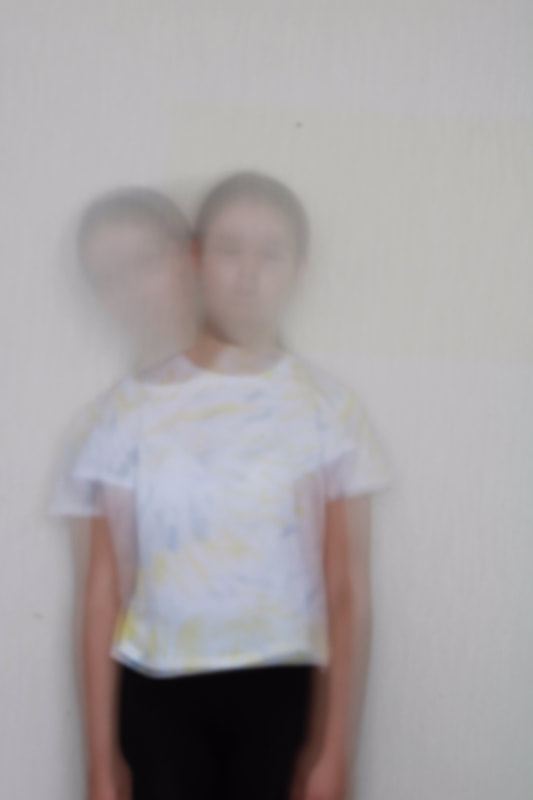
Photographic Techniques / Long Exposure / Best Image

|
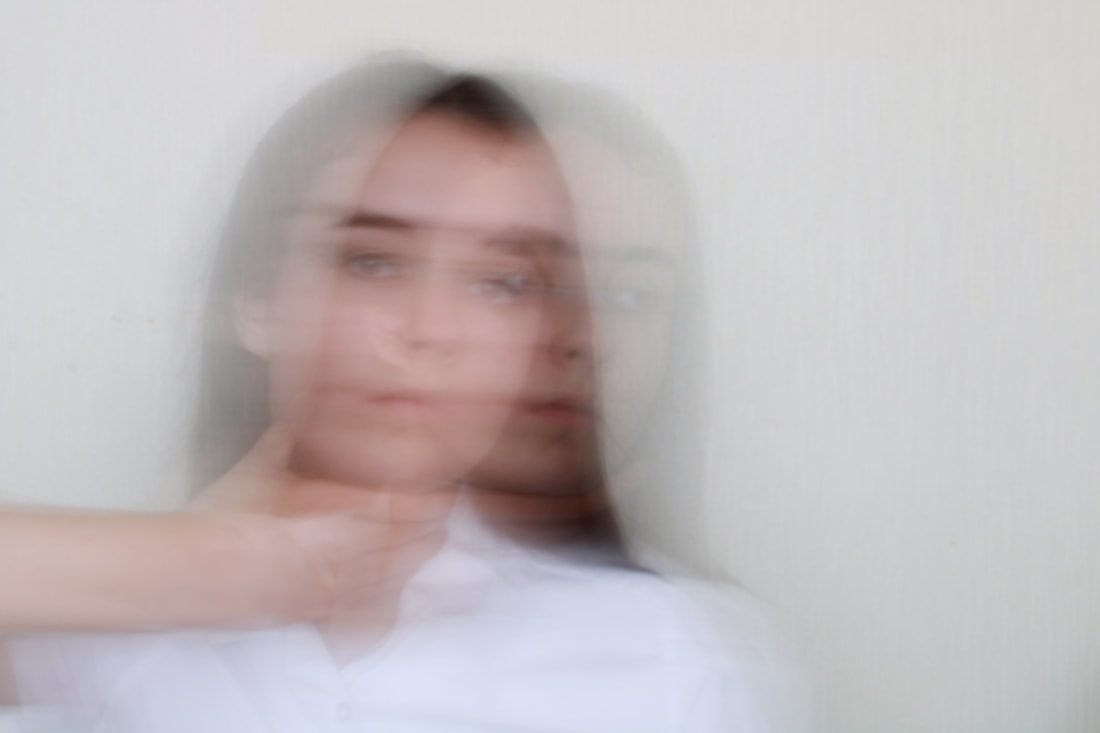
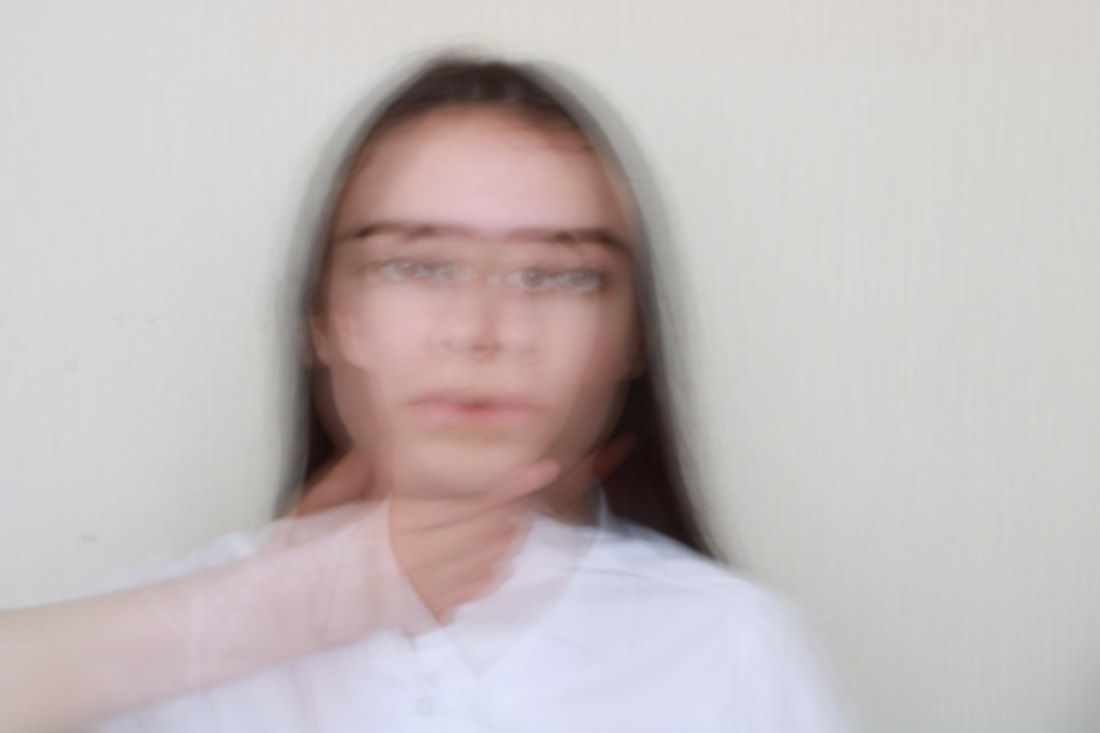
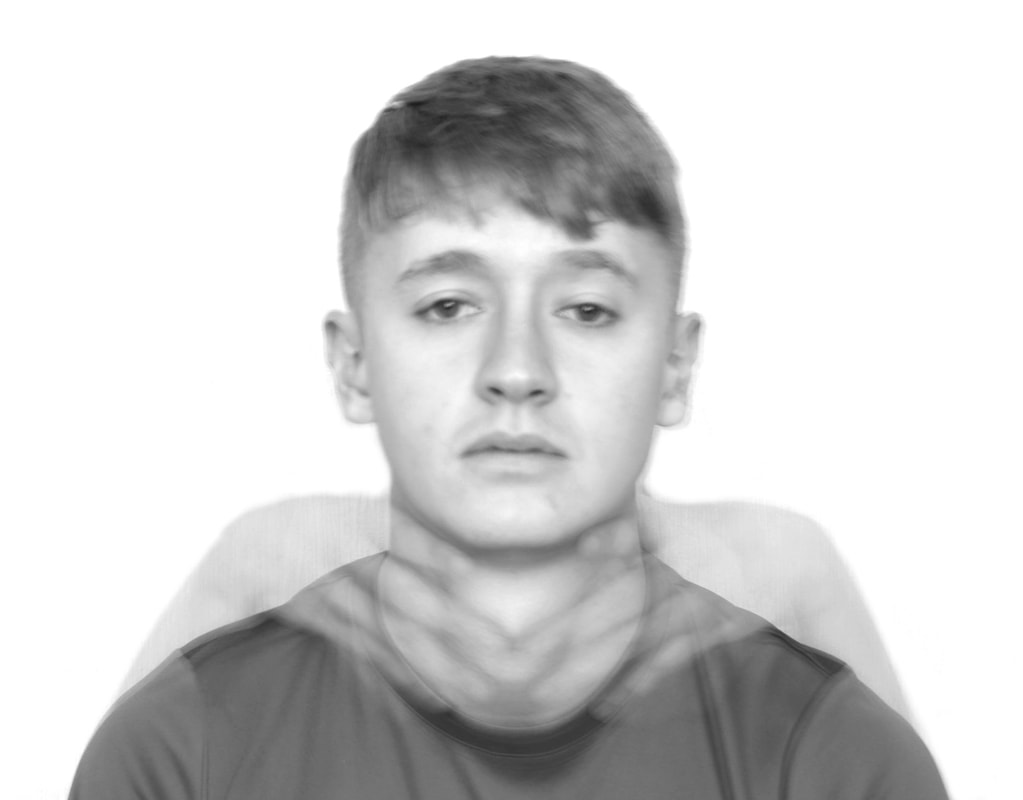
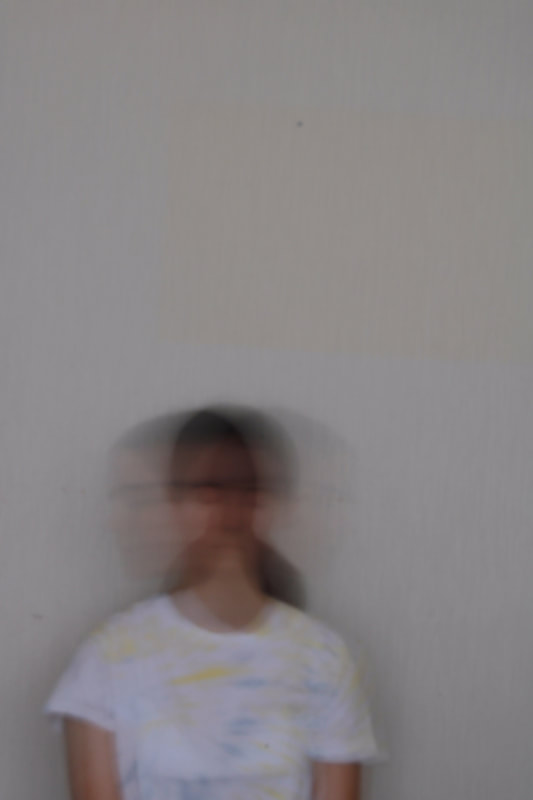
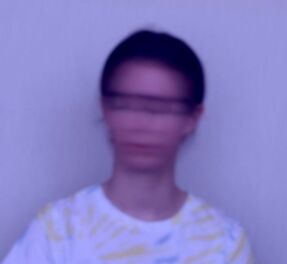
This is my favourite long exposure outcome from this shoot because of how the split personality is represented. The identification of the individual captured in this portrait, is portrayed as disfigured and fractured. The long exposure technique allows two faces to be distinguishable and separately convey the mood of the portrait, yet collectively articulate the dual personality and hidden psyche of the woman. In this photograph, the two separable expressions of the individual symbolise their soul and identity. I chose to leave the background of this image underexposed, because I liked the sinister, irregular feeling it evokes, also the eerie, shadow-like focal point further adds to the unearthly atmosphere. |
Photographic Techniques / Motion Blur
|
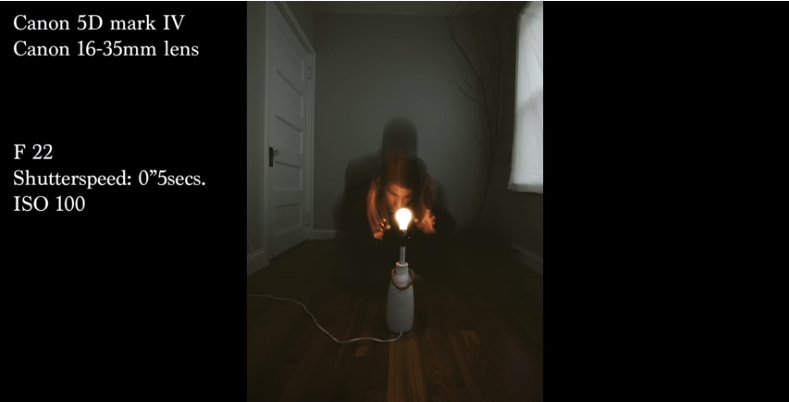
What is Motion Blur in Portrait Photography?
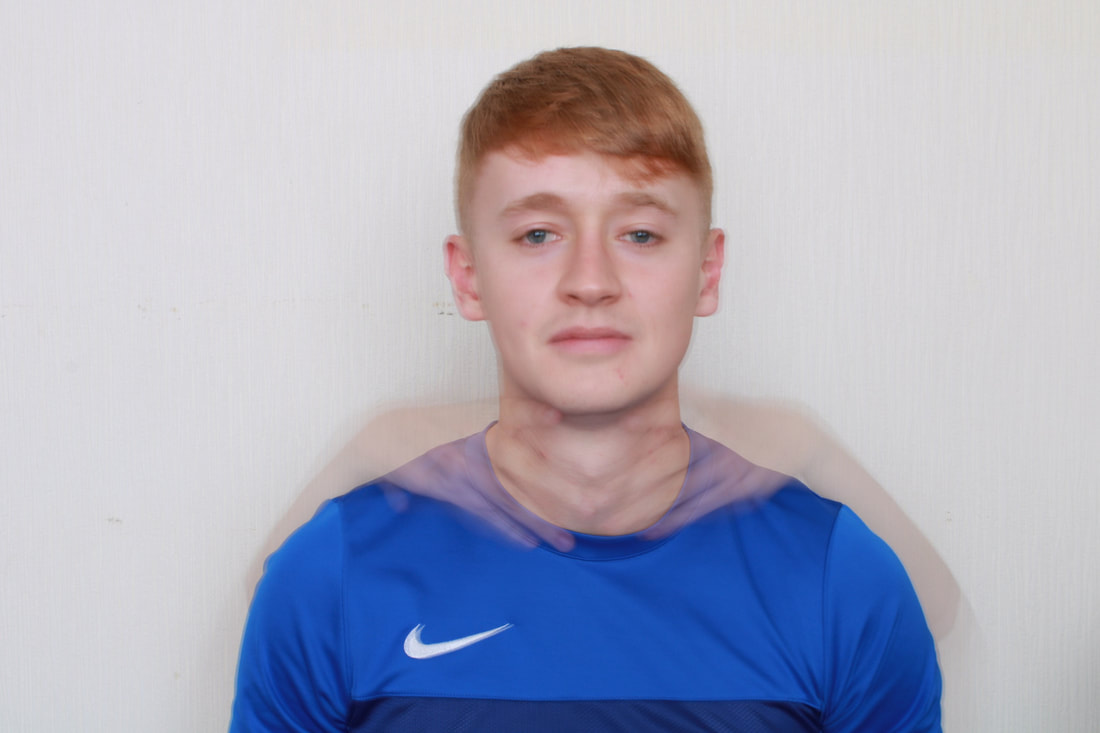
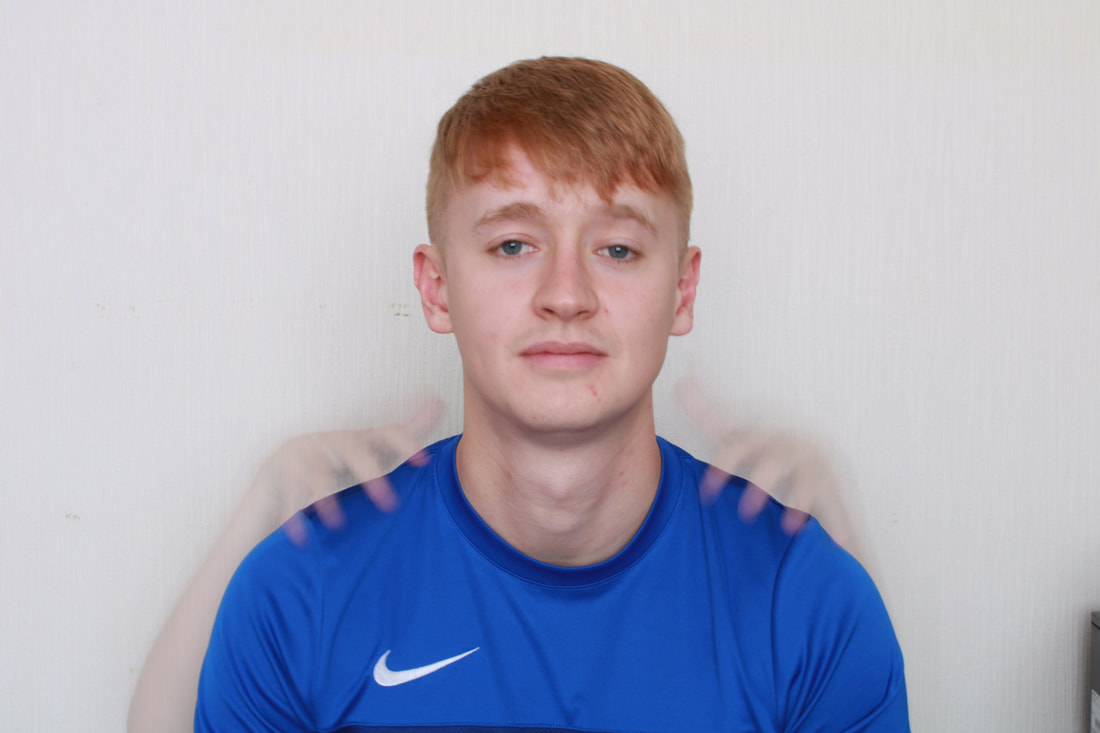
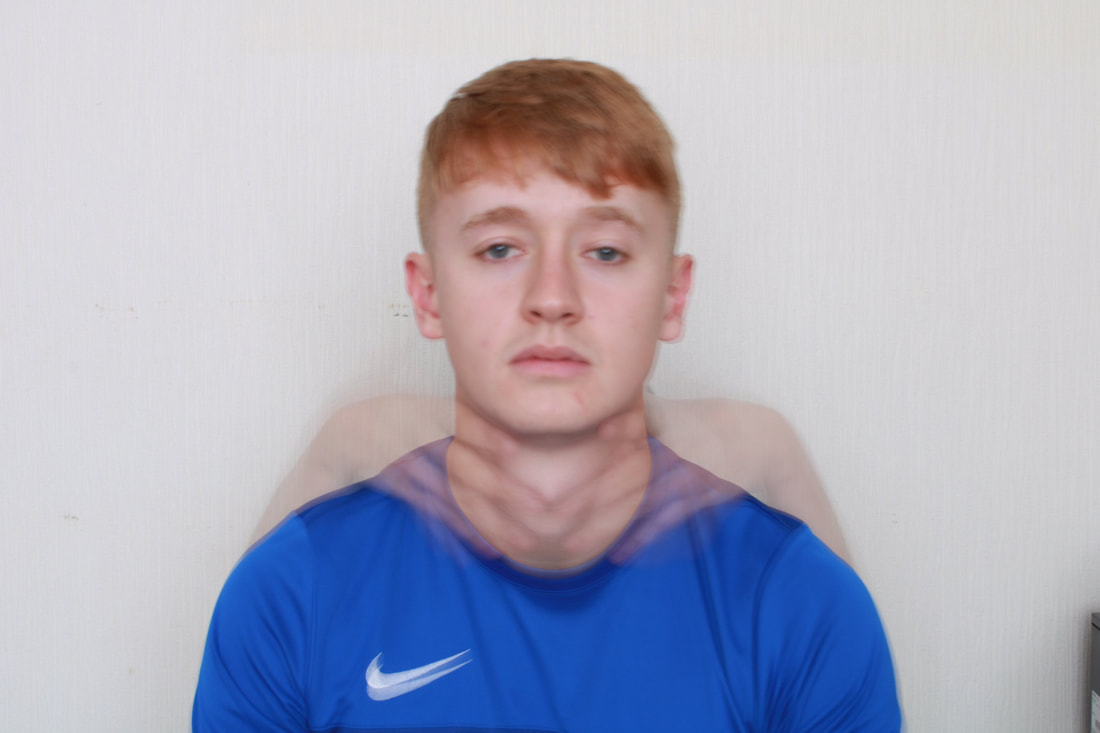
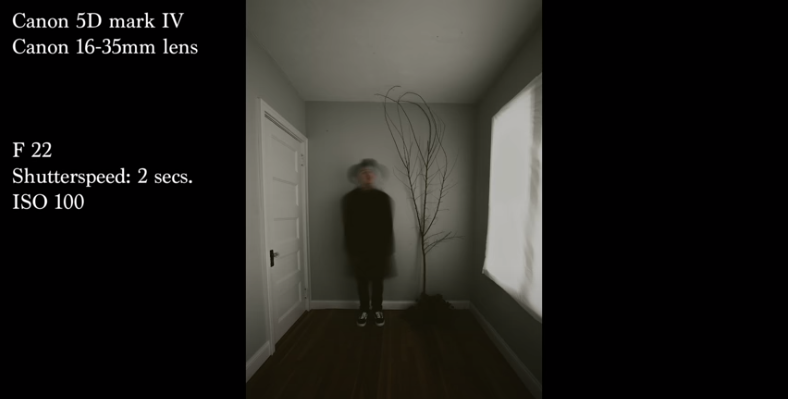
Motion blur is the purposeful streaking or blurring of an object in motion in an image for visual effect. This technique is great for capturing movement in a still image. To successfully achieve motion blur, use manual mode to set the shutter speed between 1" and 4" and set the aperture at around f/22. ISO should be at 100 and a tripod would be helpful. |
|
|
|
|
Aperture f/22
Shutter Speed 3" ISO 100 |
Aperture f/22
Shutter Speed 2" ISO 100 |
Aperture f/22
Shutter Speed 0"5 ISO 100 |
Photographic Techniques / Motion Blur / My Experiments x9

Photographic Techniques / Motion Blur / 4 Best Edited Images
|
|
|
On PIXLR, I cropped this image and adjusted the temperature and tint.
|
I cropped this portrait, adjusted the brightness and contrast, removed aberrations from the background using the drawing tool, then altered the temperature and tint.
|
I cropped this image, adjusted the brightness and contrast, removed aberrations in the background with the drawing tool, then altered the temperature and tint.
|

Using PIXLR, I cropped this image and adjusted the temperature and tint.
|
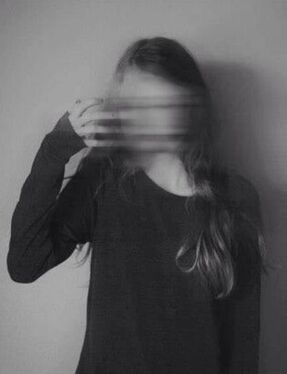
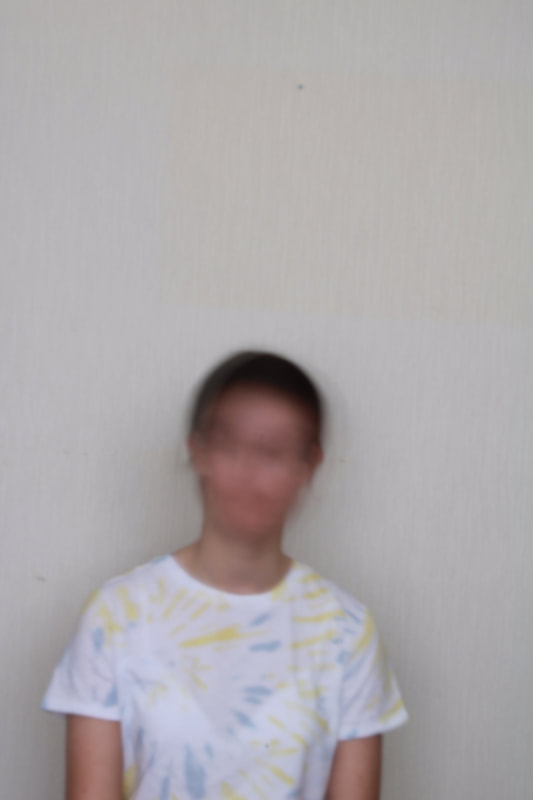
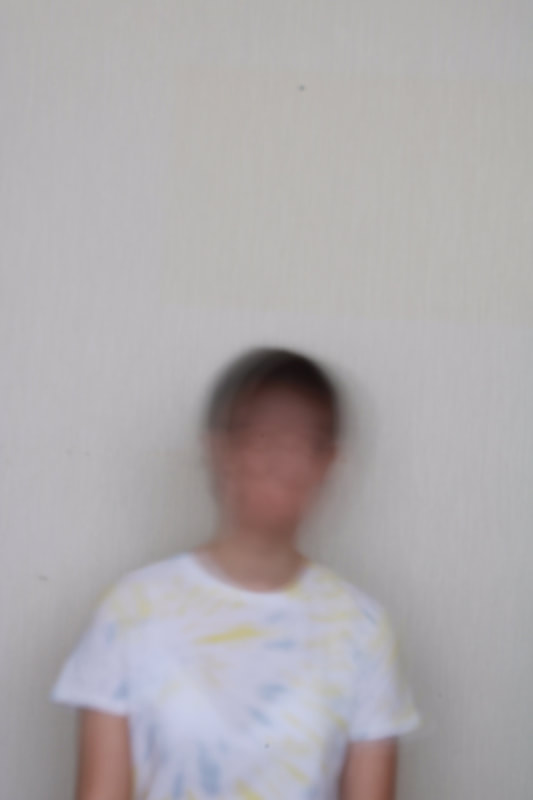
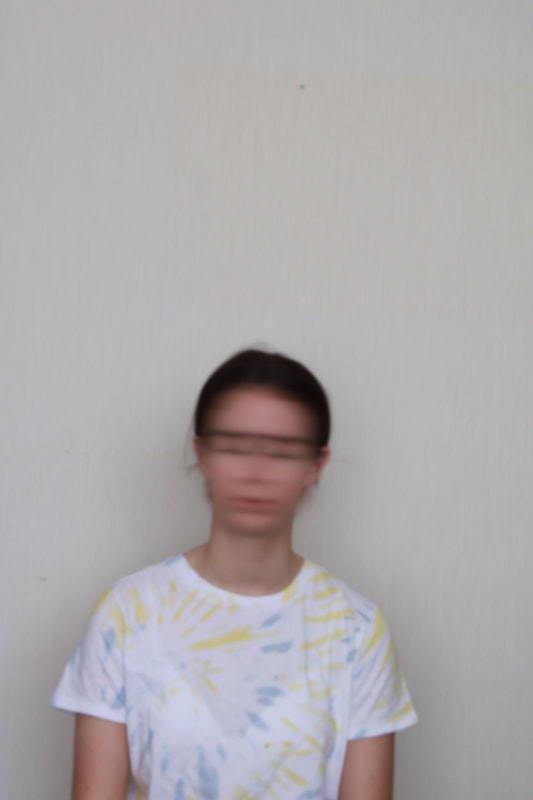
Photographic Techniques / Motion Blur / Best Images
|
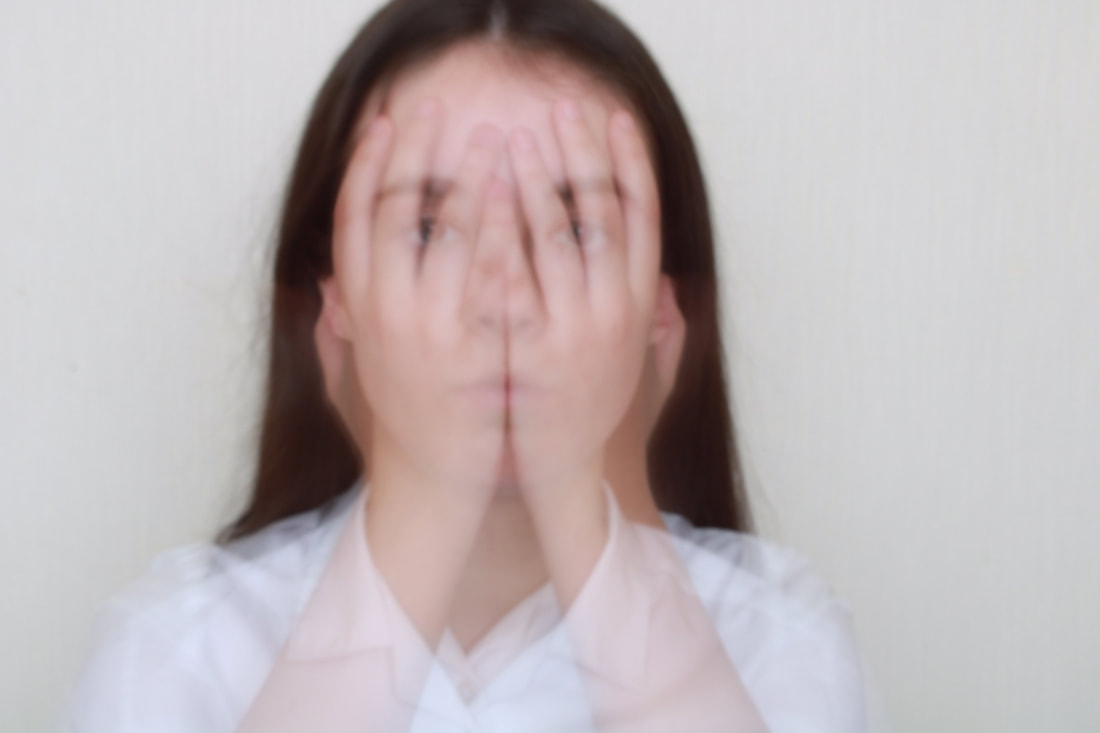
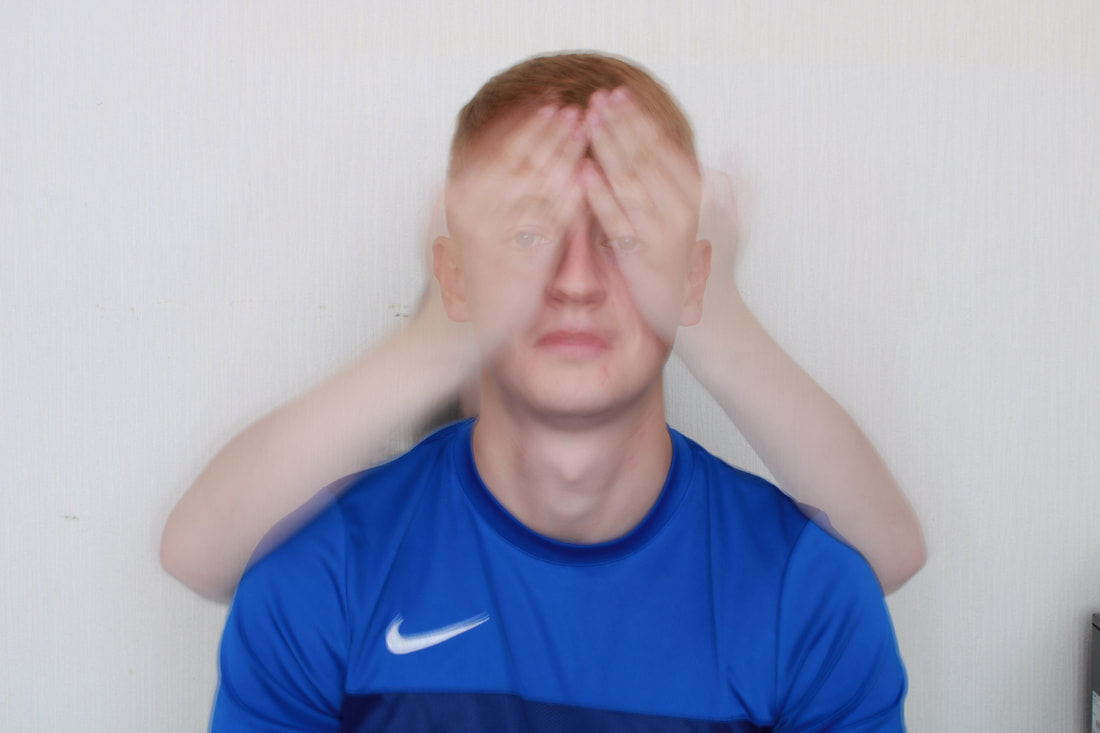
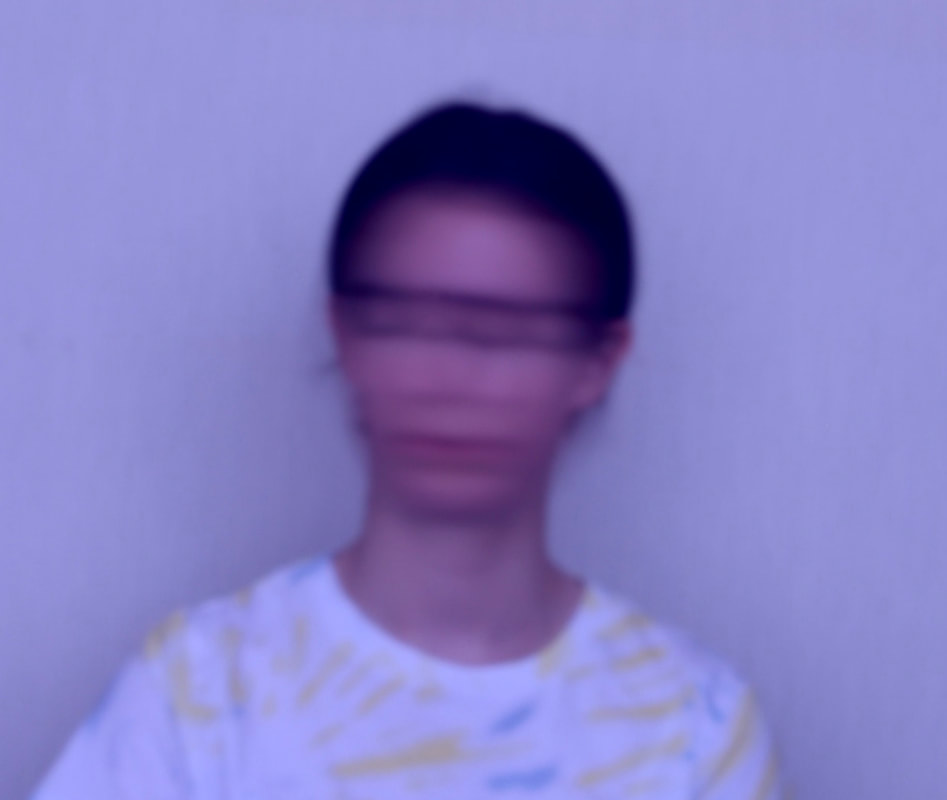
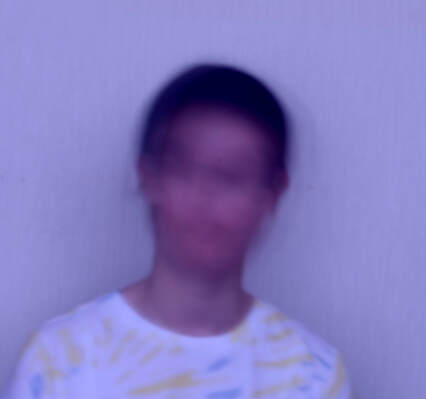
In my opinion, these images are my most successful because they lack identifiable facial features, which most people immediately associate to identity. These portraits discredit that conclusion by excluding facial features and leaving the subject's identity hidden and unclear. |
|
Photographic Techniques / Light Drawing

|
What is Light Drawing in Portrait Photography?
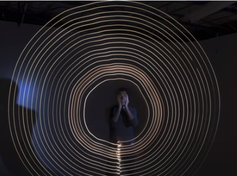
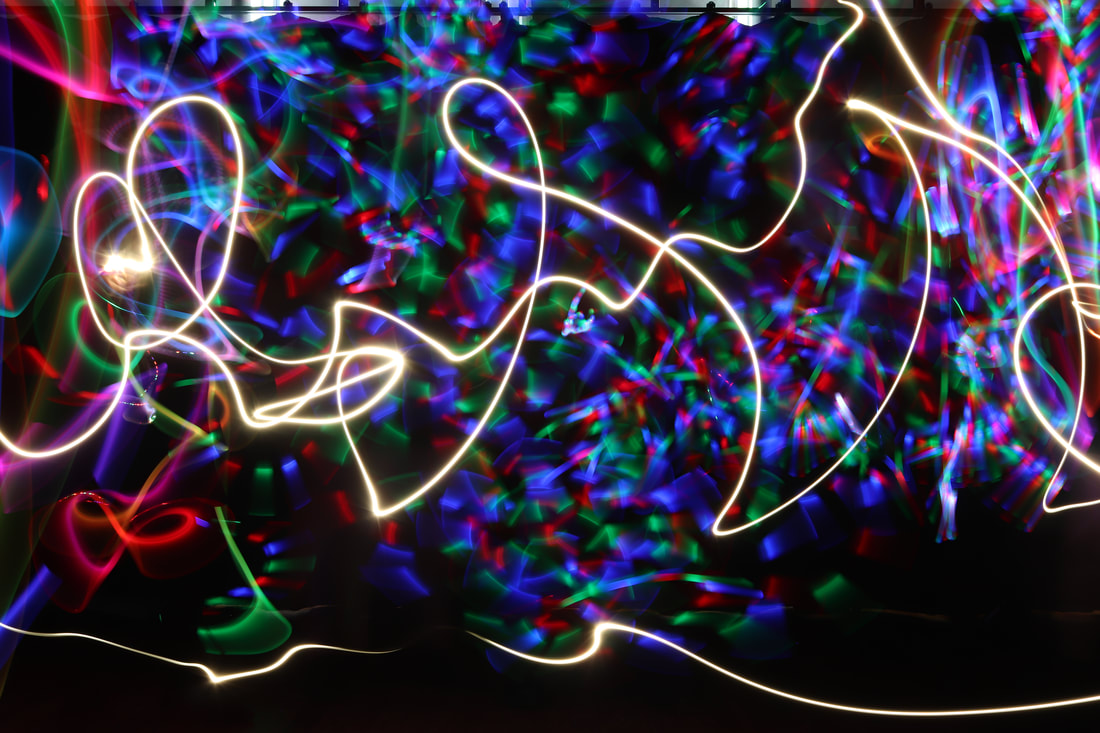
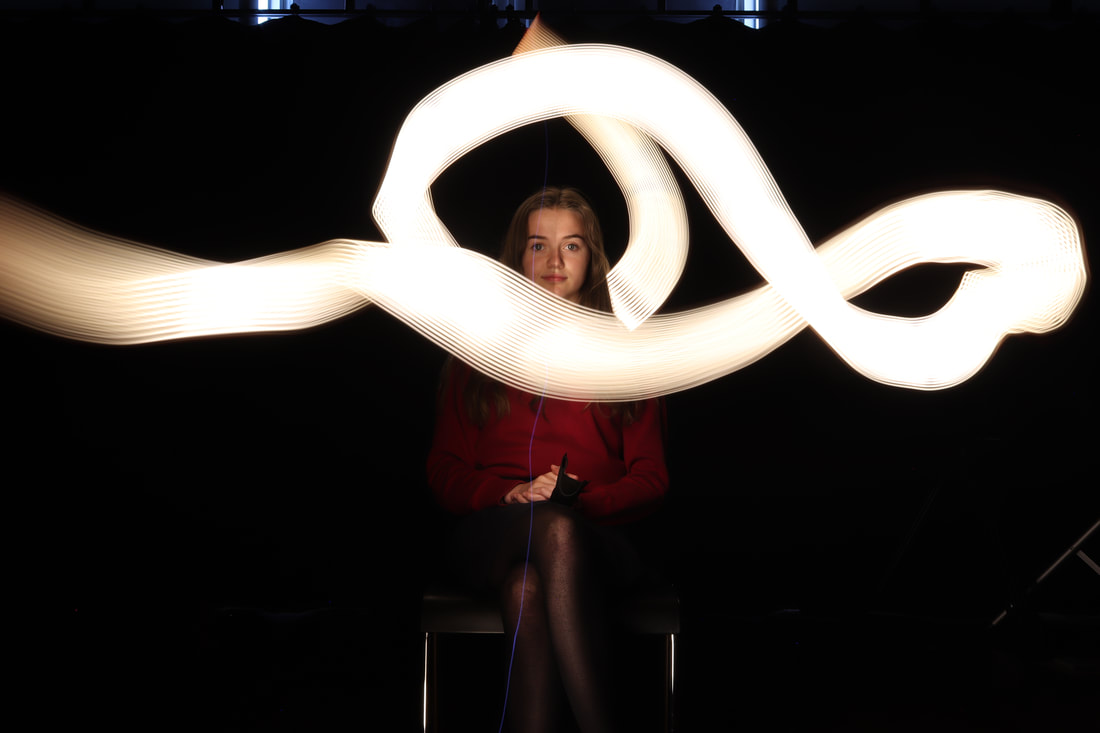
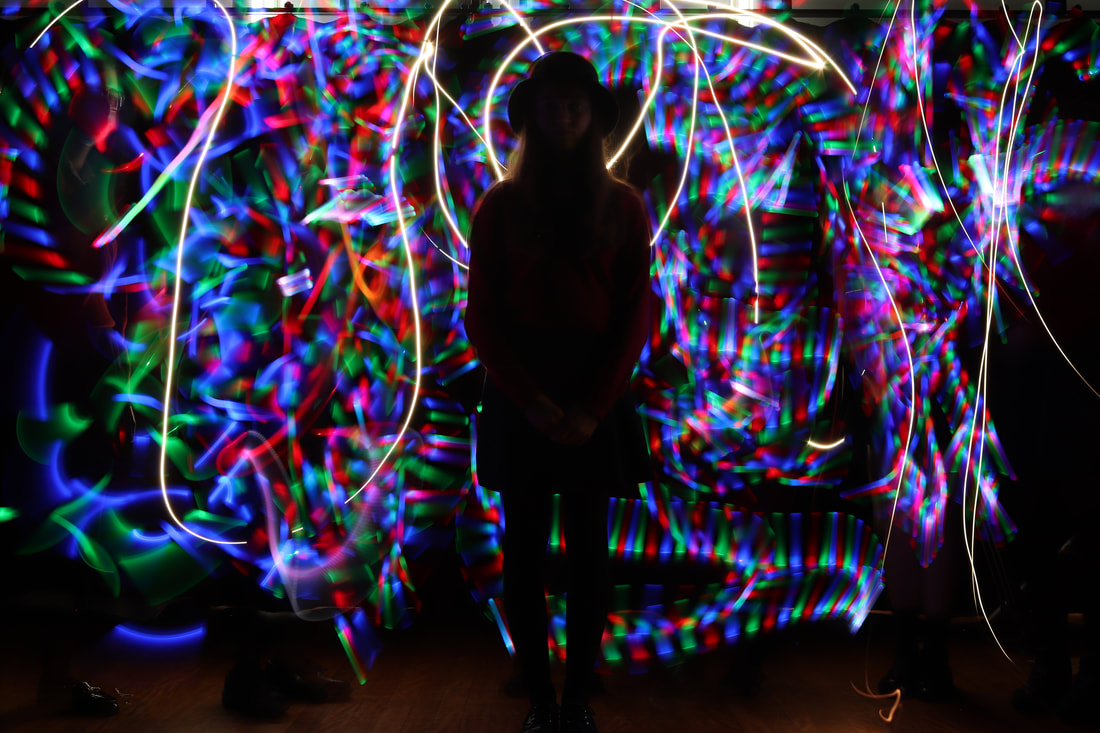
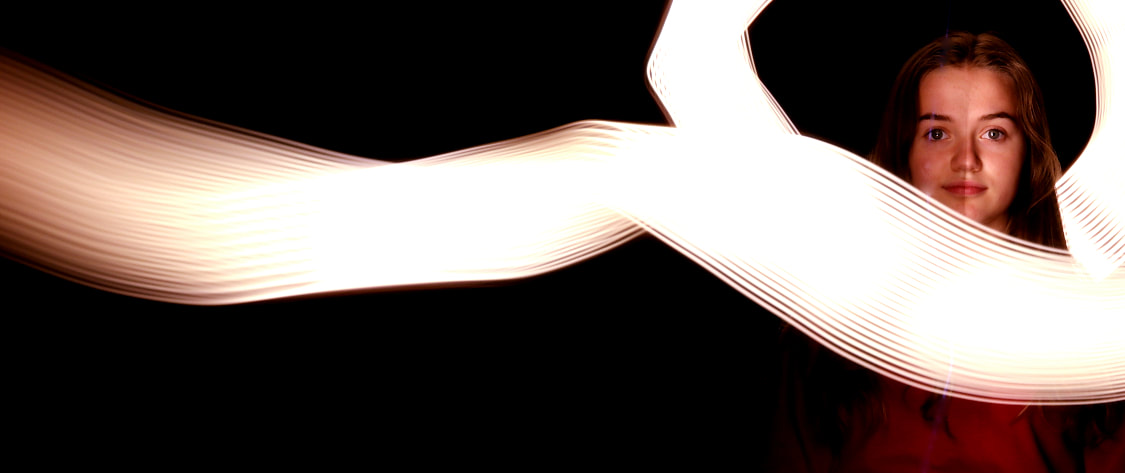
Light painting is a photographic technique where light is “painted” into the photograph using a light source during a long exposure. Painting with light is fairly easy and achieves great results, it requires little specialist equipment and you can get some really interesting results. For the best results: manual mode should be used, a slow shutter speed 10"-BULB (Long Exposure), aperture at f/16-22, ISO 100, a tripod, manual focus and a light source. |
Aperture f/16
Shutter Speed 23" ISO 100 |
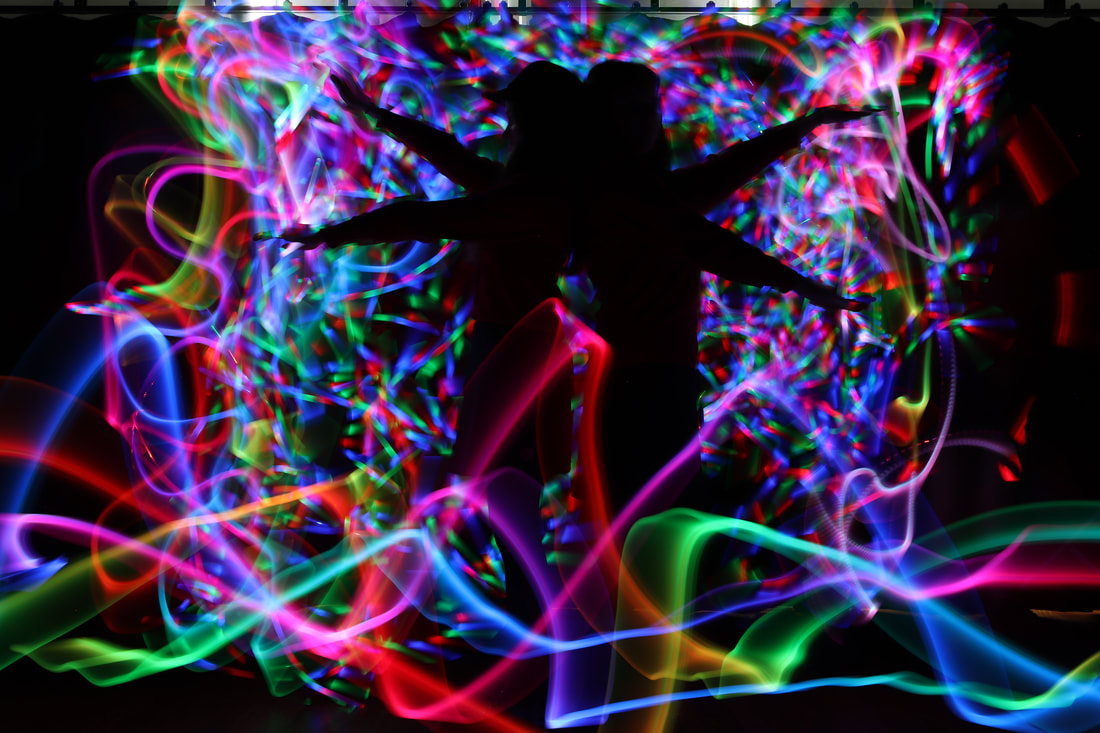
Aperture f/10
Shutter Speed 20" ISO 100 |
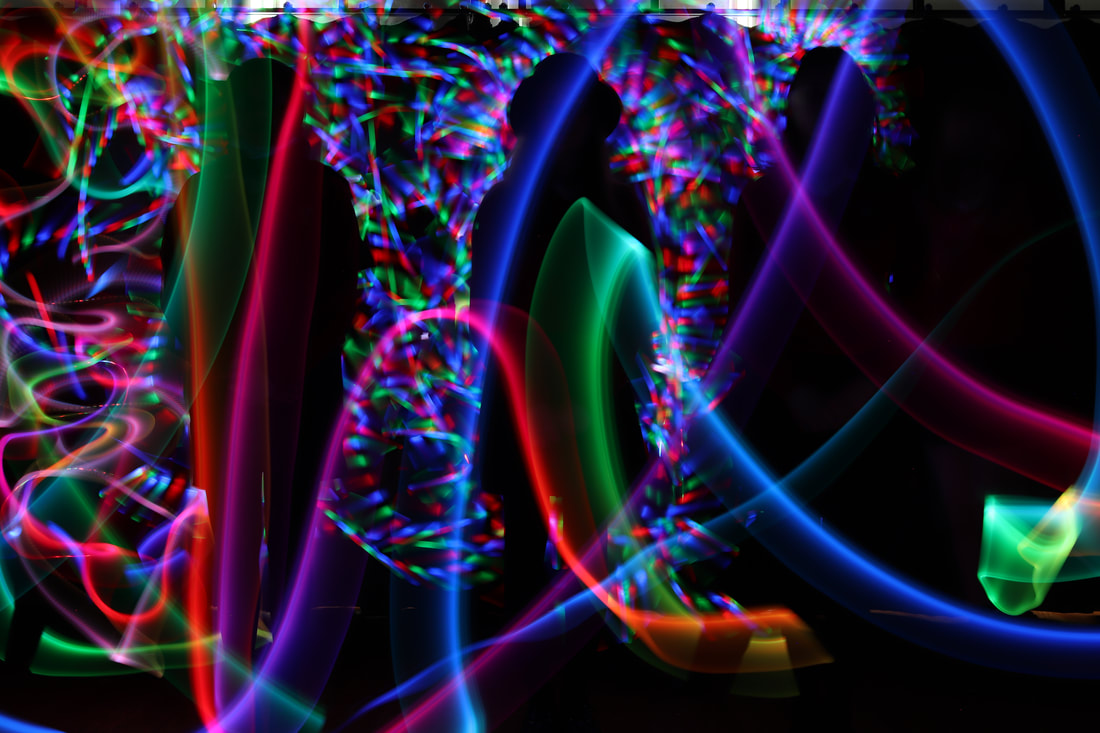
Aperture f/14
Shutter Speed 14" ISO 100 |
Photographic Techniques / Light Drawing / My Experiments x 9
Photographic Techniques / Light Drawing / 4 Best Edited Images
On PIXLR, I cropped this image and adjusted the brightness and contrast. I then used the heal tool to remove an unwanted purple line. Finally I changed the colour balance to add in some more red tones.
Using PIXLR, I cropped this picture then altered the hue, saturation and brightness.
|
I cropped this image then edited the hue, saturation & lightness.

I cropped this image, changed the hue, saturation and contrast.
|
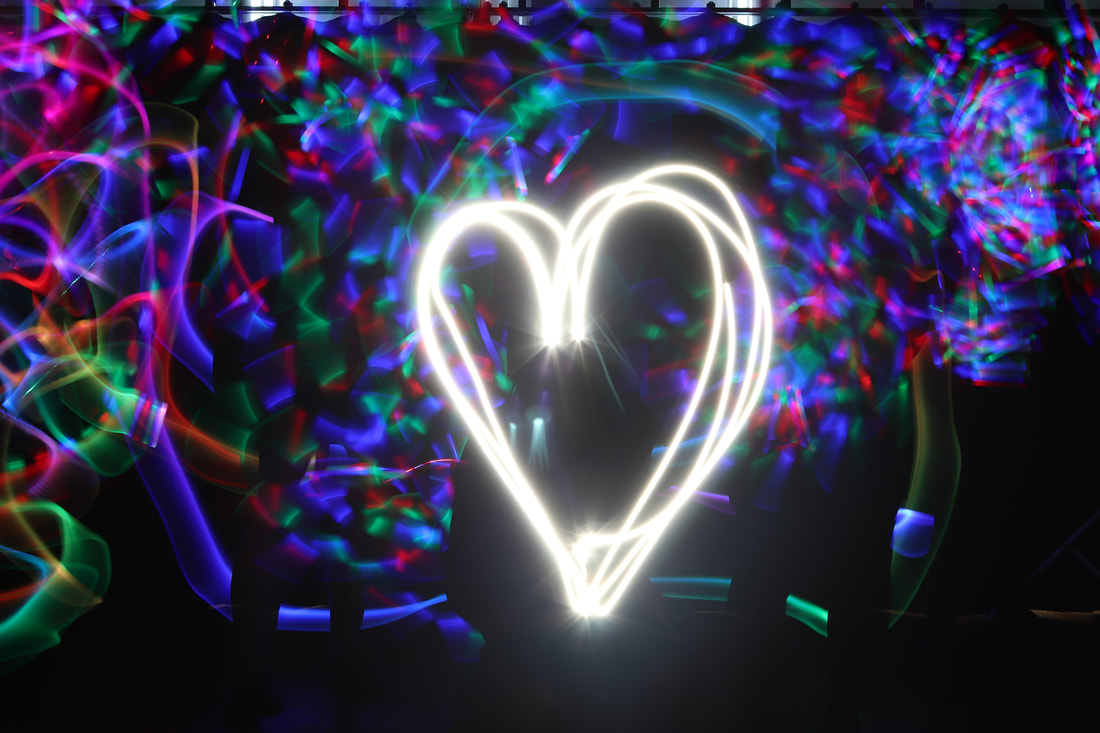
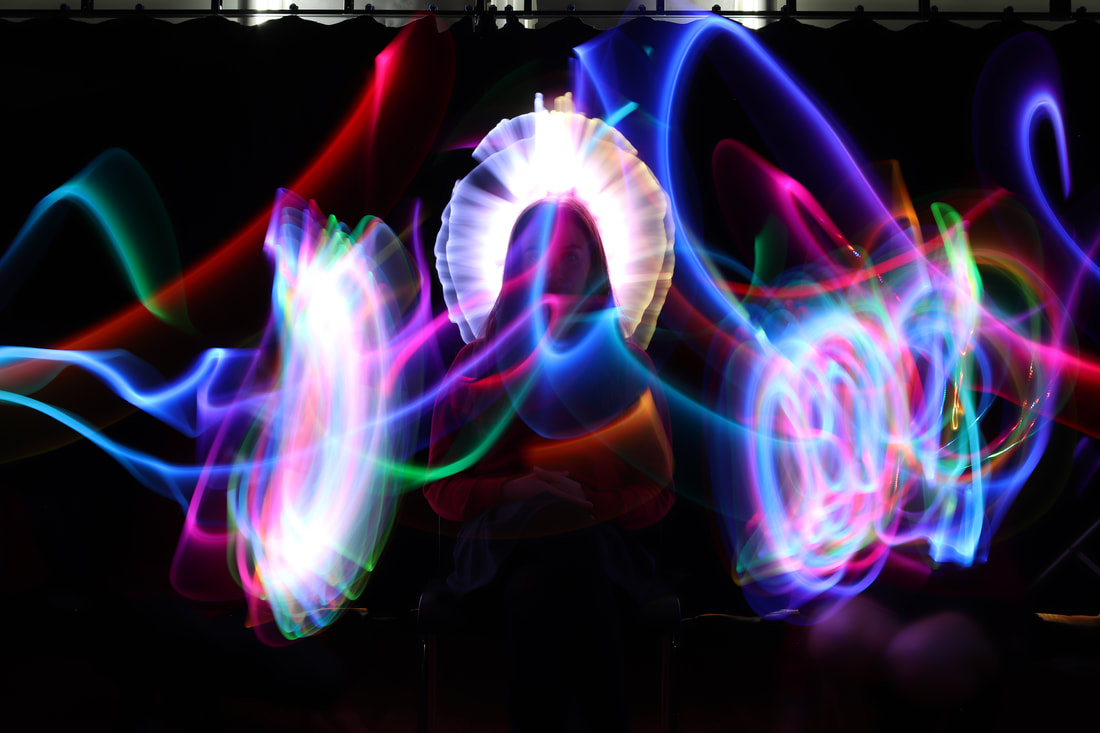
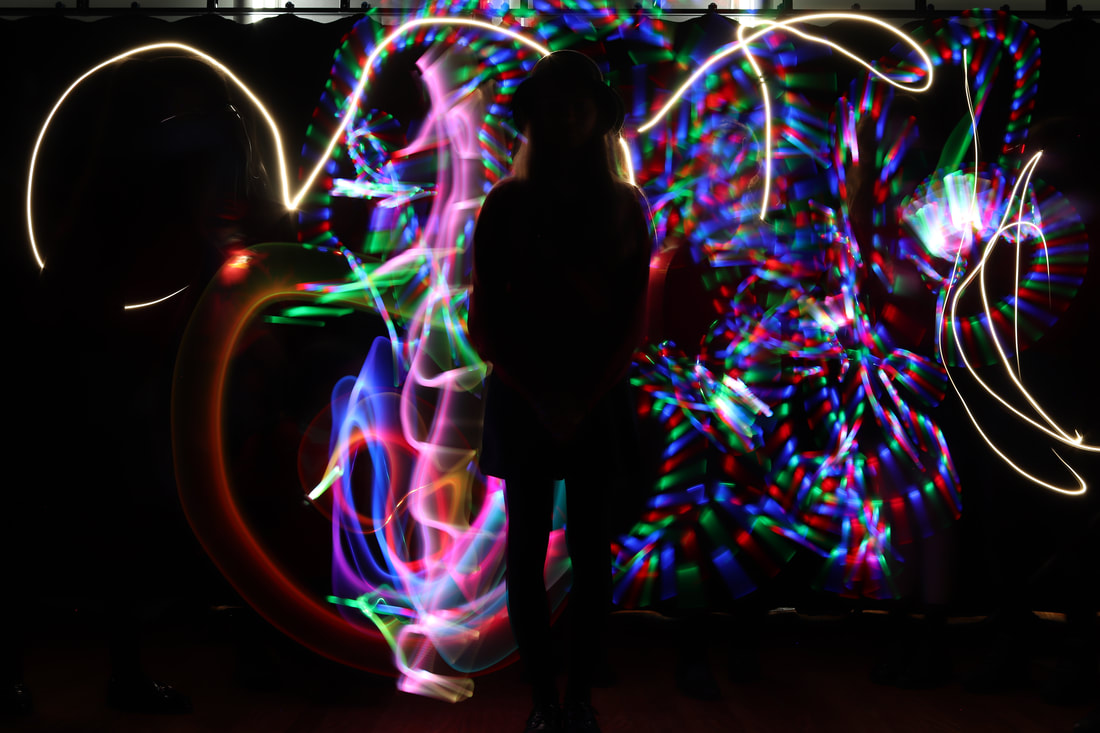
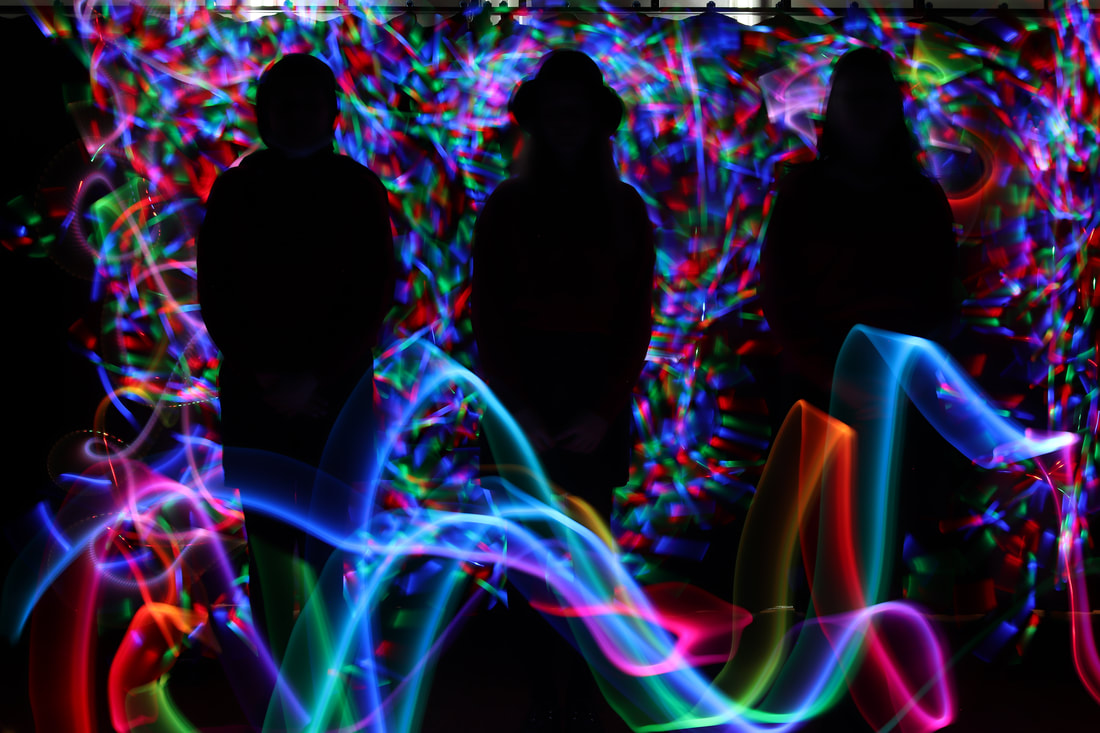
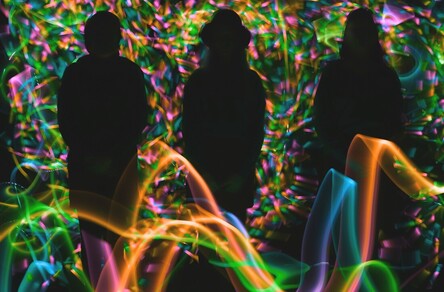
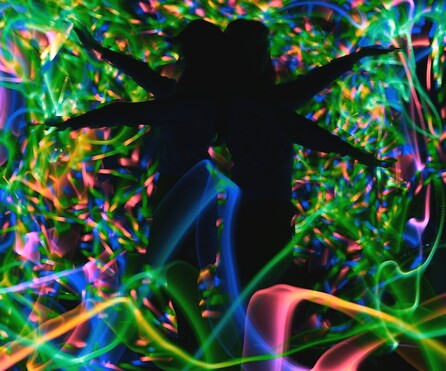
Photographic Techniques / Light Drawing / Best Image

|
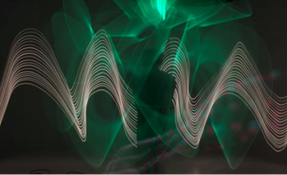
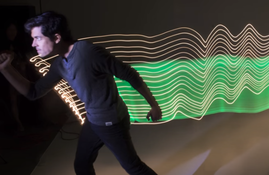
This is my most successful outcome from the light drawing shoot because the silhouettes are clearly visible and captured on a harmonious background of colour. The contrast of the background and the subject matter creates an eye catching final outcome. The use of bold colours and dark silhouettes creates a sense of intrigue as the subjects' identity is hidden, perhaps symbolising the shortage of an identity or a subconscious confusion. |
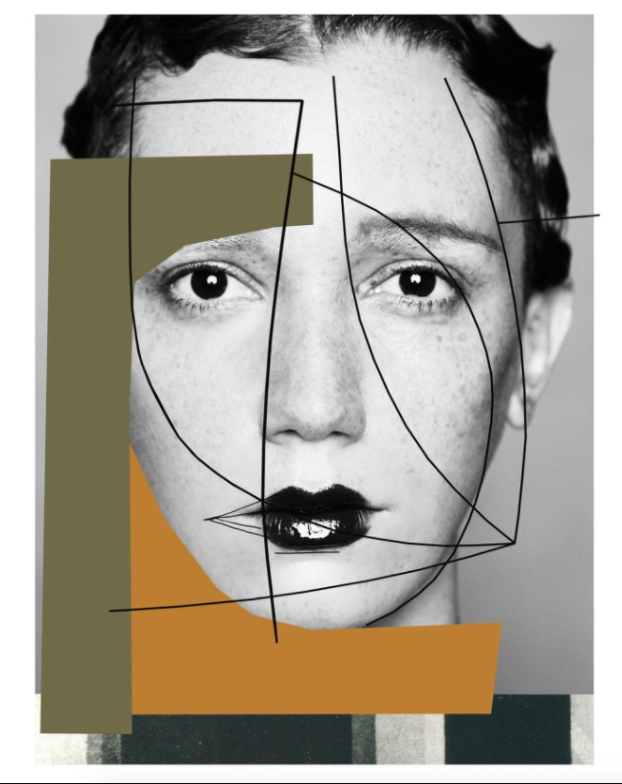
Artist Investigation / Alma Haser
"I always make work I enjoy making. I don’t like to make life easy for myself, so a photograph is never just a photograph with me."
- Alma Haser
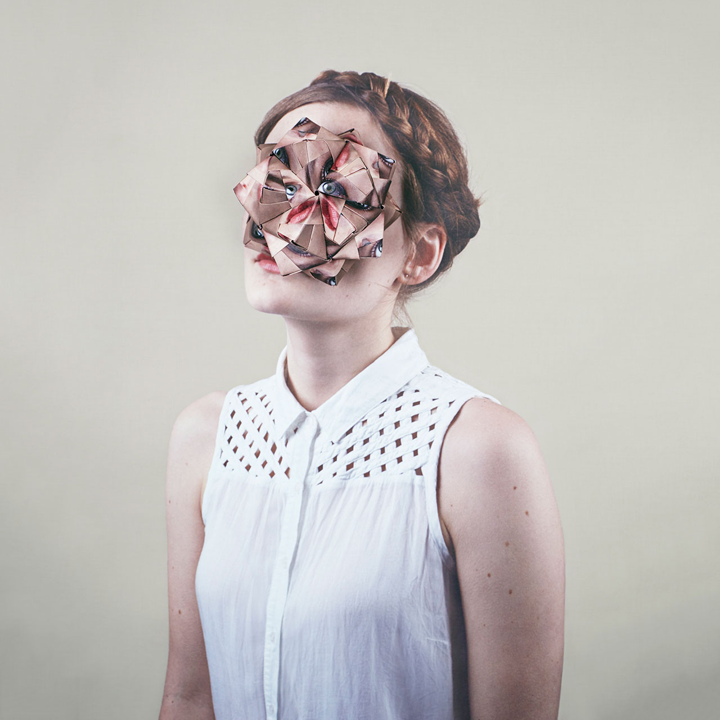
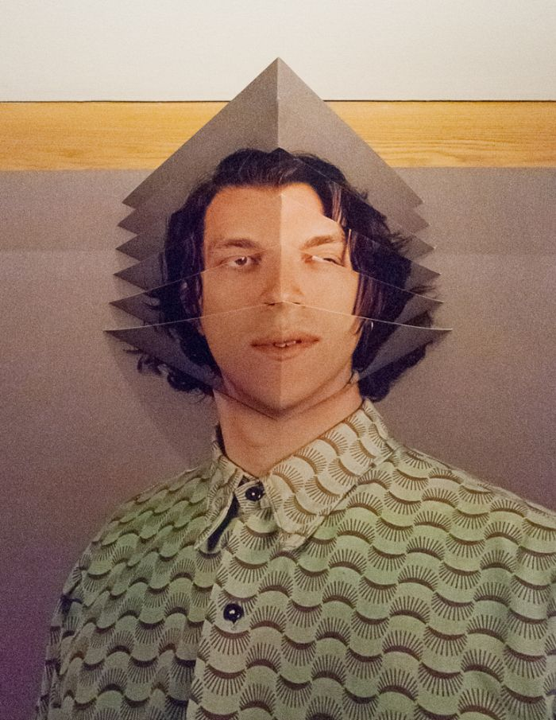
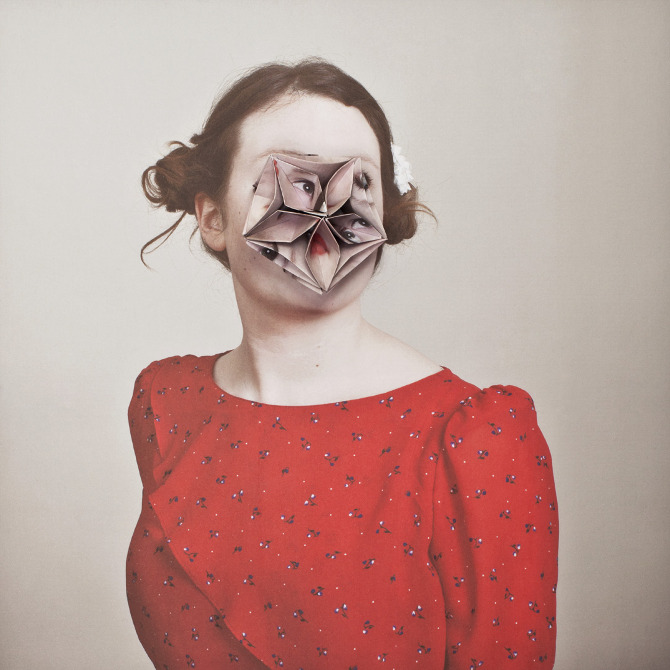
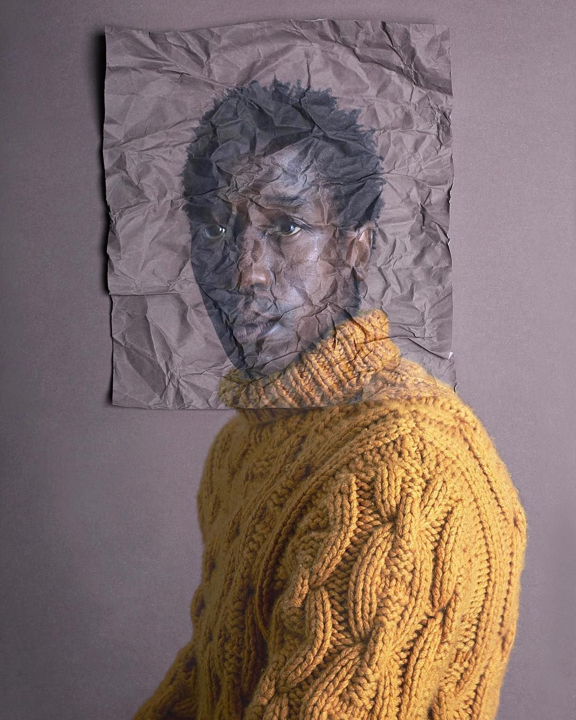
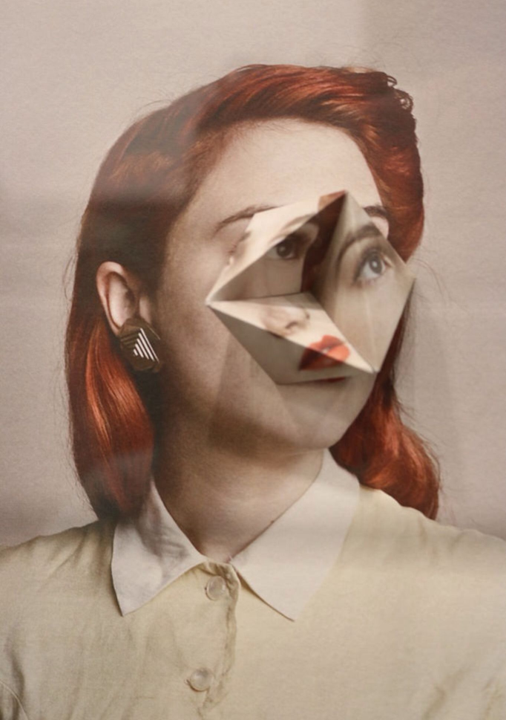
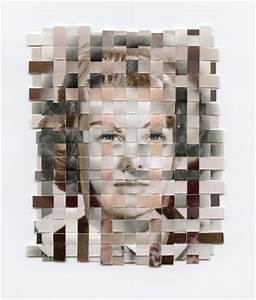
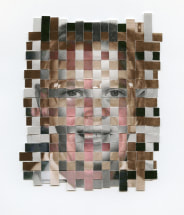
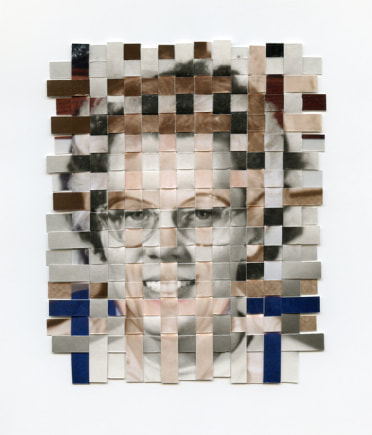
I chose to investigate Alma Haser because her work is inventive, creative and individual. She constructs interactive and sometimes 3D pieces of portraiture using her physical editing skills, which include origami and layering of images. Haser's mixed media techniques explore different dimensions within portrait photography and establish futuristic, sculptured outcomes. Her extraordinary three-dimensional imagery generate high levels of intrigue.
The video below shows examples of Alma Haser's 3D and interactive work, I find that this video is successful in presenting the distinctive style of this artist. In the video, Haser mentions that she doesn't look at other photographer's work because she doesn't want to be influenced too heavily by them and let that affect her work - instead she likes to focus on her own photographic style.
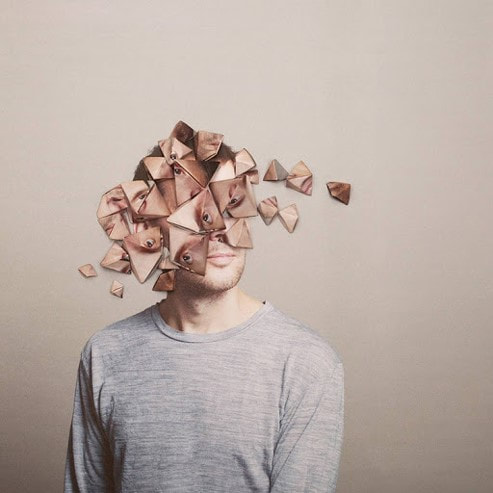
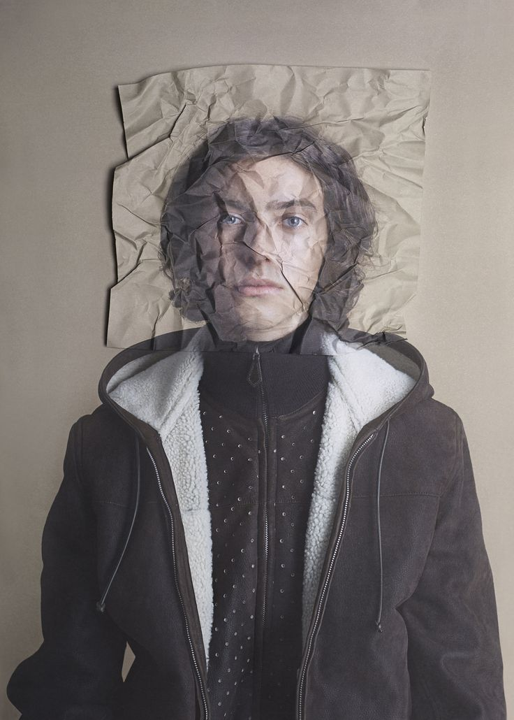
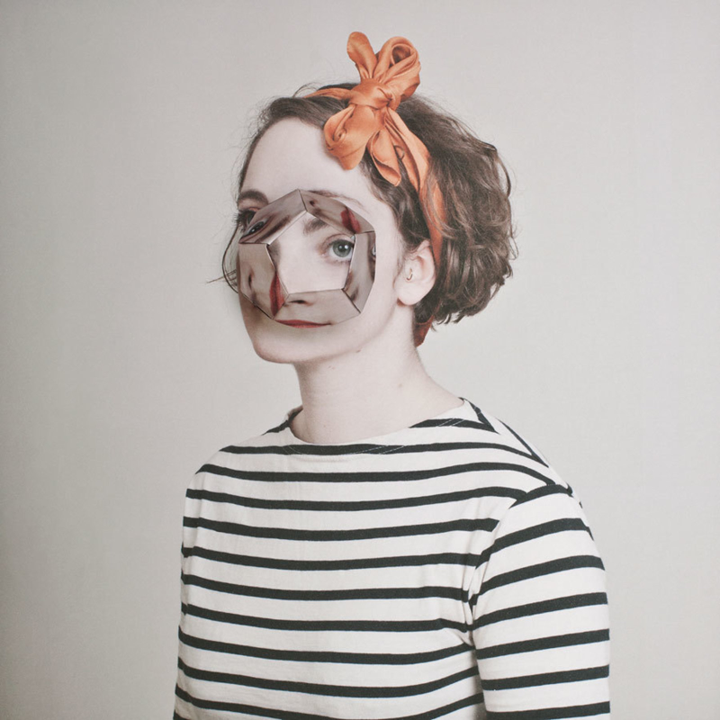
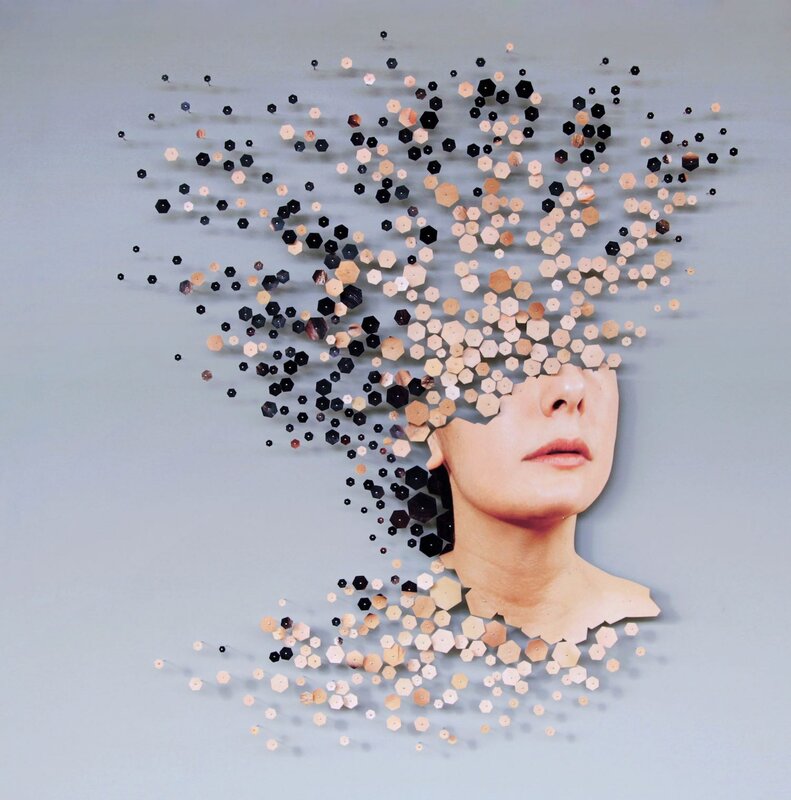
Alma Haser has said that she uses fragmentation in her images quite frequently because she doesn't want the value of her portraits to be based on the subject's face, but for the portrait to be judged on the entire photograph. I think this is an interesting outlook on portrait photography, because most of the time people are only interested in how the subject's facial features are presented, whereas Haser uses visually interesting and inventive techniques to create layers of intrigue around her subjects.
The video below shows examples of Alma Haser's 3D and interactive work, I find that this video is successful in presenting the distinctive style of this artist. In the video, Haser mentions that she doesn't look at other photographer's work because she doesn't want to be influenced too heavily by them and let that affect her work - instead she likes to focus on her own photographic style.
Alma Haser has said that she uses fragmentation in her images quite frequently because she doesn't want the value of her portraits to be based on the subject's face, but for the portrait to be judged on the entire photograph. I think this is an interesting outlook on portrait photography, because most of the time people are only interested in how the subject's facial features are presented, whereas Haser uses visually interesting and inventive techniques to create layers of intrigue around her subjects.
|

|
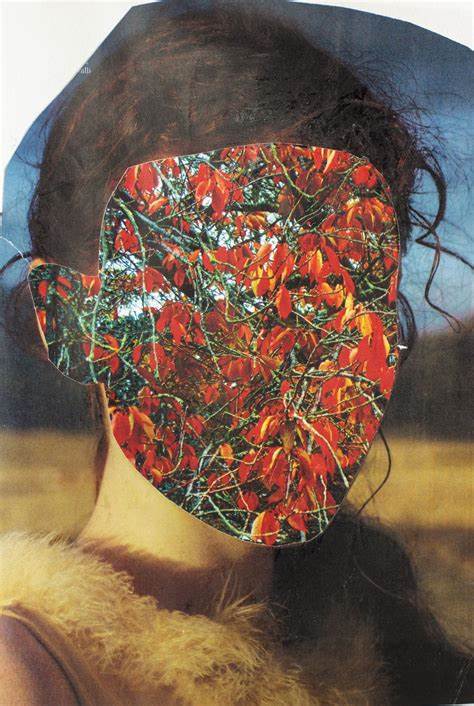
Photographic Techniques / Physical Editing
|
Alma Haser's book Cosmic Surgery shows some of her best examples of physical editing. Using her origami and paper folding skills, Haser establishes visually intriguing photographs that sometimes possess interactive features. Haser's processes that sometimes result in 3D sculptures unlock different dimensions in portrait photography.
|

If I were to emulate Alma Haser, I would take my portraits in a studio-like setting, where I could use artificial lighting. I would then experiment with fragmentation and paper folding to best emulate Haser's inventive, hand manipulation skills. Origami is another process I would try if I were to attempt to mirror Alma Haser's talents.
|
Composition Design 1
|
The aim of this shoot:
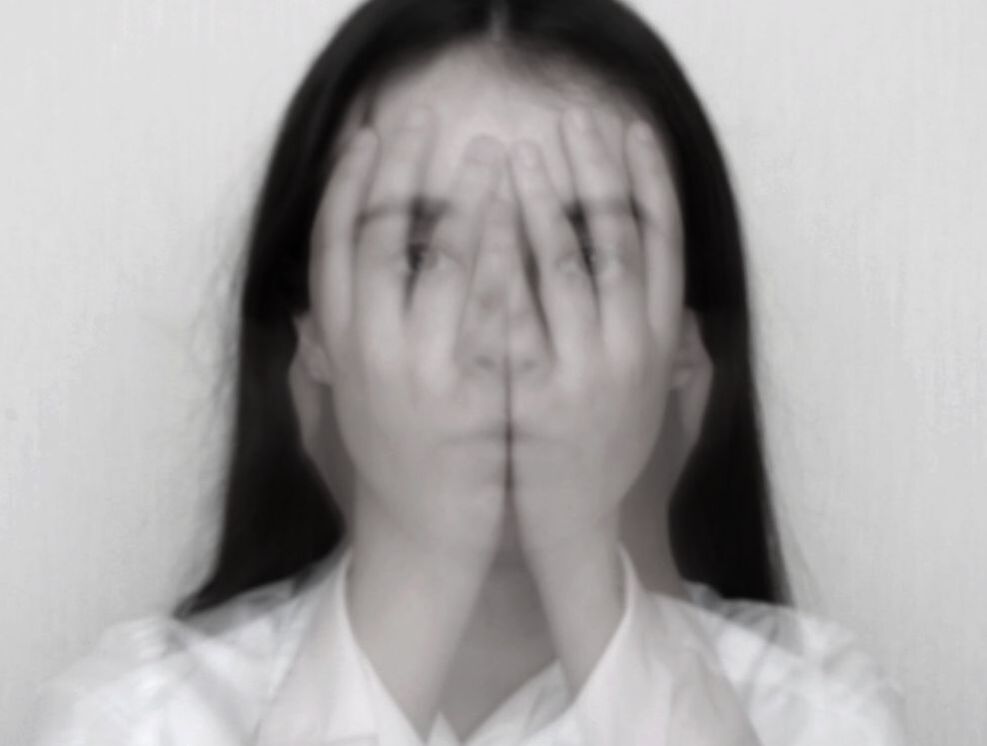
I intend to convey the theme of memories in this shoot. Through this shoot, I will explore themes such as the struggle to retain memories, and how the passage of time can fade memories. My shoot should evoke feelings of sorrow and confusion because of the disfigurement of the images. I will use fragmentation to achieve this frustrating disfigurement. |
"Memory fades, memory adjusts, memory conforms to what we think we remember." "Even the most precious memories fade with the passage of time." |
|
Photographer and technique combination for Composition 1: Alma Haser is my inspiration for this shoot, she uses fragmentation to disguise and disfigure her subject's face. Her visually intriguing editing techniques would link in well to my chosen theme of memory. I then intend to combine this with a series of digital editing processes. I may also experiment with intentional camera blur by adjusting my shutter speed to 1". |
|

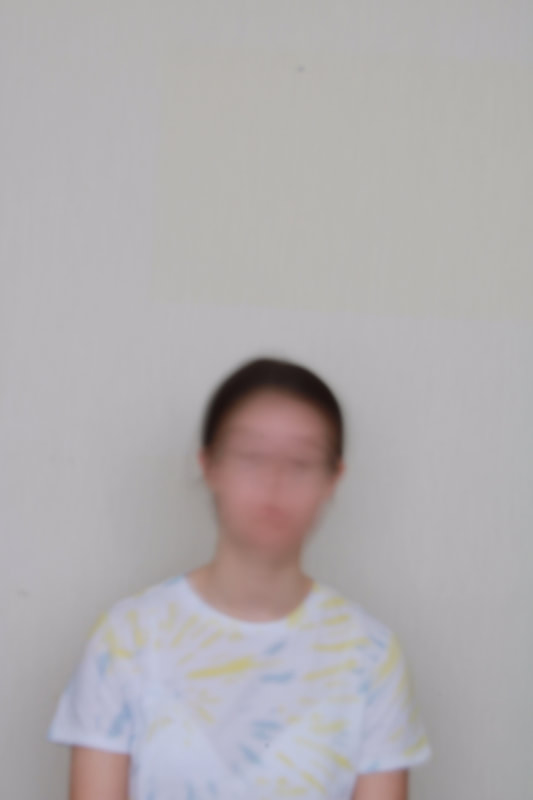
Shoot Plan:
I have drawn inspiration from the photographer Alma Haser and her inventive portraiture work, also I will draw from my motion blur research and experiment with intentional blur to convey my theme of memories fading. My shoot will take place indoors at midday to make the most of the natural light, I want my images to feel as natural and candid as possible. The props I intend to use are a model and a neutral background, also my model will be wearing dull, pale colours to further convey the sorrowful feeling of this shoot. My subject will be side lit, and I will use natural, ambient light through a window. I intend to shoot with my DSLR camera with a kit lens on a tripod, so I can use portraiture mode on my camera and keep my ISO 100. My tripod will also be necessary for my experimentation with motion blur. When experimenting with intentional blur, I will set my aperture settings to f/22, my shutter speed to 2" and have my ISO on 100. Following my shoot, I may choose to digitally edit my images on PIXLR, changing the brightness, curves and light balance, or removing any defaults or aberrations. I then plan to edit my images further, digitally, and use different tools to create visually interesting shapes and designs. Using these editing processes, I will be emulating my chosen photographer, Alma Haser.
I have drawn inspiration from the photographer Alma Haser and her inventive portraiture work, also I will draw from my motion blur research and experiment with intentional blur to convey my theme of memories fading. My shoot will take place indoors at midday to make the most of the natural light, I want my images to feel as natural and candid as possible. The props I intend to use are a model and a neutral background, also my model will be wearing dull, pale colours to further convey the sorrowful feeling of this shoot. My subject will be side lit, and I will use natural, ambient light through a window. I intend to shoot with my DSLR camera with a kit lens on a tripod, so I can use portraiture mode on my camera and keep my ISO 100. My tripod will also be necessary for my experimentation with motion blur. When experimenting with intentional blur, I will set my aperture settings to f/22, my shutter speed to 2" and have my ISO on 100. Following my shoot, I may choose to digitally edit my images on PIXLR, changing the brightness, curves and light balance, or removing any defaults or aberrations. I then plan to edit my images further, digitally, and use different tools to create visually interesting shapes and designs. Using these editing processes, I will be emulating my chosen photographer, Alma Haser.
Contact Sheet:
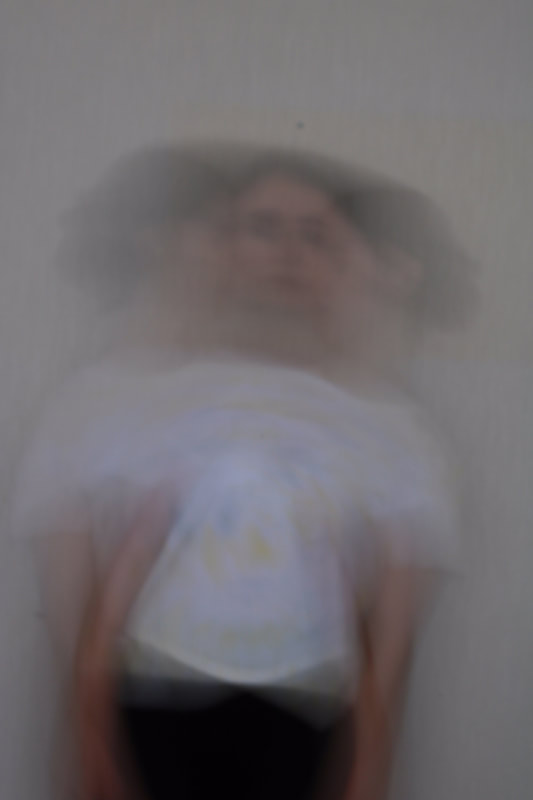
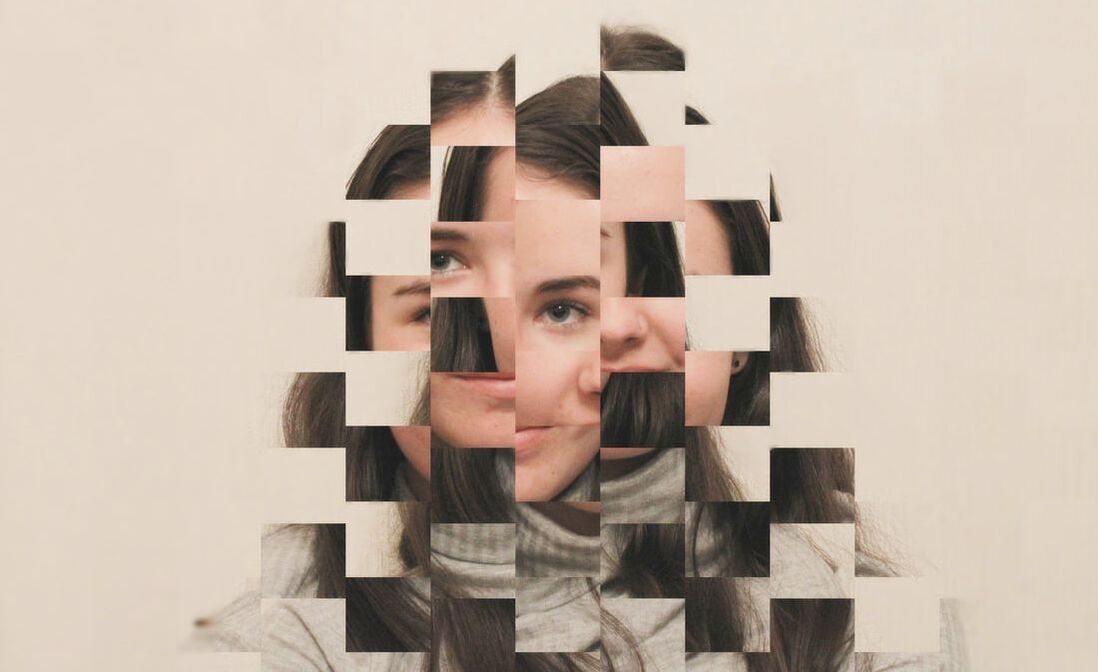
Edited Images:
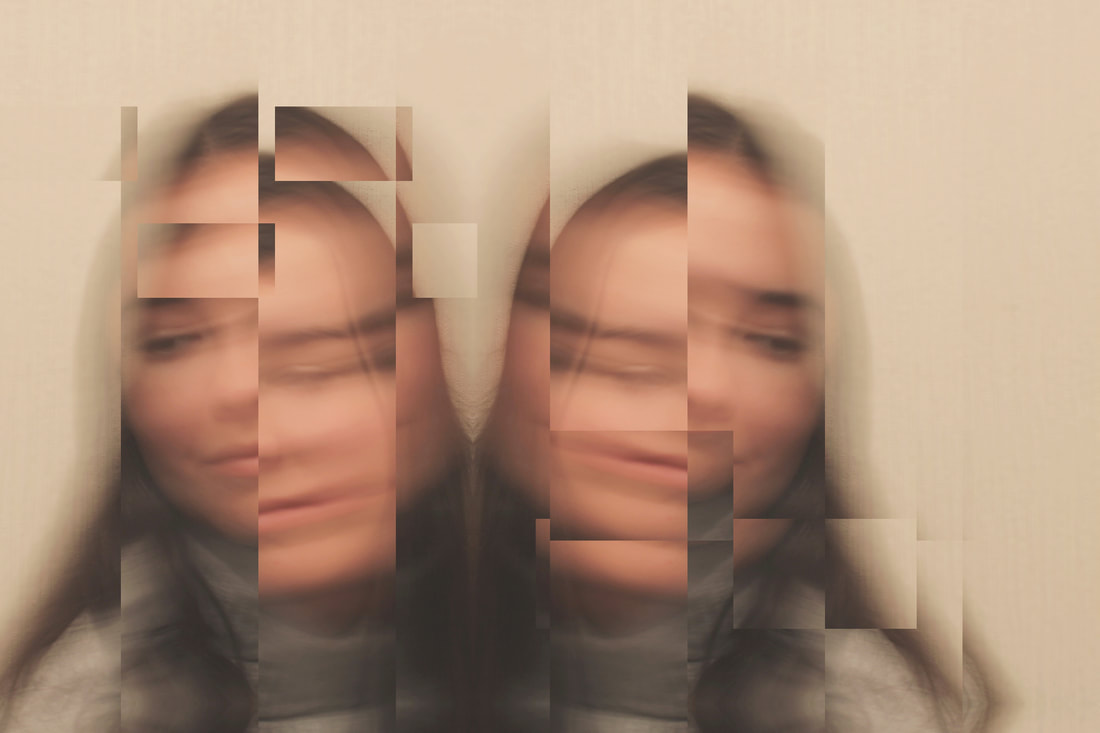
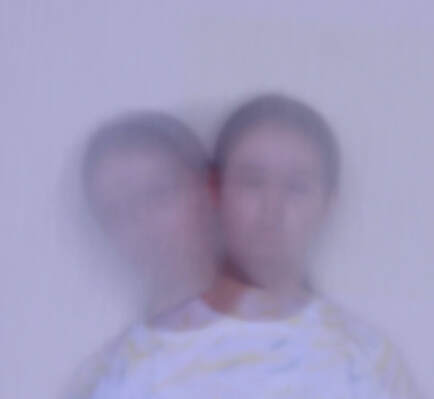
This is a successful outcome because of the motion blur and uneven distortion. The mirror image of the subject's face is effective because it adds to the confusing atmosphere of the photograph.
In this photograph, the focal point is in the centre (unlike my other outcomes), therefore there is an element of balance within the composition.
|
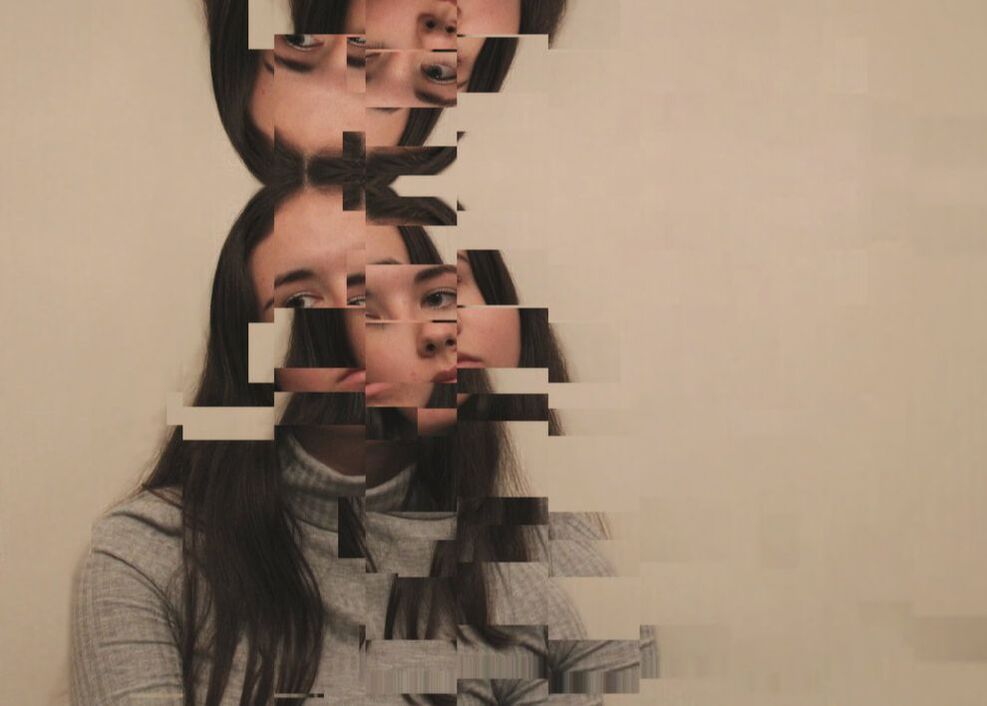
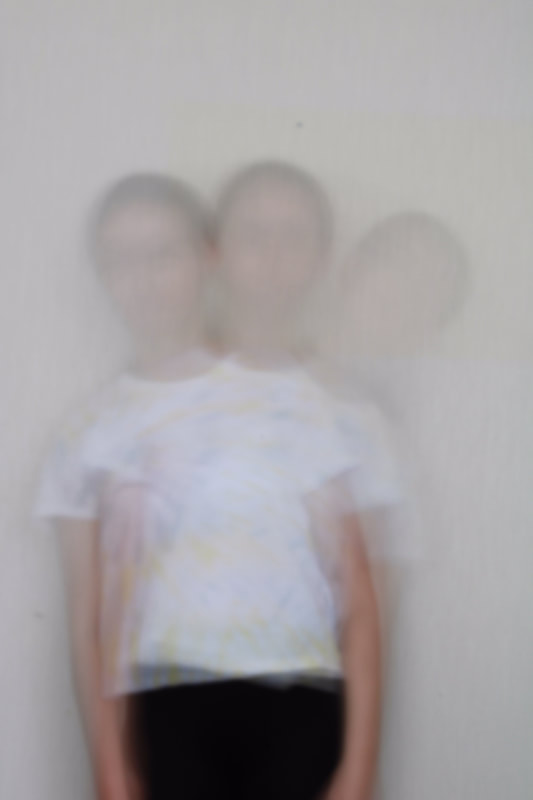
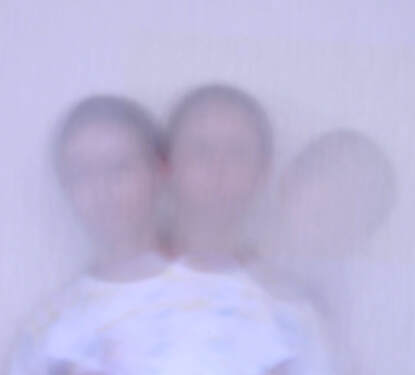
I find this photograph effective because of the off-centre focal point and the repeated face at the top of the composition. The slice filter that I applied to create this outcome is successful in creating an unclear and ambiguous final image.
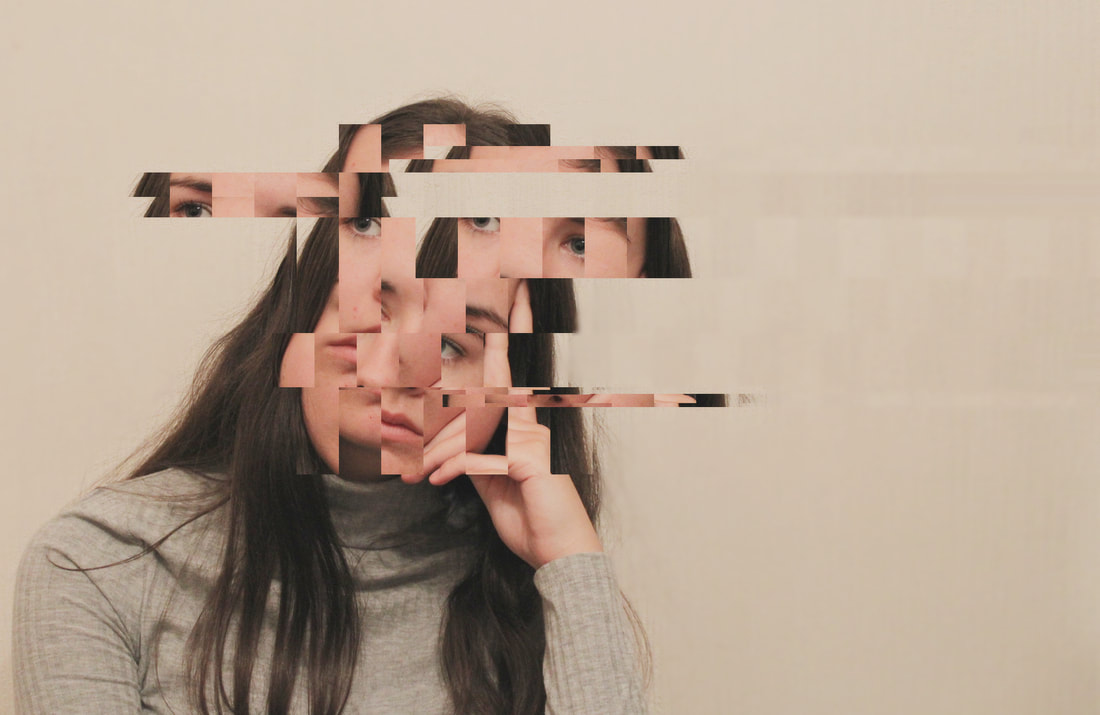
This is my favourite outcome because the fragmentation and disfigurement are uneven and follow no obvious pattern - it creates the sense of trying to piece together memories.
|
Composition Design 2
|
The aim of this shoot:
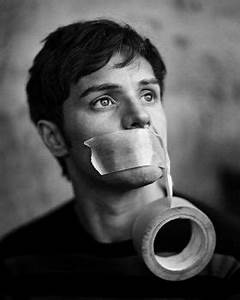
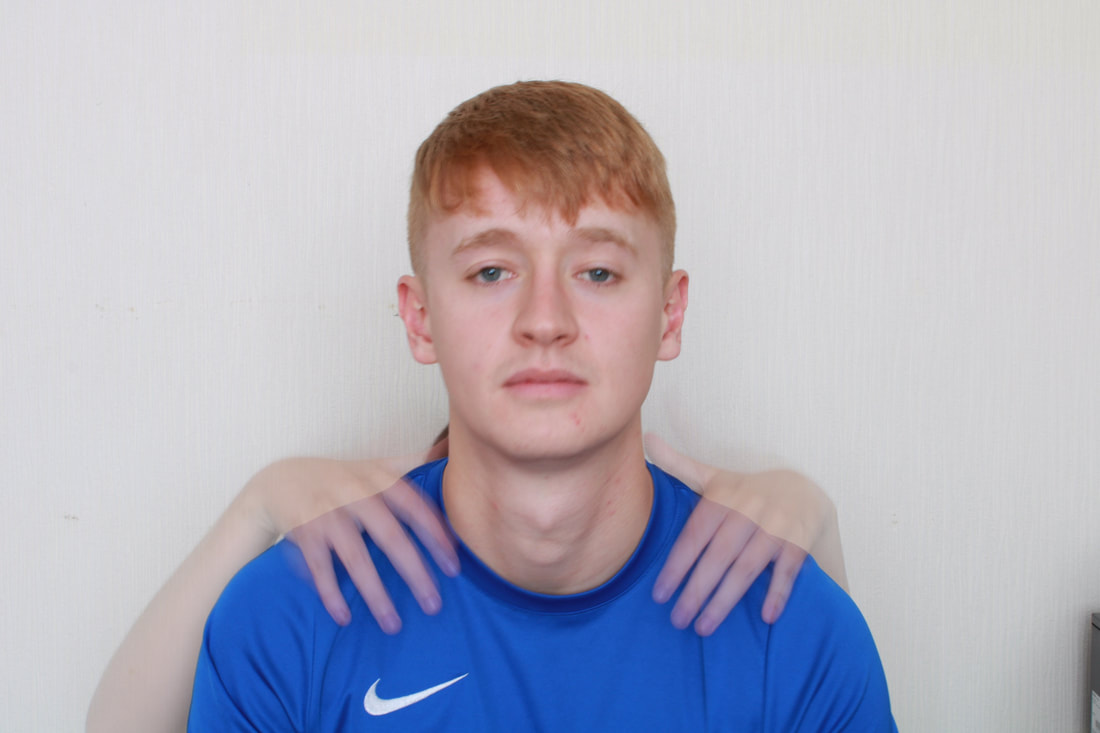
My aim for this shoot is to convey people's conflicting and bottled up emotions. My shoot will express the overwhelming fear some people feel to show their true emotions, afraid they may appear weak. |
“You know what truly aches? Having so much inside you and not having the slightest clue of how to pour it out.” |
|
Photographer and technique combination for Composition 2:
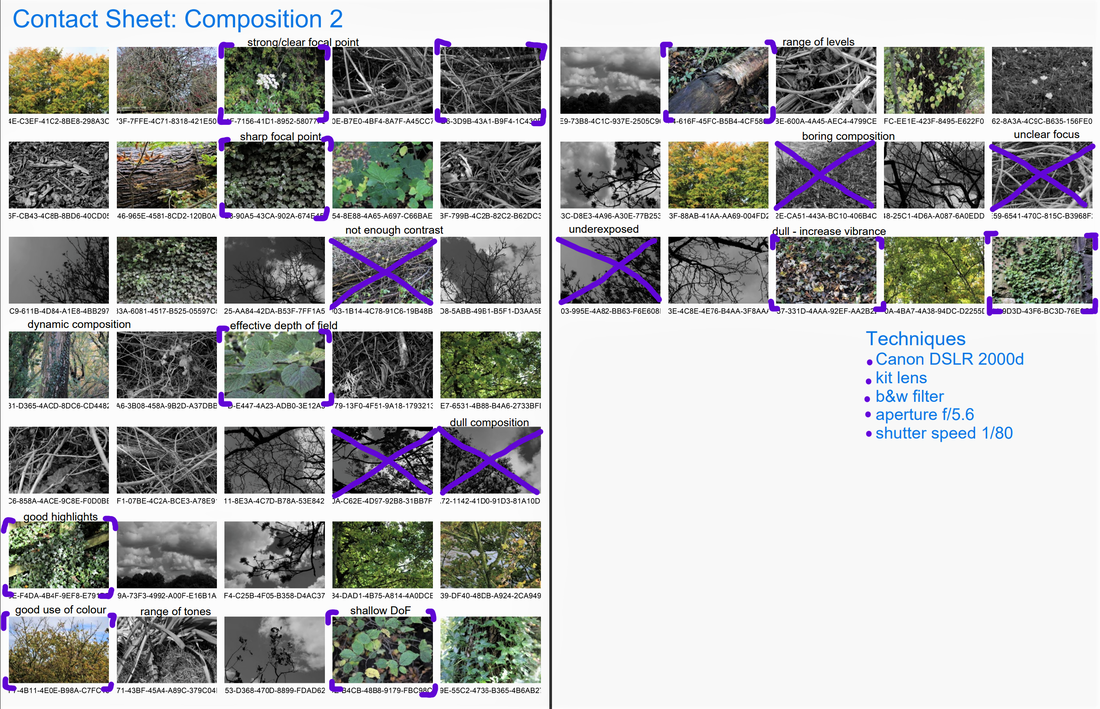
I was inspired by the work of Greg Sand for this shoot, I find his inventive framework really captivating and I think it would work well with my aim for this composition. His use of framing adds depth to an image and directs attention specifically to that area. The images of nature I took during my double exposure investigation will be the areas I inventively frame, inspired by the work of Greg Sand. |
|
Development of Composition Plan:
I will use images from two previous shoots and I will combine both portraiture and images of nature later, during the editing process. For my portraiture images, I will be using my images from my composition 1 shoot; I have drawn inspiration from the work of Greg Sand, who uses cut out, silhouetted figures to frame other elements. I plan to digitally edit these images on PIXLR to remove certain features from the model's face and then layer this on top of my natural forms imagery.
For my natural forms images, I will be using my photos from my investigation into double-exposure from earlier in this project and some from my previous project, abstract nature. I plan to digitally edit my images, then I will layer these pictures underneath the images from my portraiture shoot - experimenting with creative and dynamic formats.
Contact Sheet:
Edited Images:
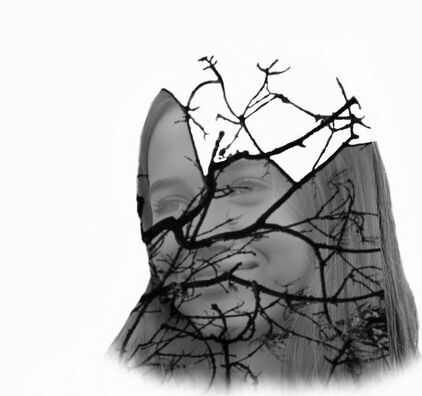
I would say that this is my weakest outcome because the image of nature appears on the model's neck as well as their face.
|
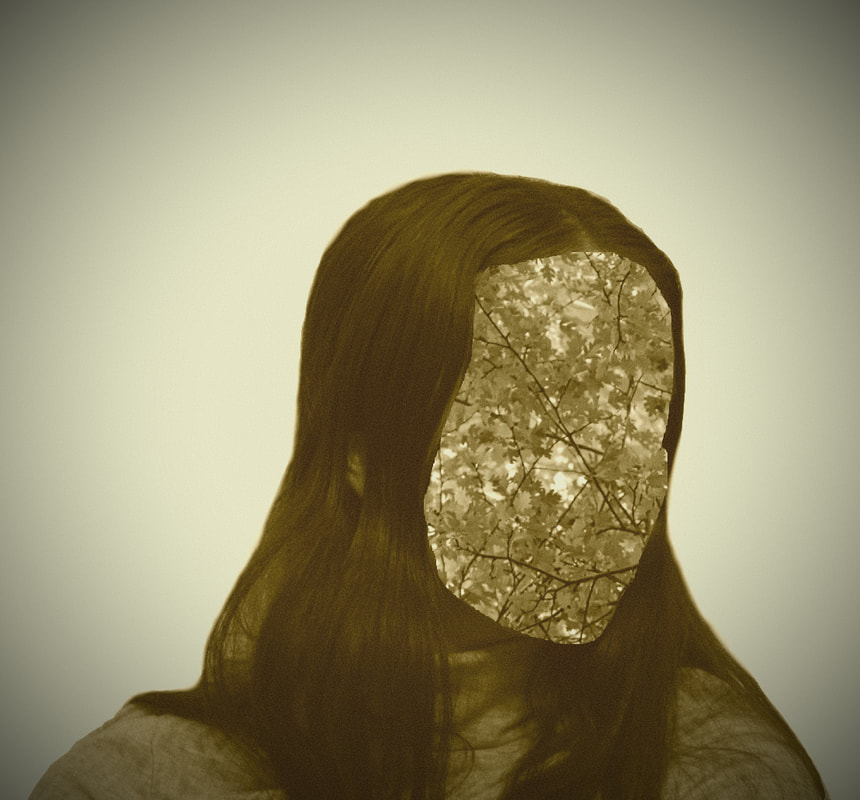
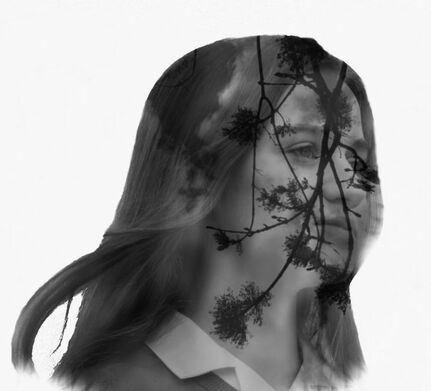
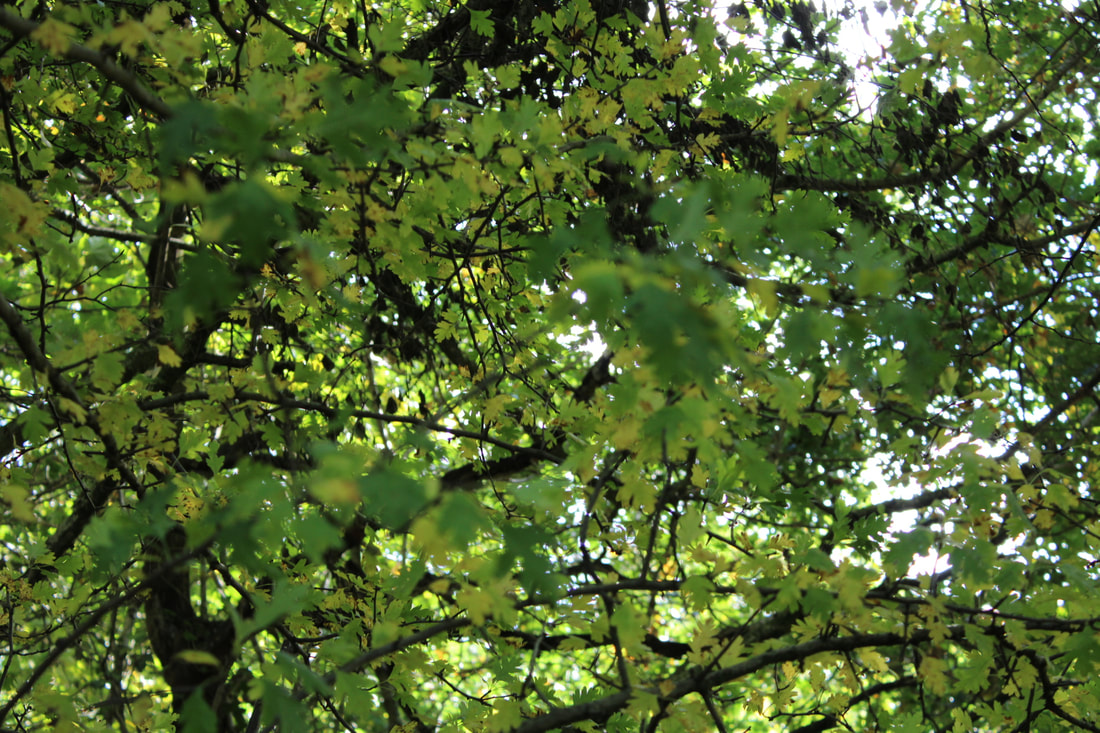
This is a relatively successful outcome, however I believe that the image of leaves needs more contrast to stand out.
|

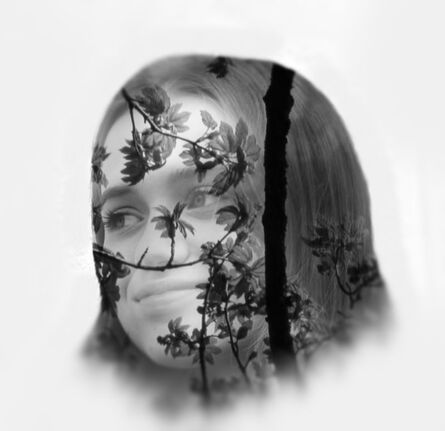
This is a successful outcome because the focal point of the lonesome flower is highly noticeable and conveys the potential loneliness that the subject may be feeling.
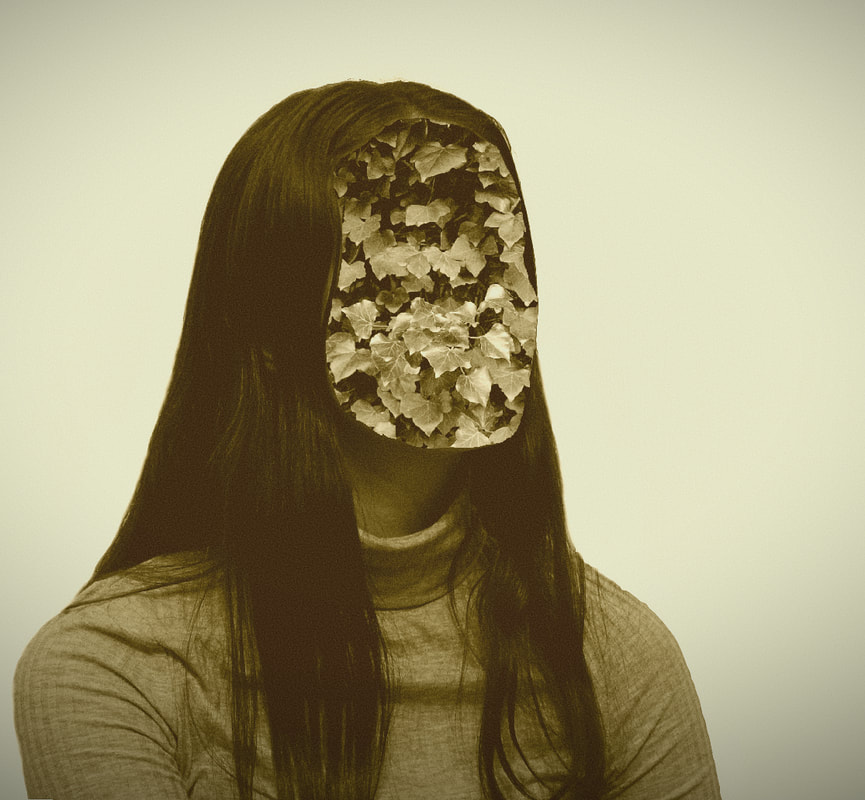
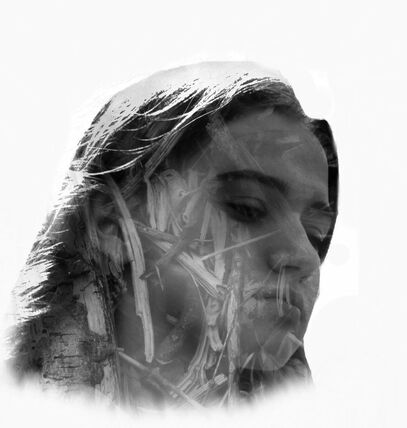
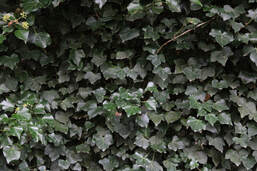
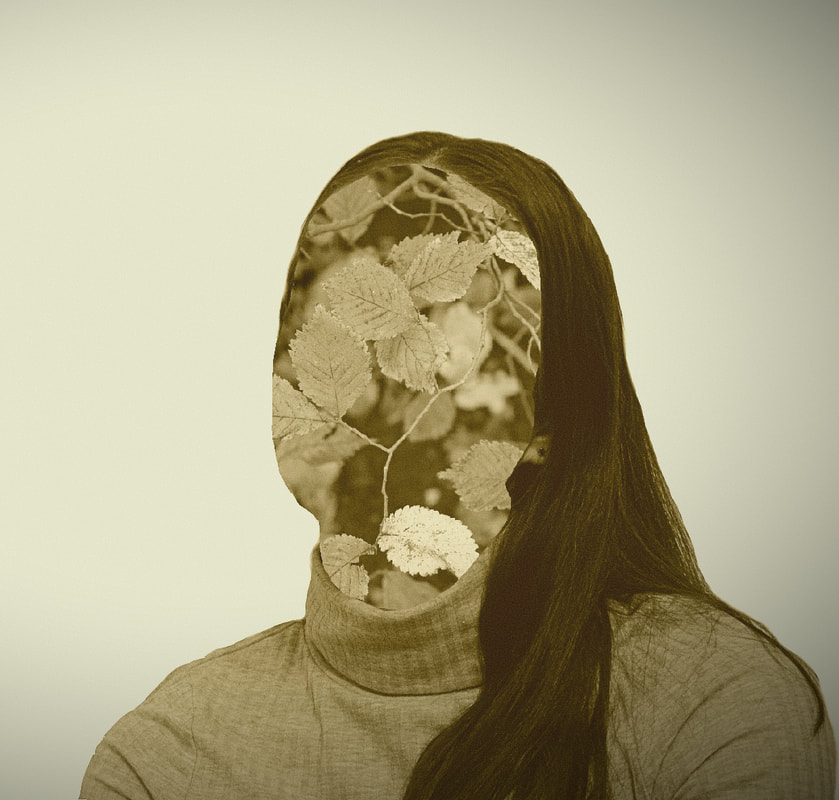
I believe that this is my most successful outcome from this composition because I find the image of ivy engaging through its depth of field and use of highlights and shadows. The ivy in this image also creates the sense of suffocation because of the way the plant smothers its surroundings.
Composition Design 3
|
The aim of this shoot:
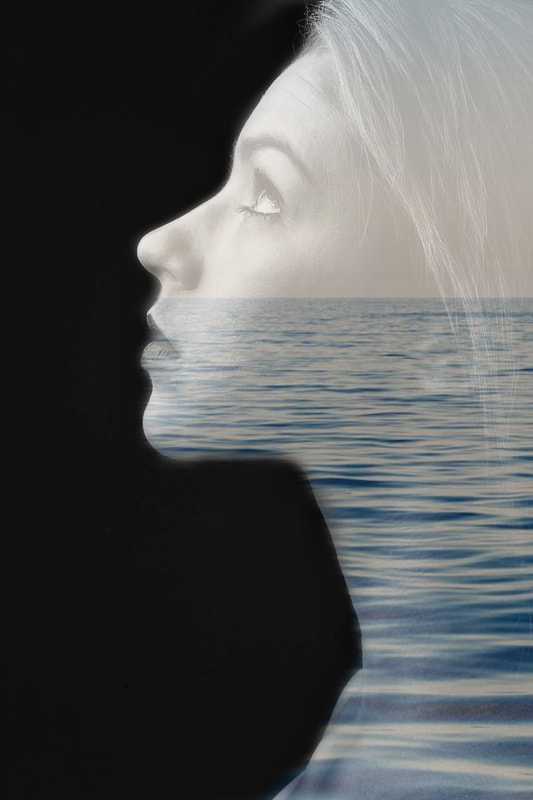
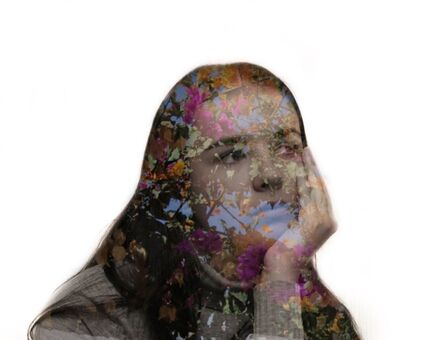
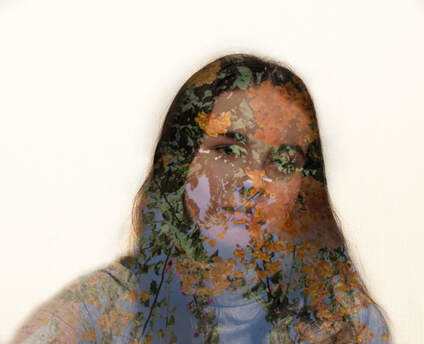
My aim of this shoot is to convey calmness and tranquillity. My shoot will have two elements of nature and portraiture, combined using double exposure. The nature element will symbolise the calmness the subject is creating for themselves. |
"Your calm mind is the ultimate weapon against your challenges" "It's all about finding the calm in the chaos" |
Photographer and technique combination for Composition 3:
For this shoot, I was inspired by the work of Christoffer Relander and the technique Double Exposure. Relander's work with this technique is a strong example of how superimposition can add symbolism to the final composition. I will draw from my research into double exposure and use the smartphone app 'snapseed' to achieve this outcome.
For this shoot, I was inspired by the work of Christoffer Relander and the technique Double Exposure. Relander's work with this technique is a strong example of how superimposition can add symbolism to the final composition. I will draw from my research into double exposure and use the smartphone app 'snapseed' to achieve this outcome.
Shoot Plan:
I will use my portrait images from composition 1 and capture new images of nature in a new shoot. I will use these new images to overlay onto the portraits. I have drawn inspiration from Christoffer Relander and his technique of double exposure. The shoot will take place outside to capture the natural elements in the crisp daylight; I will take advantage of the natural daylight to secure bright images. My DSLR camera with its kit lens will be used for this shoot. Following the shoot, I will digitally edit my images on the 'Snapseed' app, overlaying the two images of a person and nature - hopefully emulating the work of Christoffer Relander. I will incorporate more colour into my shoot, symbolising the curiosity as well as the calmness of the subject.
I will use my portrait images from composition 1 and capture new images of nature in a new shoot. I will use these new images to overlay onto the portraits. I have drawn inspiration from Christoffer Relander and his technique of double exposure. The shoot will take place outside to capture the natural elements in the crisp daylight; I will take advantage of the natural daylight to secure bright images. My DSLR camera with its kit lens will be used for this shoot. Following the shoot, I will digitally edit my images on the 'Snapseed' app, overlaying the two images of a person and nature - hopefully emulating the work of Christoffer Relander. I will incorporate more colour into my shoot, symbolising the curiosity as well as the calmness of the subject.
Contact Sheet:

Edited Images:
|
|
|
In this image there are a variety of colours, making this outcome visually intriguing. However, the background is overexposed and doesn't match the other three edited images.
|
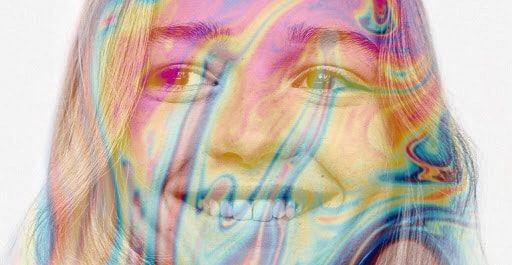
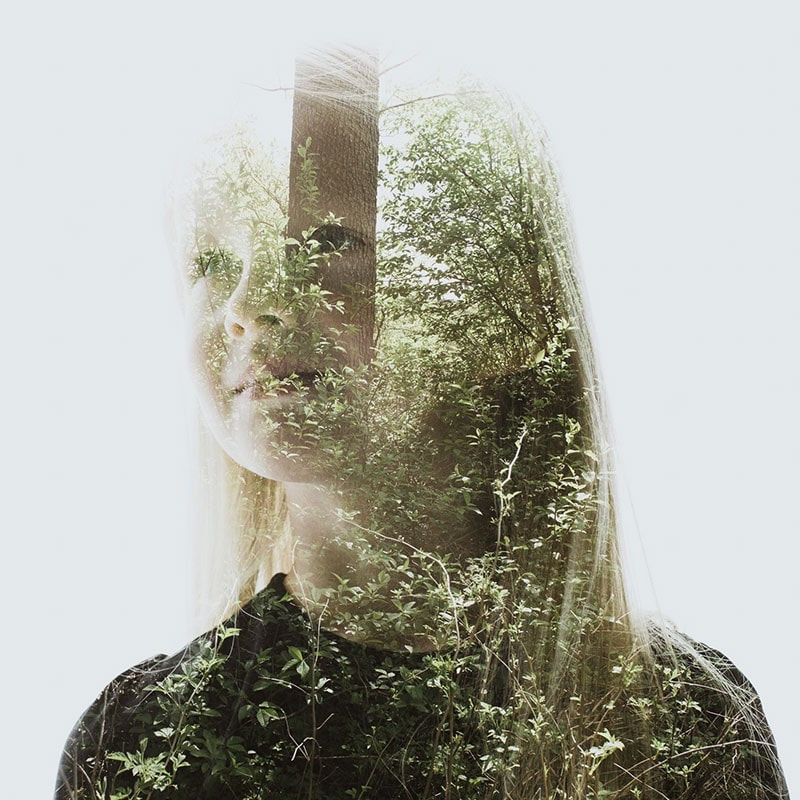
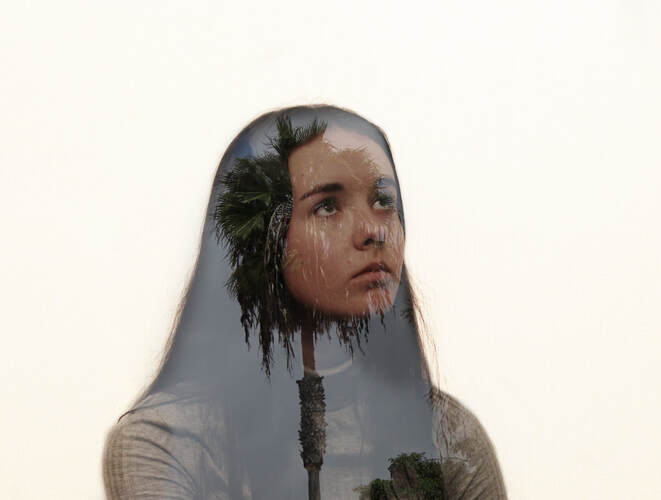
This overlay is successful because of the colours that can be seen, however the facial features of the subject are disguised by the elements within the overlay.
|
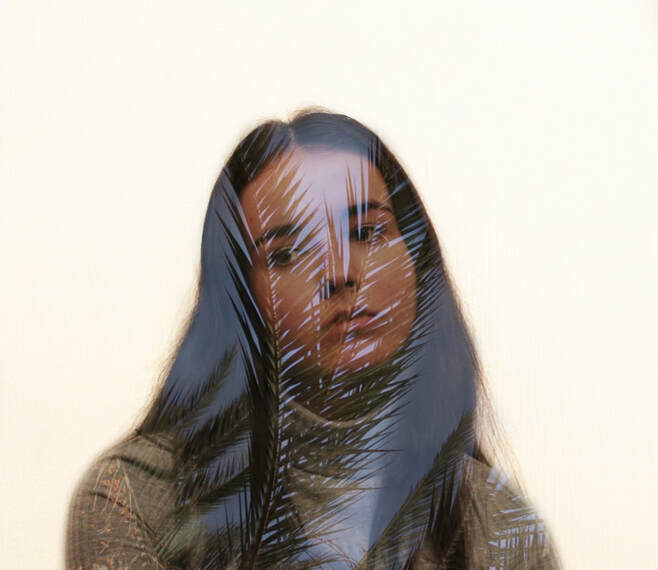
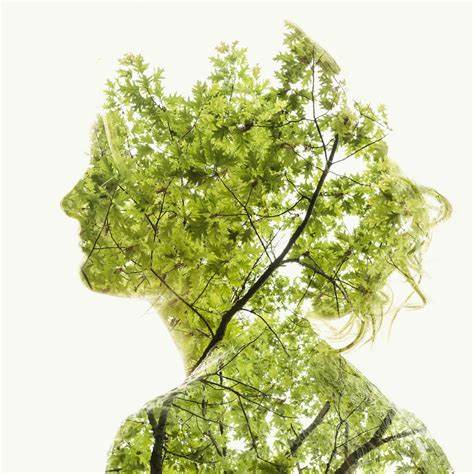
This is my most successful outcome because all the details of the palm leaf overlay are crisp, whilst still being able to see the features of the subject's face.
This is a successful outcome because the original portrait image is clear as well as the overlay. There could be more contrast between the two images.
Portraiture & Identity / Final Evaluation
Throughout this project, I have developed my understanding of portraiture and identity by exploring different photographic techniques such as long exposure and motion blur as well as different themes like memory and confusion. Initially I researched the work of Christoffer Relander, I found his work very calm and tranquil and his double exposure outcomes were very successful and inspiring. Through studying this artist, I was able to explore concepts of shape, space and harmony in my own photography examples. Relander's ability to overlay two images whilst maintaining harmony and balance is very impressive, I tried to emulate this skill in my double exposure examples. Inspired by their work, I created two series of emulations by overlaying images of people and of nature, I found Relander's use of natural forms conveyed inner peace and calmness, therefore I shot natural elements. I investigated the technical processes of double/multi exposure - emulating Christoffer Relander's work. His work helped me understand the theme of portraiture and identity through the harmonious final composition he constantly achieved and the deeper meaning of identity he managed to convey through the technique of double exposure.
Then I researched the work of American photographer, Greg Sand, whose work I find inspiring because of the range of techniques he uses to achieve his final outcomes. Through studying this artist, I was able to explore concepts of space, shape and contrast in my own photography examples. Inspired by their work, I created a series of emulations by capturing shadows and removing the figure, I thought this would best mirror Sand's work with reflection. This artist allowed me to improve and further my digital editing techniques on PIXLR because his work is heavily edited - either digitally or physically. Greg Sand's work helped me understand the theme of portraiture and identity through his variety of photographic techniques he employs in his work, each technique is selected for a reason, to best convey his chosen meaning.
Finally, I researched the photographer, Alma Haser because her visually interesting editing techniques were captivating and were successful in demonstrating her wanted themes. Through studying this artist, I was able to explore different editing processes in my own photography examples. After studying Alma Haser's work, I tried to emulate her manipulated outcomes in my composition designs, disguising and disfiguring my images. Her work helped me understand the theme of portraiture and identity because in her final images she completely disguises her subjects face, wanting the viewer to focus on the entire image and not just the beauty of their face, this outlook gave me a new understanding on the project.
On reflection, I believe my most successful outcomes were those from my Greg Sand emulation shoot because my post-editing enhanced my aim of conveying the theme of lost-memory. Also, the lighting and colour were effective in demonstrating the passage of time. Areas of improvement would be enhancing my contact sheets to aid my later editing; also, I need to increase my creativity in regards to my camera angles and physical editing skills.
